


A Guide to Mending Clothes Beautifully With Visible Mending
 August 15, 2025
I still remember the day I decided to breathe new life into my favorite childhood sweater, which had been torn and worn out from years of love. My parents, being the skilled craftsmen they are, taught me the art of visible mending techniques, and it was like a switch had been flipped – I was hooked. As I delved deeper into the world of mending, I realized that it wasn’t just about fixing clothes, but about giving them a new story to tell. That’s why I’m excited to share with you a guide to mending clothes with visible mending techniques, and show you how to turn your old favorites into one-of-a-kind masterpieces.
In this article, I’ll be sharing my personal experience and no-nonsense knowledge on how to get started with visible mending. You’ll learn how to transform worn-out fabrics into unique pieces that reflect your personality, and how to make the most of this creative and sustainable approach to fashion. From the basics of thread selection to the art of weaving new life into faded fabrics, I’ll be covering it all. So, if you’re ready to give your old clothes a new lease on life, and join the movement towards a more mindful and creative approach to fashion, then keep reading – you’re in the right place.
Table of Contents
- Guide Overview: What You'll Need
- Step-by-Step Instructions
- Reviving Fabrics With Visible Mending
- Embroidery Revival Sustainable Fashion Repair With Textile Art
- Stitches of Renewal Visible Mending for Beginners
- Weaving Wisdom: 5 Essential Tips for Mastering Visible Mending Techniques
- Key Takeaways for Visible Mending
- Mending with Heart
- Weaving a Legacy of Sustainability
- Frequently Asked Questions
Guide Overview: What You'll Need
Total Time: 2 hours 30 minutes
Estimated Cost: $10 – $30
Difficulty Level: Intermediate
Tools Required
- Sashiko Needle (or a sharp embroidery needle)
- Scissors (sharp and dedicated to cutting fabric)
- Measuring Tape (for measuring fabric and creating even stitches)
- Iron (for pressing fabric and creating crisp folds)
Supplies & Materials
- Mending Threads (in various colors to match your fabric)
- Fabric Glue (optional for stabilizing fabric before mending)
- Interfacing Fabric (for reinforcing weak areas, cut to 6 inches by 6 inches pieces)
- Sashiko Thread (for visible mending techniques, available in various colors)
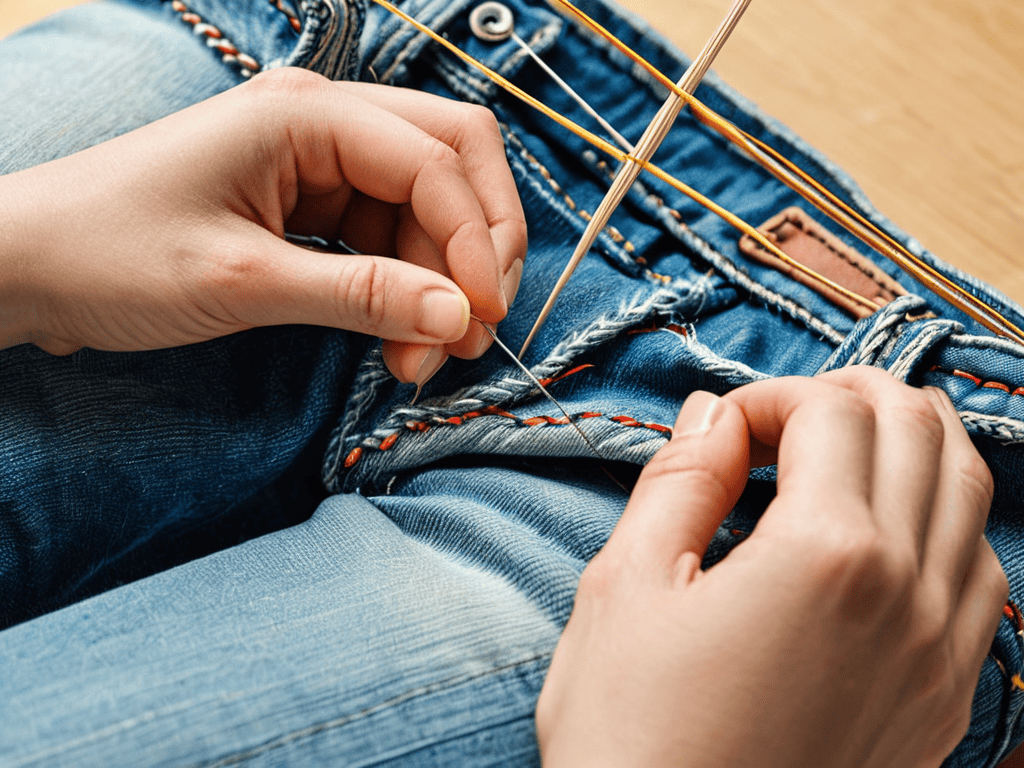
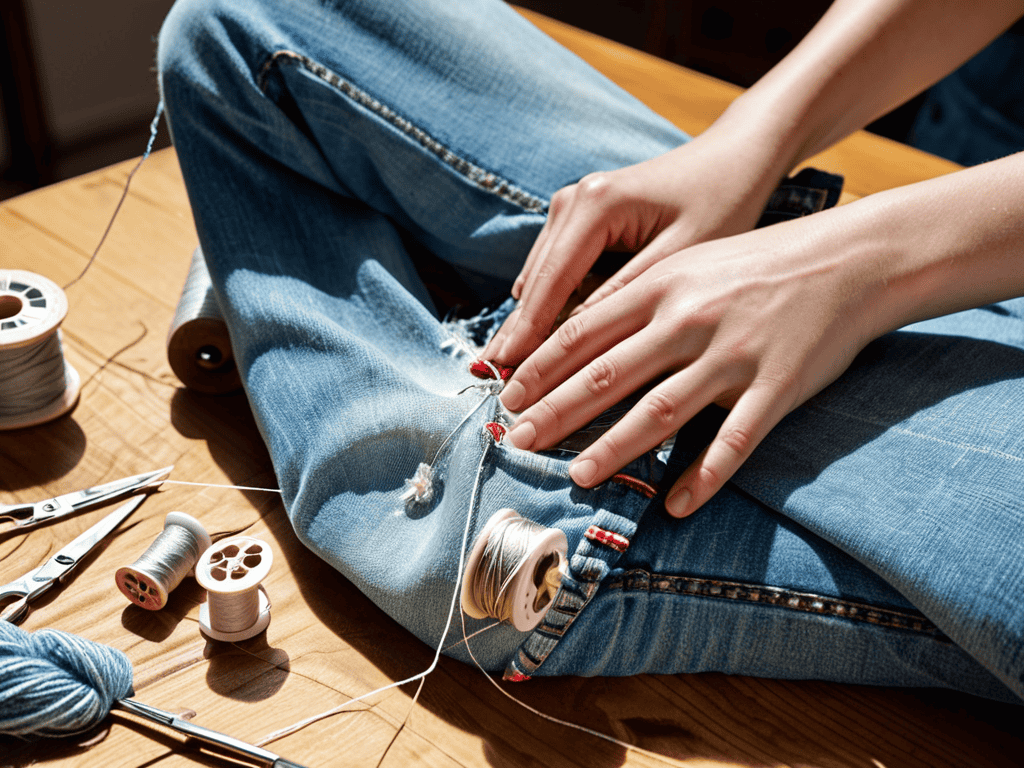
Step-by-Step Instructions
- 1. To begin with, gather your tools, which should include a sewing needle, threads of various colors, a pair of scissors, and any other embroidery floss or yarn you think might match the fabric of the garment you’re about to mend. It’s also a good idea to have a small, sharp pair of scissors dedicated just to cutting threads, as this will help prevent them from getting dull.
- 2. Next, examine the tear or hole in your garment carefully to determine the best approach for mending it. Consider the size of the damage, the type of fabric, and the location on the garment. This will help you decide whether you need to use a simple running stitch or something more complex like a darning stitch.
- 3. Now, thread your needle with the thread or yarn you’ve chosen, and tie a knot at the end to prevent it from coming loose as you sew. If you’re using a particularly thick or slippery thread, you might want to use a needle threader to help guide it through the eye of the needle.
- 4. Begin your mend by bringing the needle up through the fabric on one side of the tear, then inserting it back into the fabric about 1/8 inch away on the other side of the tear. This is the start of your visible mending stitch, which will not only repair the garment but also add a decorative element.
- 5. Continue making these small stitches, moving along the tear and weaving in and out of the fabric to secure it. As you work, try to keep your tension even, so that your stitches are consistent and not too tight, which could pucker the fabric.
- 6. If you’re working with a large hole or a complex tear, you might need to use a combination of stitches, such as the running stitch and the darning stitch, to fully repair the area. Darning involves weaving threads in a pattern to fill in the missing fabric, and it can be a bit more challenging, but with practice, you’ll get the hang of it.
- 7. Once you’ve completed your mend, tie off the thread with a secure knot, and trim the excess thread close to the knot. Then, take a step back and admire your handiwork – you’ve not only fixed a broken garment, but you’ve also added a unique, handmade touch that reflects your personal style.
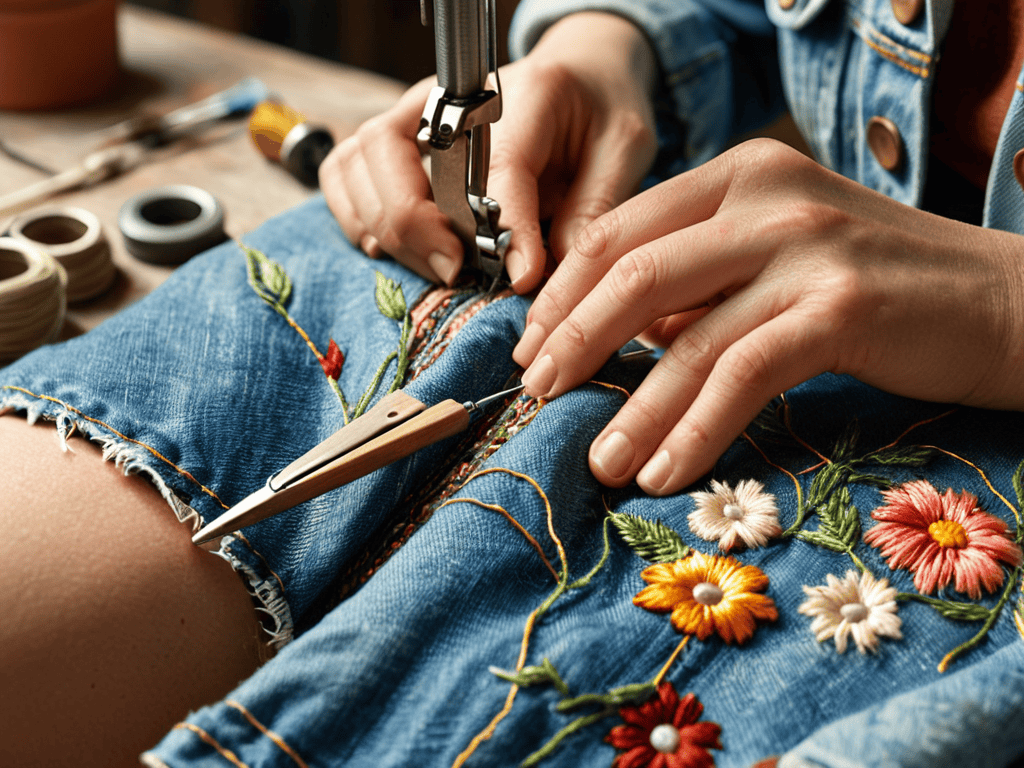
- 8. Finally, consider adding some decorative elements to your mend, such as additional stitches or embroidery, to make it truly stand out. This could be a simple pattern of straight lines, a few strategically placed knots, or even a small motif that matches the garment’s original design.
Reviving Fabrics With Visible Mending
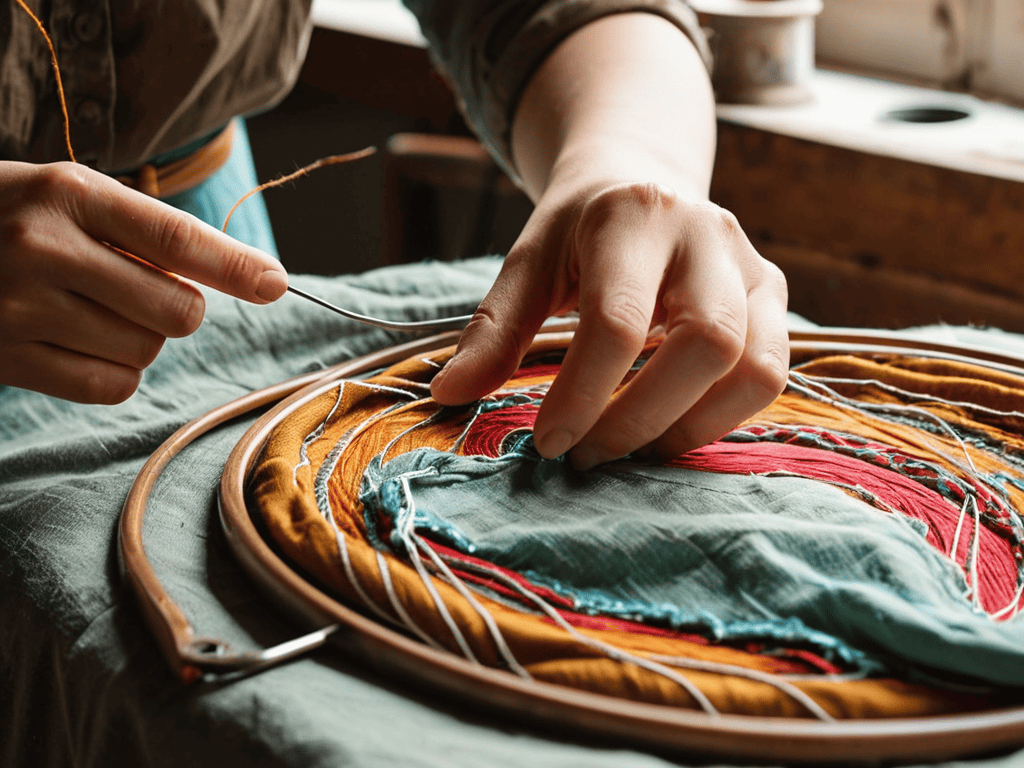
As I delve into the world of visible mending for beginners, I’m reminded of the countless hours I spent in my parents’ workshop, watching them transform discarded materials into stunning pieces of furniture. This same philosophy can be applied to clothing repair, where embroidery for clothing repair becomes an art form. By embracing the imperfections and uniqueness of each garment, we can create truly one-of-a-kind pieces that tell a story.
When it comes to textile art and mending, the possibilities are endless. I love experimenting with different hand stitching for fabric repair techniques, from the simple running stitch to more intricate patterns. Not only does this add a personal touch to each garment, but it also allows me to connect with the material on a deeper level. As someone who’s passionate about upcycling old clothes with patches, I can attest to the thrill of giving new life to a faded favorite.
As I continue to explore the world of visible mending, I’ve found that having the right resources can make all the difference in bringing your creative vision to life. For those looking to dive deeper into the art of textile repair, I highly recommend checking out online communities that share knowledge and inspiration on sustainable fashion practices, such as forums where you can discover unique tips and tricks for giving new life to old fabrics. If you’re in the Stuttgart area, you might also stumble upon local groups or meetups, like sextreffen stuttgart, where people come together to share their passions and interests, and you might even find someone who shares your enthusiasm for upcycling and repurposing materials. By connecting with like-minded individuals and staying inspired, you can continue to hone your skills and develop your own unique style, making every stitch a testament to your creativity and dedication to sustainable fashion.
In my experience, the key to successful visible mending lies in sustainable fashion repair. By choosing to repair rather than replace, we’re not only reducing waste but also preserving the memories and emotions attached to each garment. As I work on a new project, I often find myself lost in thought, remembering the stories behind each piece of fabric and the people who wore them before. It’s a truly meditative process that allows me to appreciate the beauty in imperfection.
Embroidery Revival Sustainable Fashion Repair With Textile Art
As I sit amidst my DIY team, with Bertha the sewing machine humming along, I find myself enchanted by the world of embroidery revival. This traditional craft not only adds a touch of elegance to our visibly mended garments but also tells a story of dedication and care. By incorporating embroidery into our repair techniques, we’re not only extending the life of our clothes but also infusing them with a sense of history and personality. My trusty needle, Nigel, and I have spent countless hours perfecting the art of weaving new life into faded fabrics, one stitch at a time.
With every carefully placed thread, our garments transform into unique pieces of textile art, serving as a testament to the beauty of sustainable fashion repair. Whether it’s a delicate floral pattern or a bold, statement-making design, embroidery allows us to express our creativity while reducing waste and embracing the philosophy of visible mending. As I often say, it’s all about seeing the potential in the ordinary and turning it into something extraordinary – a mantra that guides my upcycling journey and inspires me to share these techniques with you.
Stitches of Renewal Visible Mending for Beginners
As I always say, every stitch tells a story, and with visible mending, you get to be the author of your garment’s next chapter. For beginners, it’s essential to start with simple techniques like the running stitch or whipstitch. My trusty sidekick, “Stitchy” – my favorite embroidery needle – never fails to get the job done. With a little practice, you’ll be weaving new life into your faded fabrics in no time. Remember, it’s all about embracing the imperfections and having fun with the process.
I like to think of visible mending as a form of upcycling for your wardrobe. By giving new life to old favorites, you’re not only reducing waste but also creating unique, one-of-a-kind pieces that reflect your personal style. So, don’t be afraid to experiment and make those stitches your own – after all, that’s what makes visible mending so special.
Weaving Wisdom: 5 Essential Tips for Mastering Visible Mending Techniques
- Start with the right tools: Invest in a good quality needle, threads that complement your fabric, and a pair of sharp scissors to make your mending journey smoother
- Choose your stitches wisely: From the simple running stitch to more intricate embroidery patterns, selecting the right stitch can make or break the aesthetic of your mend
- Practice on scrap fabric first: Before diving into your favorite worn-out sweater, hone your skills on some spare cloth to get a feel for the stitches and the flow of your needle
- Blend functionality with flair: Visible mending is as much about form as it is about function, so don’t be afraid to add a bit of personality to your repairs with colorful threads or creative patterns
- Don’t be too hard on yourself: It’s okay if your stitches aren’t perfect at first – the beauty of visible mending lies in its uniqueness, and every imperfection tells a story of love and care for the garment
Key Takeaways for Visible Mending
By embracing visible mending techniques, you can breathe new life into old favorites, reducing waste and creating unique, storytelling pieces that reflect your personal style
Starting your visible mending journey can be as simple as learning a few basic stitches and experimenting with different threads and fabrics to find the combination that works best for you
Whether you’re a beginner looking to dip your toes into the world of textile art or a seasoned DIY enthusiast, visible mending offers a creative outlet to revive, restore, and reimagine your wardrobe in a way that’s both sustainable and aesthetically pleasing
Mending with Heart
The art of visible mending isn’t just about extending the life of your clothes, it’s about telling a story of love, care, and the human touch that goes into every stitch, every repair, and every revival of a piece that holds a memory.
Ryan Bennett
Weaving a Legacy of Sustainability
As we conclude this journey through the world of visible mending techniques, it’s essential to reflect on the impact our actions can have on the environment. By embracing this art form, we not only breathe new life into our favorite garments but also contribute to a more sustainable fashion culture. From the basic running stitch to intricate embroidery patterns, each technique offers a unique way to reimagine and renew our wardrobe staples. Whether you’re a seasoned DIY enthusiast or a beginner looking to make a positive change, the art of visible mending invites you to be part of a movement that values creativity, resourcefulness, and the beauty of the imperfect.
As you embark on your own visible mending journey, remember that every stitch is a testament to the power of transformation. It’s an opportunity to turn something old into something new, to tell a story through threads and fabric. So, let’s pick up our needles, choose our colors, and start weaving a legacy of sustainability, one stitch at a time, and make every thread count towards a more conscious, creative, and compassionate world.
Frequently Asked Questions
What are the most essential tools and materials needed to get started with visible mending techniques?
To get started with visible mending, I recommend gathering my trusty DIY team, including a sharp needle, embroidery floss, and a thimble. You’ll also need a pair of scissors, a sewing hoop, and some fabric glue. My favorite tools, Bertha the needle and Sammy the scissors, will become your new best friends in the world of visible mending.
How do I choose the right type of stitch or embroidery pattern to match the style and fabric of the garment I'm mending?
For me, choosing the right stitch or embroidery pattern is all about harmonizing with the garment’s style and fabric. I like to introduce my trusty sidekicks, like ‘Stitchy’ my sewing machine and ‘Poky’ my embroidery needle, to help me decide. Consider the fabric’s weight, texture, and the garment’s era – for example, a vintage denim jacket might call for a classic running stitch, while a delicate lace top might require intricate floral embroidery.
Can visible mending be used on all types of fabrics, or are there certain materials that are more suitable for this technique?
While visible mending can work on many fabrics, it’s best suited for natural fibers like cotton, linen, and wool. My trusty sidekick, a vintage sewing machine I’ve named Bertha, and I have found that denser fabrics like denim and canvas also respond well to visible mending techniques, but delicate or synthetic materials might require more finesse.