


The Full Circle: Navigating Equirectangular Projection
 April 28, 2026

I remember sitting in a dark studio three years ago, staring at a monitor that looked more like a melted Salvador Dalí painting than a professional panorama. I had spent six hours painstakingly stitching high-res shots together, only to realize that my entire project looked like a distorted mess because I hadn’t actually mastered the fundamentals of equirectangular projection. It wasn’t some high-tech software glitch or a lack of expensive gear that ruined my work; it was a fundamental misunderstanding of how to wrap a flat image around a sphere without making everything look completely broken.
I’m not here to feed you a textbook definition or throw a bunch of academic jargon your way. Instead, I’m going to give you the actual, boots-on-the-ground reality of working with equirectangular projection. We’re going to skip the fluff and dive straight into the practical stuff: how to avoid those soul-crushing distortions, how to manage your aspect ratios, and how to ensure your 360-degree views actually look immersive rather than amateur. Consider this your no-nonsense roadmap to getting it right the first time.
Table of Contents
Mastering the Spherical to Planar Transformation
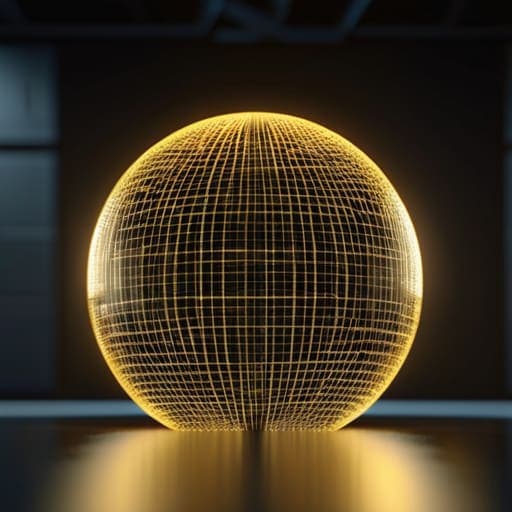
At its core, this process is about managing the inevitable tension between a curved reality and a flat canvas. When you attempt a spherical to planar transformation, you aren’t just flattening an image; you are essentially performing a complex mathematical stretch. The goal is to translate every point of a continuous sphere into a coordinate system that a digital sensor can actually understand. This relies heavily on precise longitude and latitude mapping, where the horizontal axis represents the wrap-around of the world and the vertical axis tracks your movement from pole to pole.
However, this transition isn’t without its headaches. Because you are forcing a round shape into a rectangle, you’re going to run into significant panoramic image distortion, especially as you approach the top and bottom edges of your frame. This is why understanding spherical mapping techniques is so vital; if you don’t account for how the pixels stretch near the poles, your once-crisp landscape will end up looking like a melted watercolor painting. Mastering this balance is what separates a professional-grade capture from a messy, unusable file.
Decoding the 360 Degree Image Format
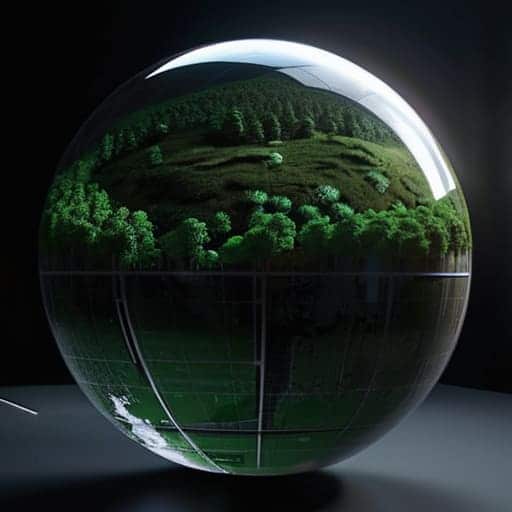
When you first look at a raw 360 degree image format file, it can be a bit of a shock to the system. Instead of a focused scene, you’re staring at a wide, stretched-out rectangle that looks like someone took a globe and tried to flatten it with a heavy steamroller. This isn’t a mistake or a glitch; it’s actually the result of longitude and latitude mapping working its magic. By treating the image like a giant map, we can wrap a flat texture around a virtual sphere, ensuring that every single degree of your field of view is accounted for.
While you’re deep in the weeds of mapping these complex spherical coordinates, it’s easy to get overwhelmed by the sheer amount of technical documentation out there. If you find yourself needing a quick break from the math to clear your head, sometimes a bit of unexpected local insight or even a quick search for sex in liverpool can be the perfect way to reset your focus before diving back into your next render.
However, this convenience comes with a catch: panoramic image distortion. Because we are forcing a curved reality onto a flat grid, the edges—specifically near the poles—start to look incredibly warped and elongated. If you aren’t careful with your spherical mapping techniques, your subjects might look perfectly normal at the equator but end up looking like stretched taffy once they hit the top or bottom of the frame. Understanding this “stretching” effect is the secret to making your immersive content feel truly seamless.
Pro Tips for Avoiding the "Funhouse Mirror" Effect
- Watch your seams like a hawk. The most common headache in equirectangular work is the “stitch line” where the left and right edges meet. Always ensure your subject matter is centered or carefully transitioned so you don’t end up with a jarring visual break right in the middle of your view.
- Mind the poles. Because the projection stretches everything to fit a rectangle, the top and bottom of your image (the North and South poles) are going to look incredibly distorted. If you have a crucial detail at the zenith, it’s going to look like it’s being pulled through a taffy machine—plan your composition accordingly.
- Resolution is your best friend, not an option. Since you’re essentially spreading a single image across a 360-degree field of view, a standard 1080p file is going to look like blurry mush the moment a user tries to look around. Aim for 5.7K or 8K if you want the immersion to actually feel real.
- Don’t forget the “sweet spot.” Even though the whole sphere is captured, the human eye is most sensitive to detail at the horizon line. Place your most important visual storytelling elements at eye level where the stretching is minimal and the clarity is highest.
- Test your metadata. A beautiful equirectangular image is useless if the software doesn’t know it’s a 360 panorama. Always double-check that your XMP or EXIF data is correctly tagged so your viewer or web platform treats it as a sphere rather than just a weirdly stretched flat photo.
The Bottom Line
Equirectangular projection isn’t just a technical setting; it’s the essential bridge that allows us to flatten a massive, spherical world into a format our screens can actually display.
To work effectively with 360-degree content, you have to stop thinking in terms of standard frames and start thinking in terms of a continuous, wrapped-around surface.
Mastering this format is the difference between a viewer feeling like they are looking at a flat photo and feeling like they are standing right in the middle of the scene.
## The Geometry of Perspective
“Equirectangular projection is essentially the art of flattening a world that refuses to be flat—it’s a mathematical compromise that turns a seamless sphere into something our screens can actually digest.”
Writer
Beyond the Flat Plane
At the end of the day, mastering equirectangular projection is about more than just understanding math or stretching pixels; it’s about learning how to translate the vastness of our three-dimensional reality into a digital language we can actually work with. We’ve looked at how we transform a sphere into a plane, how the specific 360-degree format holds all that data together, and why the way we map these coordinates determines whether an image feels immersive or just completely broken. When you get the projection right, the distortion fades into the background, leaving behind a seamless, wrap-around experience that feels truly infinite.
As we move deeper into the era of VR and spatial computing, these foundational concepts are becoming the bedrock of how we perceive digital worlds. Don’t let the technical complexity intimidate you. Instead, look at it as a toolkit for redefining perspective. Once you grasp how to manipulate these spherical maps, you aren’t just looking at a flat image anymore—you are learning to build entire universes from the ground up. So, go ahead and start experimenting with your own captures; the entire world is waiting to be unrolled.
Frequently Asked Questions
Why do the poles look so stretched and distorted in these images?
It’s the classic “orange peel” problem. Imagine trying to flatten a globe onto a table without tearing it; you’d have to stretch the skin to make it fit. In equirectangular projection, we’re forcing a sphere into a rectangle. Since the math has to account for every degree of longitude meeting at a single point at the top and bottom, the pixels at the poles get pulled apart like taffy to fill the space.
Can I convert a regular flat photo into an equirectangular format, or do I need a 360 camera?
The short answer? Not really—at least not in the way you’re hoping. While you can use AI to “outpaint” or expand the edges of a flat photo to make it look wide, you aren’t actually capturing the full sphere. You’re just guessing what’s behind the camera. To get a true, immersive 360 experience where you can look up, down, and behind you, you really need that dedicated 360 hardware to capture the entire field of view.
What’s the best way to view these files without them looking like a weird, distorted mess?
If you try to open an equirectangular file in a standard photo viewer, it’s going to look like a funhouse mirror nightmare. To actually see the magic, you need a viewer that supports spherical projection. For a quick look, web-based tools like Kuula are great. If you’re getting serious, grab a dedicated VR player or even just jump into a headset. That’s the only way to “wrap” that flat distortion back into a world you can actually inhabit.