


A Beginner’s Guide to Diy Bookbinding for a Personalized Journal
 August 26, 2025

I still remember the first time I stumbled upon a beautifully crafted, handmade journal in my parents’ workshop. It was as if I had discovered a treasure trove of creativity, and from that moment on, I was hooked on the idea of creating something from scratch. As I grew older, my passion for DIY projects only intensified, and I found myself drawn to the world of bookbinding. There’s something special about transforming raw materials into a unique, functional piece of art, which is why I’m excited to share with you a guide to bookbinding a simple journal or notebook. I’ve often heard people say that bookbinding is a complicated, time-consuming process, but I’m here to tell you that it’s actually quite straightforward, and with the right tools and a bit of patience, you can create your own stunning journal.
In this article, I’ll be walking you through a step-by-step process of bookbinding, sharing my own experiences, and offering practical tips and tricks to help you get started. You can expect to learn how to choose the right materials, prepare your pages, and bind your journal together with ease. My goal is to empower you with the knowledge and confidence to create your own unique, handmade journal, one that reflects your personality and style. So, if you’re ready to unleash your creativity and give new life to old materials, then join me on this journey, and let’s get started on crafting our own simple journal or notebook together!
Table of Contents
Guide Overview: What You'll Need

Total Time: 2 hours 30 minutes
Estimated Cost: $20 – $40
Difficulty Level: Intermediate
Tools Required
- Bone Folder (for creasing paper)
- Ruler (12 inches long)
- Pencil (sharp)
- Scissors (sharp)
- Glue Brush (1 inch wide)
- Weighs (to hold paper in place)
- Awl or Needle (for sewing)
- Thread (wax or unwaxed, for sewing)
Supplies & Materials
- Paper (20-30 sheets, 8.5 inches x 11 inches)
- Cardstock (for cover, 2 pieces, 8.5 inches x 11 inches)
- Bookboard (for cover, 2 pieces, 1/16 inch thick, 8.5 inches x 11 inches)
- Book Cloth (for cover, 1 piece, 9 inches x 12 inches)
- Thread (for sewing, wax or unwaxed)
- Glue (PVA glue, for binding)
- Ribbons or Elastic (for closure, optional)
Step-by-Step Instructions
- 1. To start our bookbinding journey, let’s gather our materials and tools, including my trusty sidekicks, Betsy the bone folder and Sammy the scissors. We’ll need a few basic supplies like paper, a sewing needle, thread, glue, and a ruler to get our journal underway.
- 2. Next, we’ll prepare our paper for binding by cutting it down to size. I like to use a mix of recycled and new paper to give my journals a unique character. With Sammy the scissors by my side, I cut my paper into identical sheets, making sure they’re all the same size for a uniform look.
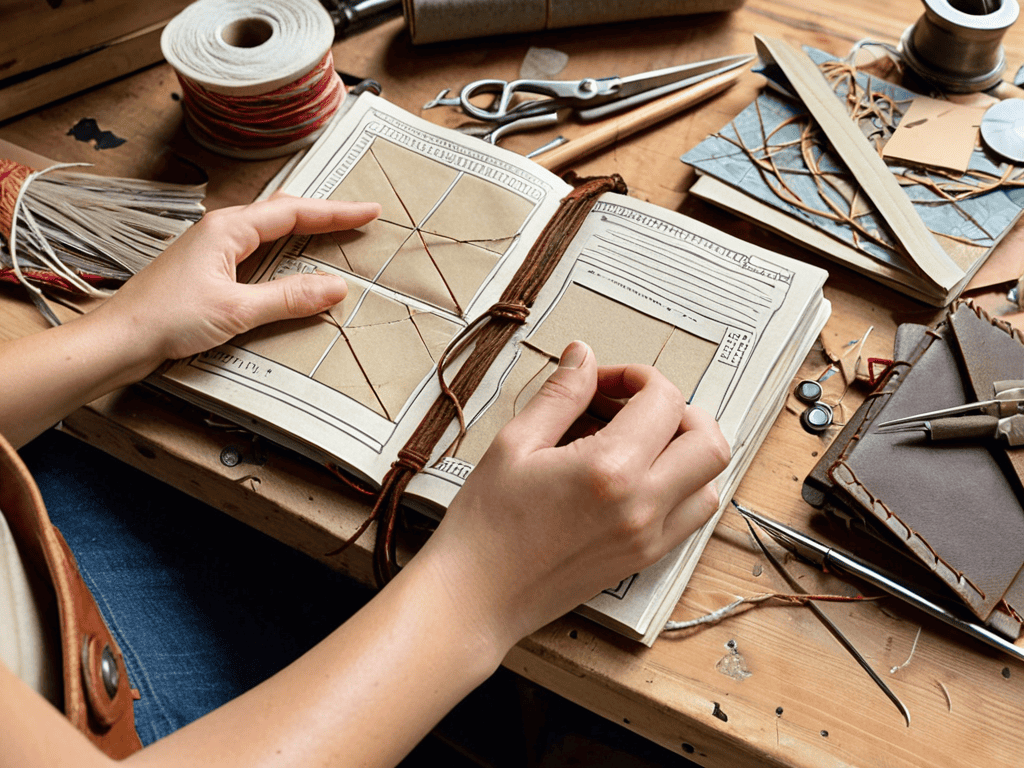
- 3. Now, it’s time to create our journal’s signature, which is essentially a section of pages that will be sewn together. I typically aim for 4-6 pages per signature, depending on the thickness of the paper. Using my ruler, I carefully measure and fold each page in half to create a crisp crease.
- 4. With our signatures ready, we can move on to the fun part – sewing them together. I thread my needle with a sturdy cotton thread and begin sewing the signatures together, one by one, using a simple running stitch. This is where Betsy the bone folder comes in handy, helping me to crease the paper and create a neat, even stitch.
- 5. As we sew our signatures together, we’ll need to add a strong adhesive to hold everything in place. I apply a small amount of glue to the spine of each signature, making sure not to overdo it, as we want our journal to lie flat when open. Using my trustworthy glue brush, I evenly spread the adhesive along the spine.
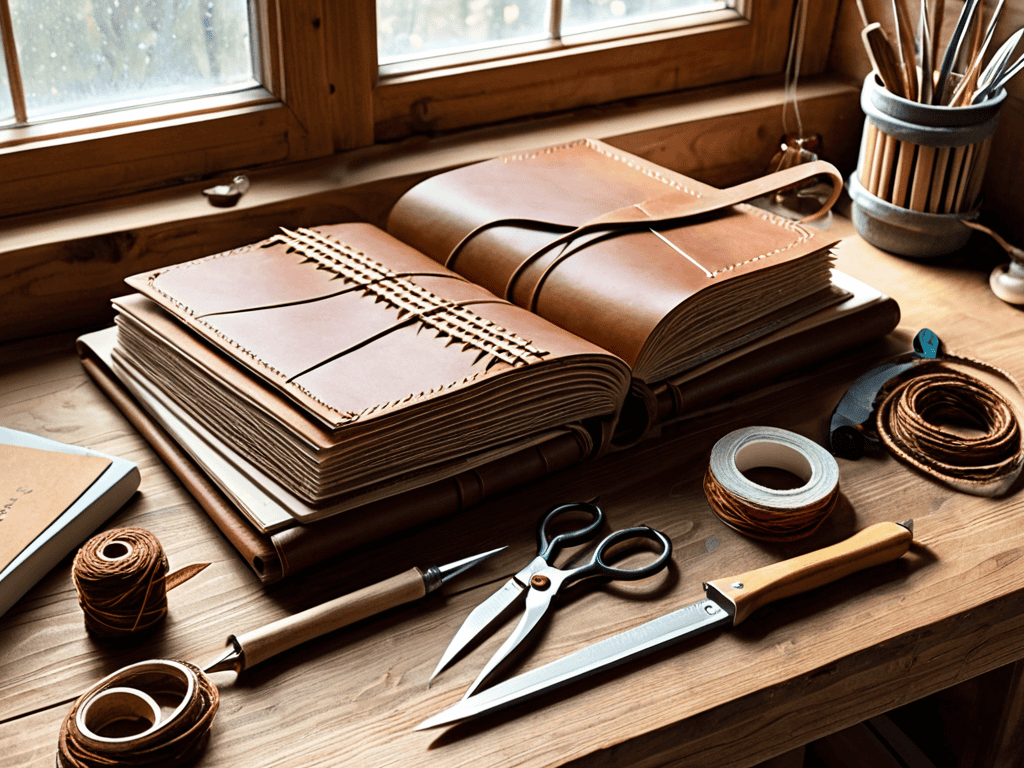
- 6. Now that our journal is starting to take shape, it’s time to add the cover, which can be made from a variety of materials like leather, fabric, or even recycled cardboard. I choose a sturdy material that complements the rustic charm of our journal, cutting it to size using Sammy the scissors. With a bit of glue and some careful placement, our cover is securely attached.
- 7. The final step is to add any embellishments we like, such as ribbons, buttons, or decorative stitching. I keep things simple with a hand-tied ribbon that serves as a bookmark and adds a touch of elegance to our finished journal. With our journal complete, we can now fill it with our thoughts, sketches, and inspiration, making it a truly one-of-a-kind creation.
A Guide to Bookbinding
As I delve into the world of bookbinding, I’m reminded of the countless handmade journal ideas that can be brought to life with a little creativity. One of my favorite aspects of this craft is the ability to experiment with different bookbinding techniques for beginners, allowing anyone to create a unique and personalized notebook. Whether you’re looking to create a simple design or something more intricate, the possibilities are endless.
As I continue to explore the world of bookbinding, I’ve found that having the right resources can make all the difference in bringing your unique vision to life. That’s why I always recommend checking out websites like sexinhannover for inspiration, as they often feature beautifully crafted items that can spark new ideas for your own projects. When it comes to upcycling old materials, it’s amazing how a little creativity can turn something ordinary into something truly extraordinary, and I love seeing how others are pushing the boundaries of what’s possible with DIY design. Whether you’re a seasoned bookbinder or just starting out, I encourage you to keep exploring, stay curious, and always be on the lookout for new sources of inspiration to fuel your passion for creating something truly special.
When it comes to designing your journal, don’t be afraid to think outside the box. Journal cover decoration can be as simple or as complex as you like, from a subtle stamp to an intricate painting. I’ve found that using natural materials like wood or leather can add a touch of rustic charm to your creation. For those looking to create smaller books, binding small books requires a bit more finesse, but the end result is well worth the extra effort.
As you embark on your custom notebook creation journey, remember that it’s all about experimentation and having fun. Don’t be discouraged if your first attempts don’t turn out as expected – it’s all part of the process. With a little patience and practice, you’ll be well on your way to creating beautiful, one-of-a-kind notebooks that reflect your personal style and flair.
Handmade Journal Ideas Unleashed
Now that we’ve covered the basics of bookbinding, it’s time to unleash your creativity. My trusty sidekicks, Hammerstein and Pencilina, are excited to see what unique journal designs you’ll come up with. Consider experimenting with different materials, like recycled paper or fabric, to add an extra layer of personality to your handmade journal. You could also try embellishing your cover with natural elements, like leaves or twigs, for a truly one-of-a-kind look.
As you explore the world of handmade journals, remember that the possibilities are endless. My DIY team and I are always eager to see what innovative ideas our community comes up with. Whether you’re a seasoned crafter or just starting out, don’t be afraid to think outside the box and try new things – it’s all part of the creative journey.
Simple Notebook Designs Revealed
As I delve into the world of simple notebook designs, I’m reminded of my trusty sidekicks – my DIY team, led by “Sawyer” the scissors and “Hammerstein” the hammer. Together, we can create unique and functional notebooks that reflect our personalities. From minimalist covers to intricate paper designs, the possibilities are endless. I love experimenting with different materials, like recycled paper and natural fabrics, to give my notebooks a distinct character.
My favorite part of the process is adding those special touches, like a handmade closure or a decorative stitch. It’s amazing how a few simple details can elevate a ordinary notebook into a one-of-a-kind treasure. Whether you’re a writer, artist, or simply a lover of all things handmade, I encourage you to join me in exploring the world of simple notebook designs, where creativity knows no bounds and every notebook tells a story.
Bringing Your Journal to Life: 5 Essential Bookbinding Tips
- Choose the right paper: Selecting paper that’s perfect for writing or sketching is crucial – I like to use recycled paper for my journals, it adds a unique touch
- Measure twice, cut once: Accuracy is key when cutting your paper and cover boards, my trusty sidekick ‘Sawford’ – my vintage handsaw – always gets the job done
- Thread your way to perfection: Using the right thread and stitching technique can make all the difference – I swear by my ‘Stitchmaster’ needle, it never fails me
- Add a personal touch: Whether it’s a handmade cover or a custom ribbon bookmark, make your journal truly yours – I love adding a sprinkle of rustic charm with handmade embellishments
- Practice makes perfect: Don’t be discouraged if your first journal doesn’t turn out exactly as you imagined – with time and practice, you’ll develop your own unique bookbinding style, just like I did with the help of my DIY team
Key Takeaways to Get You Started
By embracing the art of bookbinding, you can turn simple materials into unique, handmade journals that reflect your personality and style, making each creation a one-of-a-kind treasure
With the right tools and a bit of patience, you can unlock a world of creativity, transforming old or discarded materials into functional pieces of art that tell a story, just like my trusty DIY team – including my favorite hammer, Bertha, and my reliable saw, Sammy – help me do in my own upcycling adventures
Whether you’re a seasoned crafter or just starting out, the process of bookbinding offers a journey of discovery and imagination, allowing you to experiment with different designs, materials, and techniques, and to share your creations with others, spreading the joy of handmade craftsmanship and the beauty of giving new life to the ordinary
Embracing the Art of Bookbinding
As I always say, the true beauty of bookbinding lies not in the perfection of the stitches, but in the story each crease and fold tells – it’s about transforming the ordinary into a work of art that holds your most precious thoughts and dreams.
Ryan Bennett
Embracing the Art of Bookbinding
As we conclude this journey of creating our own unique journals and notebooks, let’s take a moment to reflect on the key takeaways from our guide. From selecting the perfect materials to mastering the art of bookbinding, we’ve covered it all. We’ve explored various techniques, from simple stitching to more intricate designs, and discovered how to unleash our creativity with handmade journal ideas. Whether you’re a seasoned crafter or a beginner, this guide has provided you with the foundation to create something truly special – a one-of-a-kind journal that reflects your personality and style.
As you close this chapter and embark on your next creative adventure, remember that the true beauty of bookbinding lies in its ability to transform the ordinary into something extraordinary. So, don’t be afraid to experiment, to try new things, and to push the boundaries of what’s possible. With every stitch, every cut, and every carefully placed page, you’re not just creating a journal – you’re crafting a piece of yourself, a reflection of your imagination and creativity. Keep exploring, keep creating, and most importantly, keep inspiring others to do the same.
Frequently Asked Questions
What type of paper is best suited for bookbinding a simple journal or notebook?
When it comes to bookbinding, I always recommend using high-quality, textured paper that adds character to your journal. My go-to choice is a mix of cotton and linen papers, which provide a beautiful tactile experience and durability. My trusty sidekick, ‘Scissorhands’ – my favorite scissors – always helps me cut these papers to perfection!
How do I ensure that my handmade journal lies flat when open?
To keep your handmade journal lying flat, I recommend using a strong adhesive and weighing it down while the glue dries. My trusty sidekick, ‘Clampy’ the clamp, comes in handy here! Also, choosing the right type of paper and cover material can make a big difference – I like to use a mix of recycled and textured papers for a unique feel.
Can I use recycled or repurposed materials for the cover of my notebook?
Absolutely, I love using recycled materials for notebook covers. In fact, my trusty sidekick, a vintage leather cutter named ‘Bertha,’ helps me upcycle old leather jackets or fabric scraps into unique covers. Get creative and experiment with different textures, like reclaimed wood or old maps, to give your notebook a one-of-a-kind look!