


How to Incorporate Educational Play Into Your Backyard Design
 February 14, 2026
I still remember the day my kids turned our backyard into a science experiment, filling our small pond with leaves and watching as the ecosystem changed before their eyes. It was a moment of pure wonder, and it got me thinking about the importance of educational play backyard design. So often, we’re led to believe that creating an educational outdoor space means sacrificing fun for function, but I’ve found that the opposite is true. By incorporating elements of learning into our backyard design, we can foster a sense of curiosity and adventure in our children that will last a lifetime.
As a family therapist, I’ve seen firsthand the impact that a well-designed outdoor space can have on a family’s dynamics. In this article, I’ll share my expertise on how to craft a magical educational playground in your own backyard. You’ll learn how to balance fun and learning, creating a space that’s both entertaining and enriching for your children. From incorporating natural elements to designing interactive learning stations, I’ll provide you with practical, no-hype advice on how to create an educational play backyard design that will inspire your kids to explore, discover, and learn.
Table of Contents
- Guide Overview: What You'll Need
- Step-by-Step Instructions
- Educational Play Backyard Design
- Nurturing Young Minds: 5 Essential Tips for Educational Play Backyard Design
- Nurturing Curiosity: 3 Key Takeaways for Educational Play Backyard Design
- Designing for Discovery
- Nurturing Young Minds: A Lasting Legacy
- Frequently Asked Questions
Guide Overview: What You'll Need
Total Time: 4 hours 30 minutes
Estimated Cost: $500 – $1000
Difficulty Level: Intermediate
Tools Required
- Shovel (for digging and leveling)
- Rake (for smoothing out soil)
- Tape measure (for measuring and marking areas)
- Level (for ensuring surfaces are even)
- Hammer (for tapping pieces into place)
- Saw (for cutting lumber to size)
- Drill (for making holes for screws or plantings)
- Wheelbarrow (for transporting heavy materials)
Supplies & Materials
- 2-in x 6-in lumber (for building benches or borders)
- Wooden boards (for creating a bridge or ramp)
- Gravel (for drainage and stability)
- Sand (for play areas or as a base layer)
- Mulch (for landscaping and weed suppression)
- Seeds or plants (for gardening and educational activities)
- Outdoor toys and equipment (such as a sandbox or water table)
- Weather-resistant materials (for signage or educational displays)
- Irrigation system (for efficient watering of plants)
Step-by-Step Instructions
- 1. First, assess your backyard space to determine the best layout for your educational play area. Consider the size, shape, and any existing features like trees, gardens, or slopes. I like to think of this step as a fun treasure hunt, where you get to discover the hidden potential of your own yard. Take note of the areas that receive the most sunlight and those that are shaded, as this will help you decide where to place different activities.
- 2. Next, brainstorm a list of educational activities that you want to incorporate into your backyard design. This could include a garden for teaching botany, a bird-watching station for learning about ornithology, or a sensory play area for exploring textures and colors. Don’t be afraid to get creative and think outside the box – or in this case, the backyard fence. Consider what your children are interested in and what you want them to learn, and let that guide your planning.
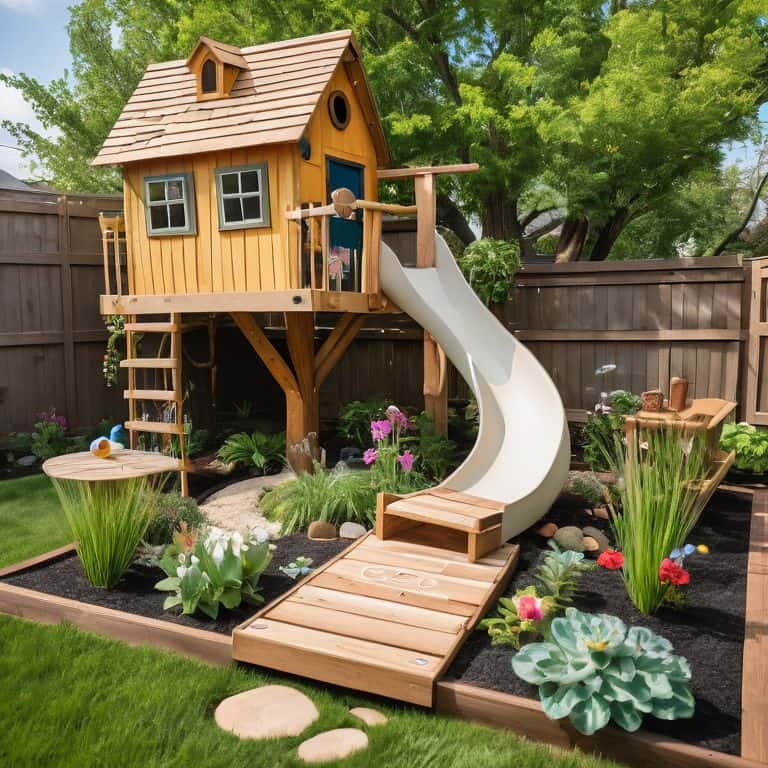
- 3. Now it’s time to create a themed zone for each activity. For example, if you want to create a mini-ecosystem for teaching about habitats, you could design a small pond or water feature, complete with rocks, plants, and even a few fish. I’ve found that using natural materials like wood and stone can help bring a sense of warmth and authenticity to each zone. Don’t forget to include signage or labels to help your kids learn about the different components of each ecosystem.
- 4. To encourage active learning, incorporate interactive elements into each zone. This could be as simple as a chalkboard or whiteboard for labeling plants, or as complex as a DIY water table for experimenting with fluid dynamics. The key is to create an environment that invites exploration and discovery, rather than just passive observation. I’ve seen kids spend hours engaged in active learning when given the right tools and encouragement.
- 5. As you’re designing your educational play backyard, be sure to incorporate plenty of seating areas for rest and reflection. This could be a bench under a shady tree, a picnic table, or even a hammock for lounging. I’ve found that taking breaks and enjoying the surroundings is just as important as the learning activities themselves, as it helps to recharge and refocus the mind. Consider adding a few comfortable cushions or pillows to make the seating areas even more inviting.
- 6. To make your educational play backyard a true sensory experience, incorporate a variety of textures, colors, and sounds. This could include a sensory garden with different herbs and flowers, a wind chime or bird feeder for auditory interest, or even a small water feature with a fountain or bubbler. I’ve found that engaging multiple senses at once can help to create a more immersive and memorable learning experience. Don’t be afraid to experiment and try out new things – it’s all part of the fun.
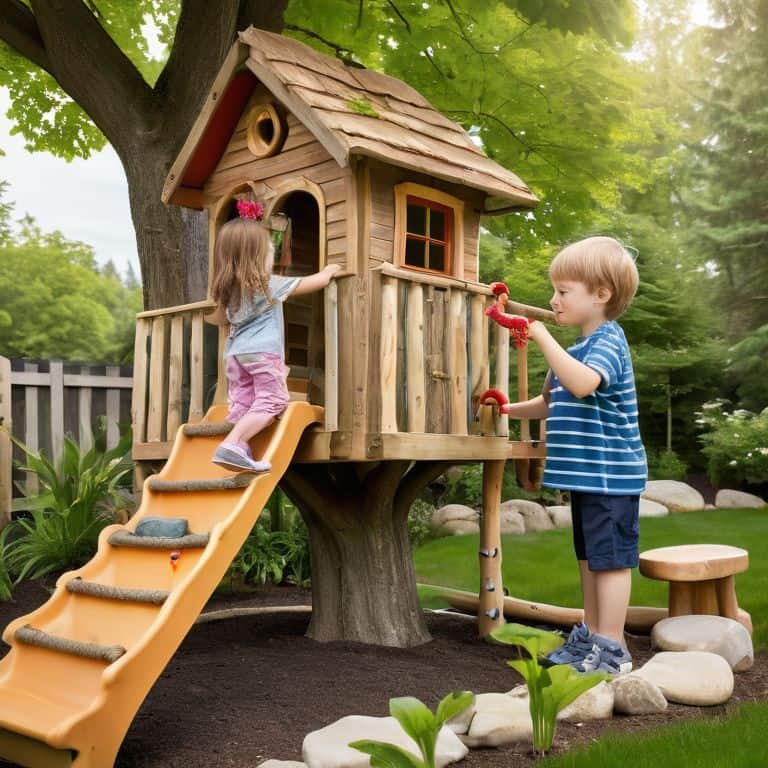
- 7. Finally, make it a family affair by involving your kids in the design and maintenance of your educational play backyard. This could be as simple as letting them help with planting or watering, or as involved as having them design their own themed zone or activity. I’ve found that when kids feel invested in the process, they’re more likely to take ownership of their learning and have a blast doing it. Consider making it a regular family activity, like a weekly gardening day or a monthly nature walk, to help foster a sense of connection and community.
Educational Play Backyard Design
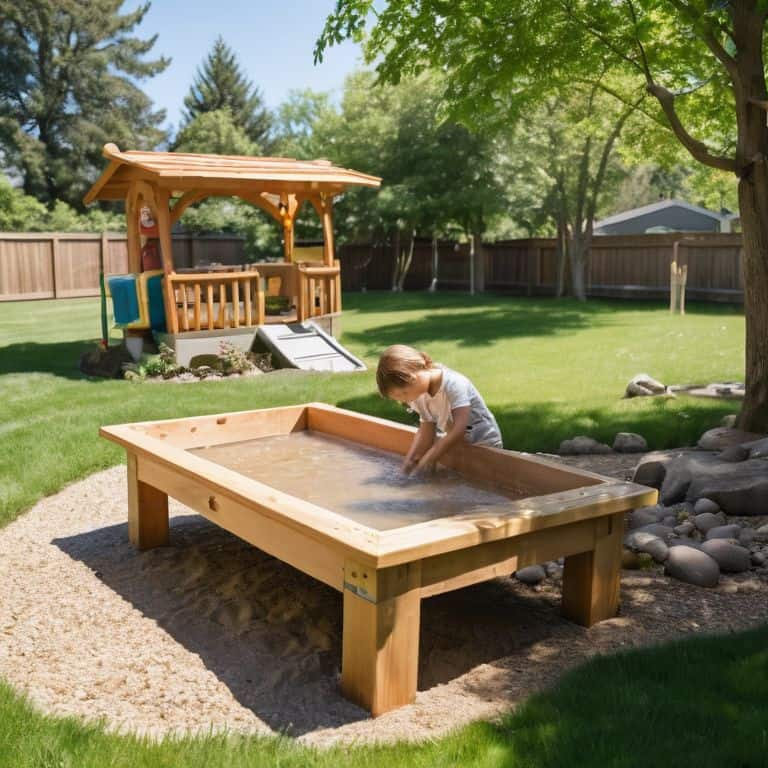
As I reflect on my own childhood, I realize how much I learned from simply being outdoors. My parents would often send me and my siblings out to play, and we’d spend hours exploring the woods behind our house, collecting leaves and watching the birds. It was an immersive learning experience that sparked my curiosity and sense of wonder. Now, as a family therapist, I encourage parents to create similar opportunities for their kids. One way to do this is by incorporating sensory play equipment into your backyard design, such as a water table or a sand pit.
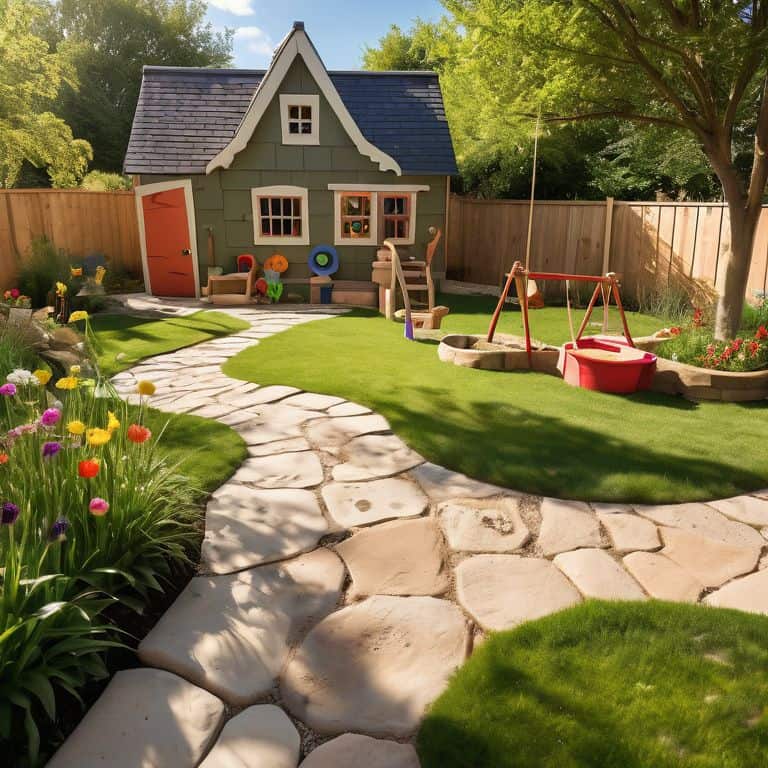
When designing an outdoor space for kids, it’s essential to consider nature based learning activities that promote exploration and discovery. For example, you could create a backyard obstacle course that incorporates natural elements like logs, rocks, and hills. This type of design not only encourages physical activity but also helps kids develop problem-solving skills and learn about the natural world. By incorporating elements like a kids’ gardening project, you can also teach children about the importance of nurturing and caring for the environment.
As you design your outdoor space, don’t forget to prioritize playground safety tips to ensure a fun and secure experience for your kids. This might include installing soft surfacing, securing any heavy equipment, and supervising children during playtime. By taking these precautions, you can create a space where your kids can thrive and learn, surrounded by the beauty and wonder of nature.
Nature Based Learning Activities
As I reflect on my own childhood, I realize the impact that nature had on my learning and development. I’ve carried this appreciation into my own family, and we love incorporating nature-based learning activities into our backyard play. One of our favorite things to do is create a sensory garden, filled with plants of different textures, smells, and tastes. My kids adore exploring and discovering the various sensations, and it’s amazing to see how it sparks their curiosity and creativity.
By bringing nature into our educational play, we’re not only fostering a love for the outdoors, but also encouraging an appreciation for the world around us. Whether it’s planting a tree, watching a butterfly emerge, or simply observing the changing seasons, these experiences have a profound impact on our children’s understanding of the world and their place in it.
Sensory Play Equipment Essentials
As I reflect on my own childhood, I realize the significance of sensory play in fostering curiosity and creativity. When designing an educational play backyard, incorporating sensory play equipment is essential. I’ve seen firsthand how simple elements like sand, water, and textures can captivate children’s imagination. For instance, a sand table or a water table can provide endless hours of creative play, while a texture garden with varied plants and materials can stimulate their sense of touch.
To create a well-rounded sensory play area, consider including equipment like swings, slides, and climbing structures that encourage physical activity and exploration. Additionally, incorporating natural elements like logs, rocks, and plants can add depth and complexity to the space, allowing children to engage their senses and develop a deeper connection with nature.
Nurturing Young Minds: 5 Essential Tips for Educational Play Backyard Design
- Create a sensory garden filled with a variety of textures, colors, and scents to encourage exploration and curiosity
- Designate a ‘discovery zone’ with natural elements like rocks, logs, and water features to foster an appreciation for the environment
- Incorporate outdoor instruments and art stations to promote creativity and self-expression
- Build a ‘mini-orchard’ or a small vegetable garden to teach children about the importance of nutrition, growth, and responsibility
- Establish a ‘storytelling circle’ with a fire pit or a cozy reading nook to encourage a love for language, history, and cultural heritage
Nurturing Curiosity: 3 Key Takeaways for Educational Play Backyard Design
As we explore the world of educational play backyard design, I’m reminded of the countless hours I spent as a child playing in my grandparents’ garden, discovering the wonders of nature and fostering a sense of curiosity that has stayed with me to this day.
By incorporating nature-based learning activities, such as gardening and outdoor scavenger hunts, into our backyard designs, we can provide our children with a unique opportunity to develop a deeper appreciation for the natural world and its many wonders.
Through the thoughtful selection of sensory play equipment, like water tables and sandboxes, and the creation of inviting outdoor spaces that encourage exploration and discovery, we can help our children cultivate a love of learning that extends far beyond the boundaries of our backyard, and into the world at large.
Designing for Discovery
As I reflect on my own childhood and now, as a mother, watch my kids explore our backyard, I’ve come to realize that educational play isn’t just about learning – it’s about cultivating a sense of wonder that stays with us for a lifetime, and that’s exactly what a well-designed educational play backyard can offer.
Laura Bennett
Nurturing Young Minds: A Lasting Legacy
As I reflect on the journey of creating an educational play backyard design, I’m reminded of the countless moments of wonder that await our children in these specially crafted spaces. From nature-based learning activities to sensory play equipment essentials, each element plays a vital role in fostering a deeper connection with the natural world and encouraging a sense of curiosity. By incorporating these elements, we not only provide our children with a unique learning environment but also lay the foundation for a lifelong love of learning and exploration.
As we conclude this journey, I’d like to leave you with a final thought: the true magic of an educational play backyard design lies not just in its individual components, but in the shared experiences and memories we create with our children. So, let’s embark on this adventure together, and watch as our backyards transform into vibrant hubs of learning, growth, and unforgettable moments that will stay with our families for generations to come.
Frequently Asked Questions
How can I incorporate educational elements into my backyard design without making it feel too structured or formal for my kids?
I totally get it – you want to nurture your kids’ curiosity without making your backyard feel like a classroom. For me, it’s all about striking a balance between structure and freedom. I’ve found that incorporating natural elements, like a garden or a water feature, can create a sense of wonder and encourage learning through exploration.
What are some budget-friendly ways to create a nature-based learning area in my backyard?
I just love creating nature-based learning areas on a budget. One of my favorite tips is to repurpose items like old logs, rocks, and leaves to create interactive sensory experiences for kids. You can also start a small herb or vegetable garden, which is not only budget-friendly but also teaches kids about growth and responsibility.
How can I ensure that my educational play backyard design is inclusive and accessible for children of all ages and abilities?
When designing my own backyard, I made sure to include a variety of textures, sounds, and activities to cater to different ages and abilities. I’ve found that incorporating transfer stations, adaptive swings, and sensory-friendly zones can make a huge difference in creating an inclusive space for all kids to thrive and learn together.