


How to Make Your Own Radiant Floor Heating System
 November 11, 2025
I still remember the first time I installed DIY radiant floor heating in my own home – it was like walking on sunshine. The warmth and coziness it brought to my space was incredible, and I was hooked. But what really surprised me was how many people thought it was a complicated and expensive process. I’ve heard friends and family members say that radiant floor heating is only for luxury homes or that it’s too difficult to install yourself. But the truth is, with the right guidance and tools, anyone can enjoy the benefits of DIY radiant floor heating.
In this article, I’ll share my personal experience and expertise to guide you through the process of installing radiant floor heating in your own home. You’ll learn how to choose the right materials, design a system that fits your space, and overcome common obstacles. My goal is to provide you with honest and practical advice that will make your DIY project a success. Whether you’re a seasoned DIY enthusiast or a beginner, I’ll walk you through each step of the way, sharing tips and tricks that I’ve learned from my own experiences with DIY radiant floor heating.
Table of Contents
- Guide Overview: What You'll Need
- Step-by-Step Instructions
- Embracing Diy Radiant Floor Heating
- Warming Wisdom: 5 Essential Tips for a Cozy DIY Radiant Floor Heating Experience
- Warmth at Your Fingertips: 3 Key Takeaways
- Warming the Heart of Your Home
- Wrapping Up with Warmth and Wisdom
- Frequently Asked Questions
Guide Overview: What You'll Need
Total Time: 2 days to 1 week
Estimated Cost: $500 – $2000
Difficulty Level: Hard
Tools Required
- Tubing cutter (for cutting PEX tubing to size)
- Drill press (for making precise holes in subfloor)
- Circular saw (for cutting 2-in x 6-in lumber for subfloor support)
- Pliers (for gripping and bending PEX tubing)
- Multimeter (for testing thermostat and heating element connections)
- Wrench set (for securing fittings and connections)
- Tape measure (for measuring room dimensions and tubing lengths)
- Level (for ensuring proper installation and leveling of heating elements)
Supplies & Materials
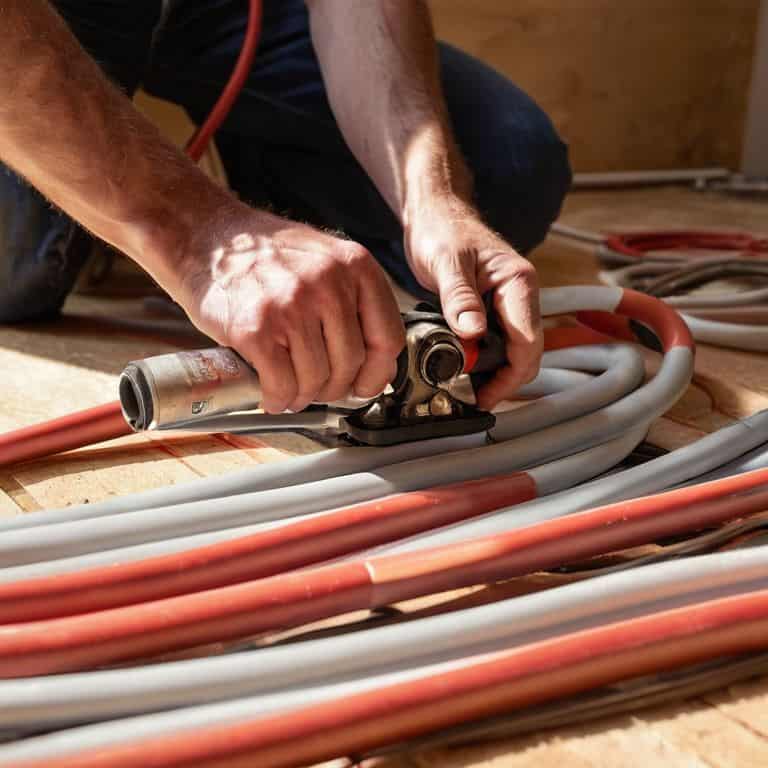
- PEX tubing (1/2 inch or 5/8 inch diameter, depending on system design)
- Thermostat (programmable or non-programmable, depending on user preference)
- Heating elements (electric mats or hydronic tubes, depending on system type)
- Insulation (reflective insulation or foam board, depending on climate and subfloor type)
- Subfloor materials (2-in x 6-in lumber, plywood, or oriented strand board, depending on system design)
- Pipe fittings (elbows, tees, and couplers for connecting PEX tubing)
- Pipe hangers (for securing PEX tubing to subfloor or joists)
- Thermal mass (concrete, brick, or stone, depending on system design and user preference)
Step-by-Step Instructions
- 1. First, let’s start with the basics – before we dive into the installation process, it’s essential to assess your space and determine if DIY radiant floor heating is right for you. Consider the size of the area you want to heat, the type of flooring you have, and the climate you live in. My trusty sidekick, a tape measure named “Mae,” will come in handy during this step.
- 2. Next, gather your materials, including the radiant floor heating system, insulation, and any necessary tools. I like to introduce my “DIY team” at this stage – we have “Sawyer” the circular saw, “Drilliam” the drill press, and “Tomy” the trusty hammer. Make sure you have all the components, and don’t hesitate to double-check the manufacturer’s instructions for specific requirements.
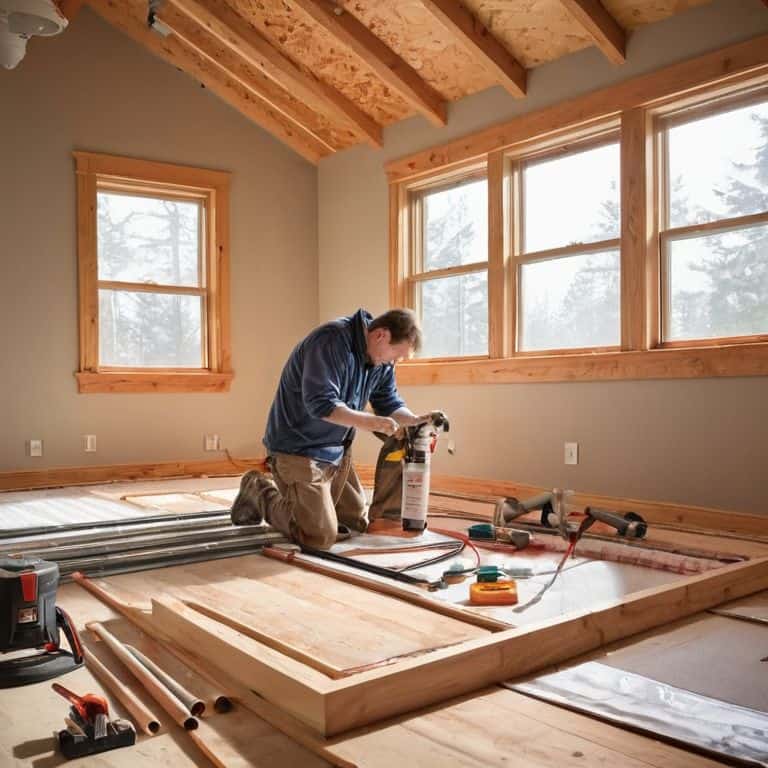
- 3. Now it’s time to prepare the subfloor – this involves insulating the area to ensure maximum efficiency and minimal heat loss. I use a combination of foam board insulation and reflective insulation to create a thermal barrier. This step can be a bit tedious, but it’s crucial for the overall performance of your radiant floor heating system.
- 4. With the subfloor prepared, it’s time to install the radiant floor heating system. This typically involves laying down a network of tubing or mats, which will distribute the heat evenly throughout the space. My “DIY team” is instrumental during this step – “Sawyer” helps me cut the tubing to size, while “Drilliam” assists with securing the mats to the subfloor.
- 5. Once the radiant floor heating system is in place, it’s time to add the finishing touches – this includes installing the flooring of your choice, such as hardwood, tile, or laminate. I like to use a floating floor system to allow for easy installation and future repairs. Remember to follow the manufacturer’s instructions for the specific flooring material you’re using.
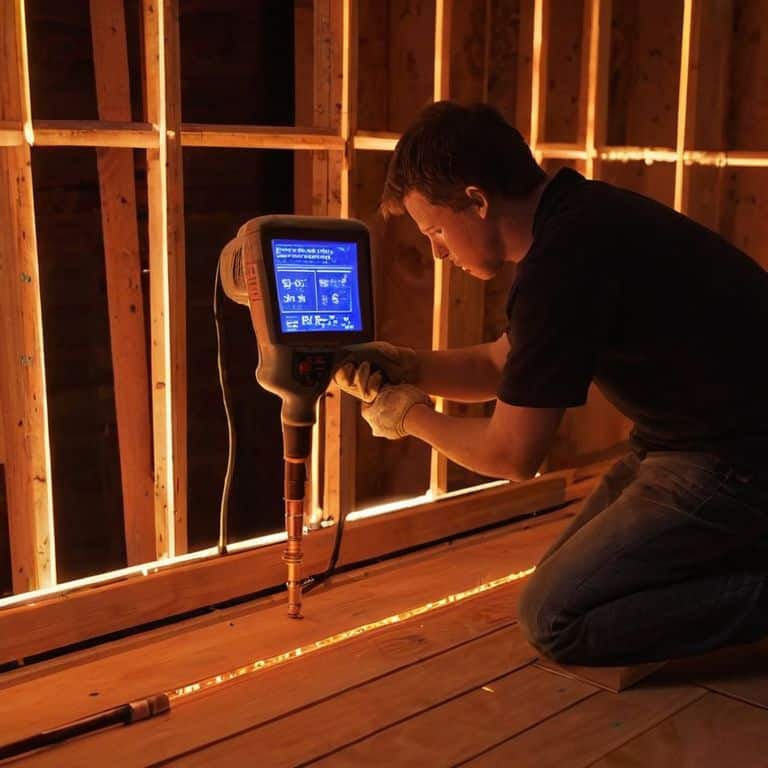
- 6. Next, connect the radiant floor heating system to a heat source, such as a boiler or heat pump. This step requires careful planning and attention to detail to ensure a safe and efficient connection. I always triple-check my connections to avoid any potential issues down the line.
- 7. Finally, test your radiant floor heating system to ensure it’s working properly. This involves checking the temperature, flow rates, and overall performance of the system. If everything is functioning as expected, you can sit back, relax, and enjoy the warmth and comfort of your new DIY radiant floor heating system. Don’t forget to maintain your system regularly to optimize its performance and extend its lifespan.
Embracing Diy Radiant Floor Heating
As I reflect on my own experiences with hydronic radiant floor heating systems, I’m reminded of the importance of proper insulation for radiant floor heating. It’s a crucial step that can make all the difference in the efficiency and effectiveness of your system. My trusty sidekick, a heat gun named Bertha, has helped me identify areas where heat might be escaping, allowing me to make adjustments and optimize the performance of my radiant floor heating.
When it comes to electric radiant floor heating installation, it’s essential to consider the type of flooring you have. For instance, radiant floor heating for concrete slabs requires a different approach than installing it under wooden floors. I’ve found that using pex tubing for radiant floor heating can be a game-changer, as it’s flexible and easy to work with. My drill, which I’ve lovingly named Daisy, has been instrumental in helping me get the job done.
To get the most out of your radiant floor heating system, it’s vital to invest in a good thermostat options for radiant floor heating. This will allow you to regulate the temperature and ensure that your space is always cozy and inviting. I’ve experimented with different thermostat settings, and I can attest that it makes a significant difference in the overall comfort and ambiance of a room. With the right tools and a bit of creativity, you can create a warm and welcoming space that’s perfect for relaxing and unwinding.
Electric Installation for Concrete Slabs
When it comes to electric installation for concrete slabs, my trusty sidekick, “Volty” – my voltage tester, is always by my side. I’ve found that electric radiant floor heating is a fantastic option for concrete slabs, as it’s relatively easy to install and maintain. By laying out electric heating mats or cables, you can create a warm and inviting space that’s perfect for cozying up on chilly mornings.
I’ve had great success with electric installations in my own projects, and I’m excited to share my tips with you. From choosing the right materials to ensuring a safe and efficient installation, I’ll guide you through the process with the help of my DIY team, including “Sparky” – my drill, and “Tappy” – my trusty tape measure.
Hydronic Systems for Cozy Spaces
As I delve deeper into the world of DIY radiant floor heating, I’m excited to share with you the wonders of hydronic systems. My trusty sidekick, “Hydie” the hydraulic wrench, has been instrumental in helping me navigate the intricacies of these systems. With hydronic systems, you can create a cozy atmosphere that’s hard to resist. By circulating warm water through pipes under your floor, you can enjoy a consistent and efficient heat that’s perfect for chilly mornings and snug evenings.
I’ve had the pleasure of working with hydronic systems in several of my upcycling projects, and I must say, the results are nothing short of magical. From transforming an old barn into a cozy retreat to creating a warm and inviting atmosphere in a modern living room, hydronic systems have proven to be a game-changer. With the right tools and a bit of creativity, you can bring warmth and character to any space, making it truly special.
Warming Wisdom: 5 Essential Tips for a Cozy DIY Radiant Floor Heating Experience

- Measure Twice, Cut Once: Double-Check Your Floor Plans to Ensure a Seamless Installation
- Insulation is Key: Don’t Forget to Line Your Floors with the Right Materials to Maximize Heat Efficiency
- Get to Know Your DIY Team: Familiarize Yourself with My Trusty Tools, Like Bertha the Drill and Sammy the Saw, to Make the Process Smoother
- Rustic Charm Meets Modern Tech: Consider Combining Traditional Materials with Innovative Thermostats for a Truly Unique Heating System
- Don’t Be Afraid to Get Creative: Think Outside the Box and Experiment with Different Materials, Like Reclaimed Wood or Vintage Tiles, to Add a Personal Touch to Your Radiant Floor Heating Project
Warmth at Your Fingertips: 3 Key Takeaways
I’ve learned that with the right mindset and tools, anyone can create a cozy haven with DIY radiant floor heating – it’s all about embracing the process and having fun with it, just like I do with my trusty DIY team, including my favorite drill, Bertha, and my reliable hammer, Hank.
From hydronic systems to electric installations, the possibilities for adding warmth and character to your space are endless, and I’m excited to see how you’ll apply these principles to your own projects, whether you’re upcycling vintage furniture or starting from scratch.
By combining rustic charm with modern design elements, like reclaimed wood and sleek thermostats, you can create a truly unique and inviting atmosphere that reflects your personal style – and that’s what DIY radiant floor heating is all about: transforming the ordinary into something extraordinary.
Warming the Heart of Your Home
As I always say, DIY radiant floor heating is not just about warming your floors, it’s about igniting a sense of comfort and tranquility in every corner of your living space – it’s where functionality meets feeling, and that’s the true magic of a well-crafted home.
Ryan Bennett
Wrapping Up with Warmth and Wisdom
As I conclude this journey into the world of DIY radiant floor heating, I want to emphasize the importance of patience and creativity in bringing your vision to life. From hydronic systems that circulate warm water beneath your floors to electric installations that can transform any concrete slab into a cozy oasis, the options are vast and exciting. Remember, the key to a successful DIY project is not just about following instructions, but about seeing the potential in every aspect of your space and embracing the process as an opportunity for growth and learning.
So, as you embark on your own DIY radiant floor heating adventure, I leave you with a final thought: the true magic happens when you combine rustic charm with modern functionality. Don’t be afraid to experiment, to try new things, and to make mistakes – for it’s in those moments of uncertainty that we often discover our most brilliant creations. With every hammer swing and every carefully placed tile, you’re not just building a warmer space, you’re crafting a story that will unfold with every step, every gathering, and every moment of peace found within your transformed haven.
Frequently Asked Questions
What are the most common mistakes to avoid when installing DIY radiant floor heating?
When tackling DIY radiant floor heating, I’ve seen folks trip up on a few common pitfalls – like improper insulation, incorrect tubing spacing, and neglecting to test the system before pouring the concrete. My trusty sidekick, ‘Tighty’ the tape measure, always reminds me to double-check those measurements!
How do I determine the best type of radiant floor heating system for my specific home and climate?
For me, choosing the right radiant floor heating system is all about considering your home’s unique character and climate. I like to think of it as introducing a new member to my DIY team – you’ve got to find the right fit. Hydronic systems are great for colder climates, while electric installations work wonders for concrete slabs in milder areas. Let’s weigh the options together!
Can I install DIY radiant floor heating in an existing home, or is it only suitable for new construction?
I’ve worked with existing homes and can confidently say that DIY radiant floor heating is definitely doable. My trusty sidekick, ‘Drilliam,’ and I have tackled several retrofit projects, and with some planning, you can warm up your space without breaking the bank or requiring major renovations. It’s all about assessing your home’s unique needs and choosing the right system.