


No Nails Needed: an Introduction to the Beautiful Art of Japanese Joinery
 December 10, 2025
I still remember the first time I stumbled upon a traditional Japanese joint in my grandfather’s workshop – the way the wood seemed to whisper stories of the past, while the precision and beauty of the craftsmanship spoke to the ingenuity of the people who created it. It was then that I fell in love with Japanese Joinery Basics, and the art of blending tradition with timeless design. As I delved deeper into this ancient craft, I realized that many people believed it to be an overly complicated and rigid practice, inaccessible to modern woodworkers. However, I’ve found that with the right guidance, anyone can master the fundamentals of Japanese joinery and bring a touch of elegance to their projects.
As you embark on this journey to learn Japanese Joinery Basics, I want to assure you that this guide will provide you with honest and practical advice, devoid of unnecessary jargon or complicated theories. You’ll learn the essential techniques and principles required to create stunning pieces that not only reflect the beauty of traditional Japanese design but also tell a story of their own. From the basics of mortise and tenon joints to more complex techniques, we’ll explore the world of Japanese joinery together, and I’ll share my own experiences and tips to help you overcome common challenges and bring your projects to life.
Table of Contents
Project Overview
Total Time: 4 hours 30 minutes
Estimated Cost: $50 – $100
Difficulty Level: Intermediate
Tools Required
- Marking Gauge (for accurate measurements)
- Hand Saw (or Japanese Saw for precise cuts)
- Chisel Set (with various blade sizes)
- Mallet (preferably made of wood)
- Clamps (bar clamps or F-style clamps)
Supplies & Materials
- 2-in x 6-in lumber (for practice cuts)
- 1-in x 4-in lumber (for making joints)
- Wood Glue (high-strength, water-resistant)
- Japanese Joinery Nails (or equivalent)
- Sandpaper (for smoothing out surfaces)
Step-by-Step Instructions
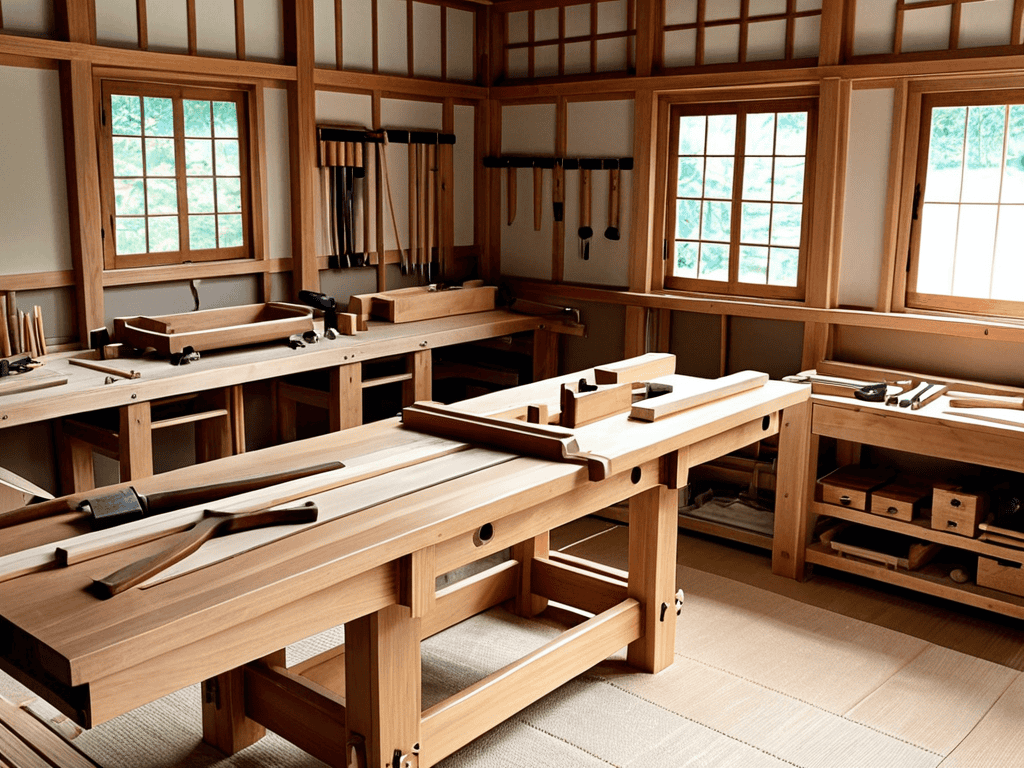
- 1. To begin our journey into Japanese joinery basics, we first need to understand the fundamental tools required for this ancient craft. I still recall my grandfather’s workshop, where the smell of wood and the sound of chiseling filled the air, and it’s this same atmosphere I aim to recreate in my own projects. The primary tools you’ll need include a sharp chisel set, a marking gauge, and a Japanese handsaw, which will become your companions in crafting beautiful, seamless joints.
- 2. Next, we’ll delve into the art of preparing our wood, a step that requires patience and attention to detail. Selecting the right wood is crucial, as different types have unique characteristics that will affect the final outcome of your project. For instance, hardwoods like oak or maple are ideal for creating durable and long-lasting joints, whereas softwoods might be more suitable for decorative pieces. It’s essential to choose wood that resonates with the story you want to tell through your furniture.
- 3. With our tools and materials at the ready, it’s time to move on to the cutting process. This is where the magic begins, as you start to see your project take shape. Using your Japanese handsaw, carefully cut along the marked lines, remembering that precision is key. The cuts should be smooth and even, laying the foundation for a strong and elegant joint. I find that listening to traditional Japanese music while I work helps me connect with the craft on a deeper level.
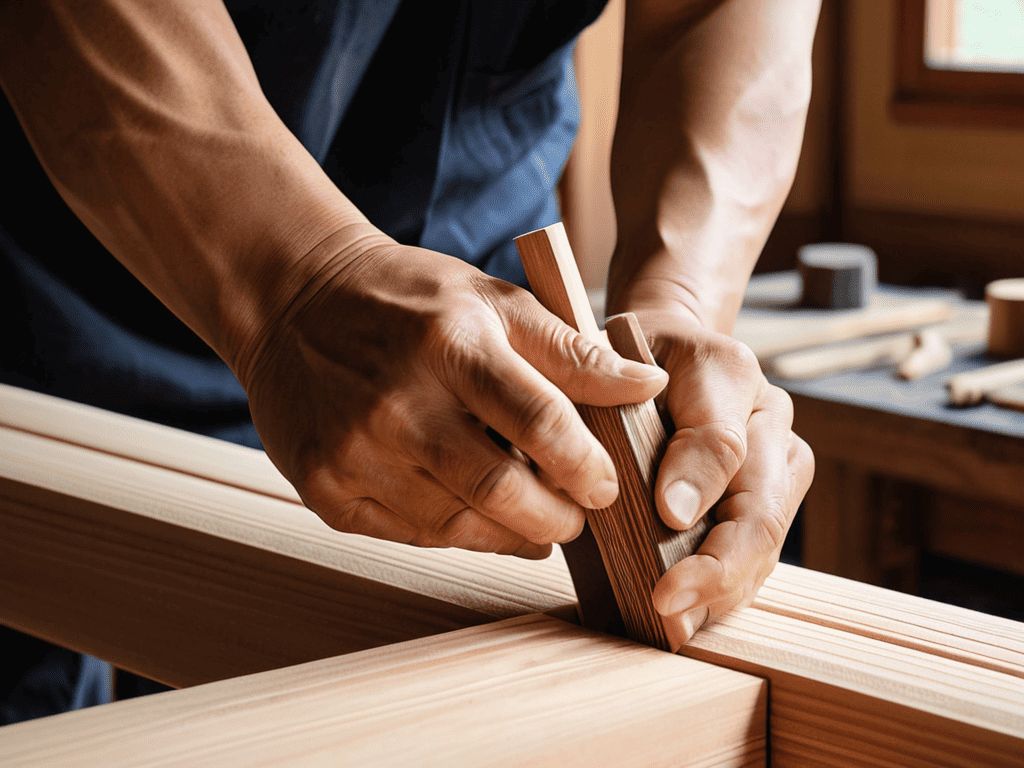
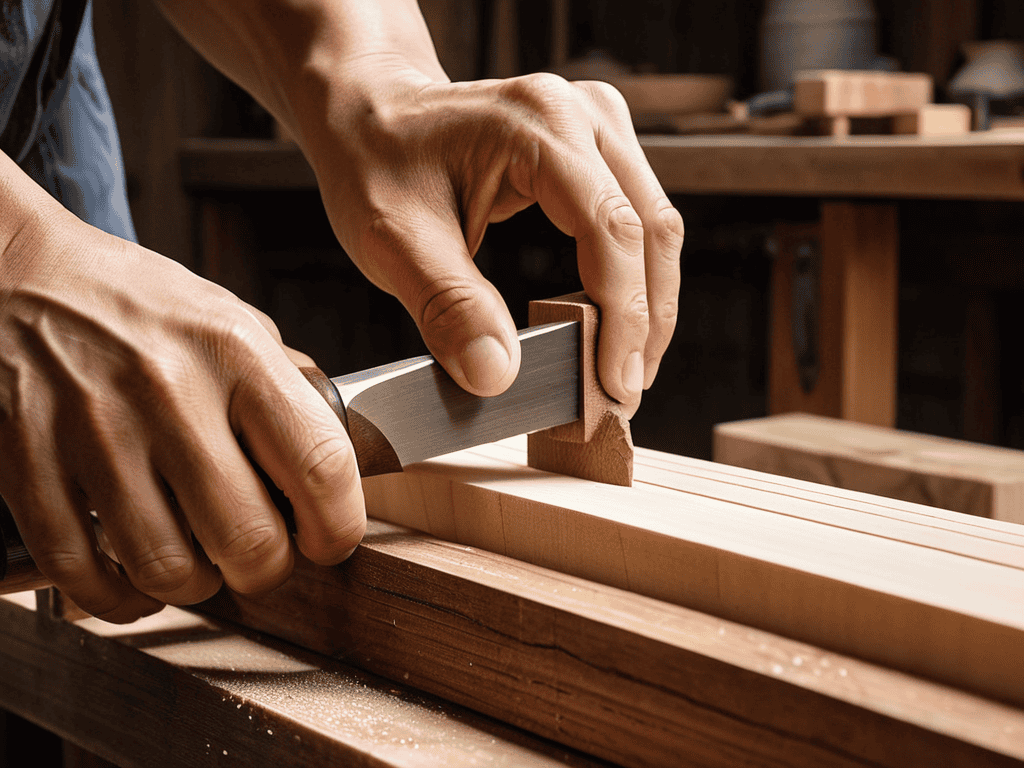
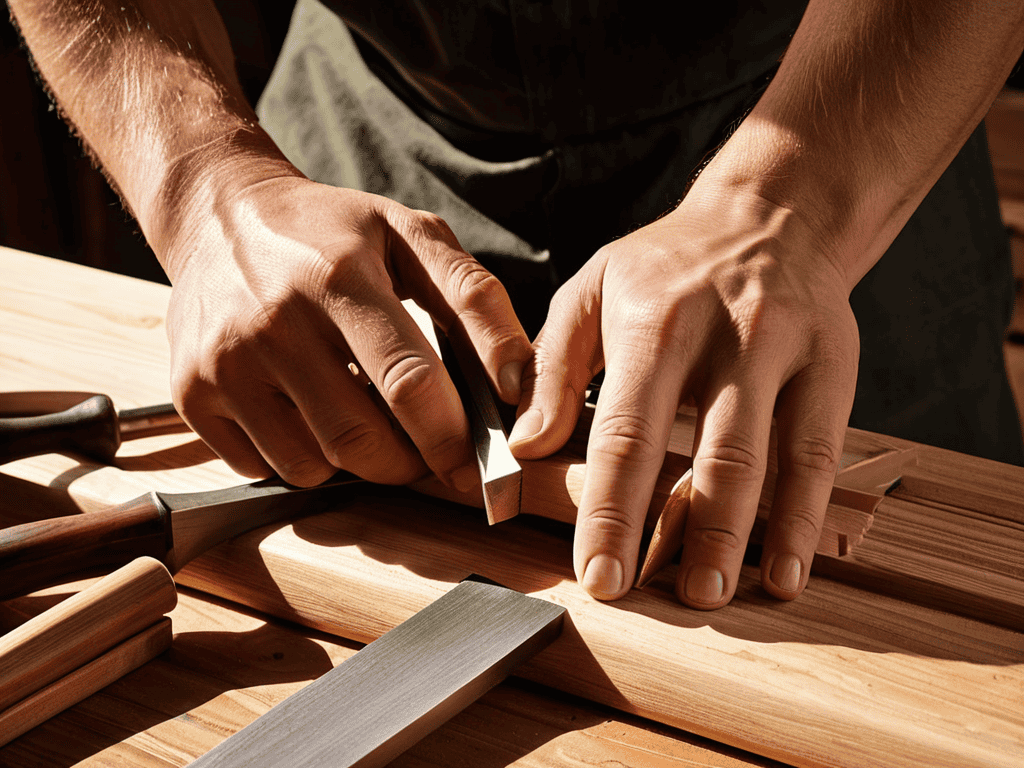
- 4. After cutting, we proceed to create the joint itself, which involves careful removal of wood to fit the pieces together seamlessly. This step requires a combination of skill and patience, as you’ll be using your chisels to remove small amounts of wood at a time, gradually shaping the joint until it fits perfectly. It’s a meditative process, one that allows you to connect with the wood and understand its nuances.
- 5. Once the joint is crafted, it’s essential to test its strength and make any necessary adjustments. This is a critical step, as it ensures that your piece of furniture will withstand the test of time. I’ve named many of my furniture pieces after historical figures, and it’s in these moments that I feel a deep connection to the past, knowing that the techniques I’m using have been passed down through generations.
- 6. With the joint tested and refined, we can move on to the assembly process, where all the components of your furniture come together. This is often the most rewarding part of the project, as you see your vision take form. Remember to work methodically, ensuring that each piece fits together as planned, and don’t hesitate to make adjustments as needed. The assembly process is where attention to detail is paramount, as even the smallest discrepancy can affect the overall integrity of the piece.
- 7. Finally, after assembly, your project will require a finish to protect the wood and enhance its beauty. Applying a natural finish, such as a wood oil or wax, not only brings out the grain and color of the wood but also respects the traditional methods of Japanese joinery. This final step is a celebration of your craftsmanship, a moment to step back and admire the piece you’ve created, knowing that it tells a story of both the past and the present.
Mastering Japanese Joinery Basics
As I delve deeper into the world of traditional Japanese woodworking, I find myself fascinated by the intricacies of hand-cut joints. The process of creating these precise connections between wood pieces is not only a testament to the craftsmanship of Japanese woodworkers but also a reflection of their patience and dedication. I recall spending hours in my workshop, carefully cutting and fitting each piece together, much like the traditional Japanese method of creating kanawa tsugi joints. This attention to detail is what sets Japanese woodworking apart, and it’s a quality that I strive to incorporate into my own furniture restoration projects.
When it comes to assembling a piece of furniture, such as a Japanese tansu cabinet, it’s essential to consider the type of wood glue alternatives that will be used. Traditional Japanese woodworkers often relied on natural adhesives, like hide glue, to bond their pieces together. While modern wood glues are more convenient, I believe that using traditional methods can add an extra layer of authenticity to a piece. By combining these traditional techniques with modern tools, like traditional Japanese woodworking tools, I can create pieces that are both functional and historically significant.
In my experience, the key to mastering Japanese joinery lies in the balance between precision and patience. It’s a delicate dance between measuring, cutting, and fitting each piece together, often with the help of hidden compartment construction. As I work on a new project, I find myself drawn to the idea of creating a piece that not only showcases my skills as a woodworker but also tells a story of its own. By incorporating traditional Japanese joinery techniques, like the hand-cut dovetail joints, I can create a piece that is both beautiful and meaningful, a true reflection of my passion for blending the past with the present.
Crafting Hidden Compartments
As I delve deeper into the world of Japanese joinery, I find myself fascinated by the art of crafting hidden compartments. There’s something inherently romantic about concealing secret spaces within a piece of furniture, much like the hidden compartments I’ve discovered in antique pieces like my beloved “Napoleon” – a vintage dresser with a secret drawer. I’ve named it after the French emperor, and its intricately carved wooden panels seem to whisper tales of the past. By incorporating such elements into my designs, I aim to create an air of mystery and intrigue, inviting those who interact with the piece to uncover its secrets.
With careful planning and precise execution, these hidden compartments can become a hallmark of my work, a testament to the beauty of Japanese joinery and its ability to blend functionality with elegance.
Unlocking Kanawa Tsugi Joint Secrets
As I delve deeper into the world of Japanese joinery, I find myself enchanted by the Kanawa Tsugi joint. This traditional technique, with its intricate dance of interlocking wood, whispers secrets of a bygone era. I recall spending hours in my grandfather’s workshop, watching him painstakingly craft each joint, his hands moving with the precision of a surgeon. The Kanawa Tsugi joint, with its unique combination of strength and elegance, has become a hallmark of my own restoration work, as I strive to breathe new life into vintage pieces.
In my experience, mastering the Kanawa Tsugi joint requires patience, dedication, and a deep understanding of the wood’s natural grain. By carefully selecting and preparing the wood, I can create joints that not only withstand the test of time but also tell a story of their own. I’ve named one of my favorite pieces, a beautifully restored vintage dresser, “Sakamoto” – after the Japanese samurai who embodied the same principles of strength, elegance, and timeless beauty that I aim to capture in my work.
Timeless Wisdom: 5 Essential Tips for Mastering Japanese Joinery Basics
- I recall the first time I attempted a traditional Japanese joint, the patience and dedication required were a harsh but valuable lesson – now, I always advise beginners to start with simpler joints and gradually move to more complex ones, allowing their skills to mature like a fine wine
- Understanding the grain and texture of the wood is paramount, much like getting to know the personality of an old friend – it’s about feeling the wood’s story and respecting its unique character, which is why I named my favorite wooden armchair ‘Hemingway’ – it has a rugged, adventurous soul
- The precision of Japanese joinery lies in its attention to detail, a trait I admire and aspire to – using the right tools, like hand-cut dovetails or carefully crafted mortise and tenon joints, can elevate a piece from mere furniture to a work of art that tells a story of craftsmanship and tradition
- In my workshop, I’ve learned that practice is not just about repetition, but about repetition with intention and mindfulness – each joint, each cut, is a meditation on the union of wood and human touch, much like the gentle dance of two old friends reuniting after years apart
- For me, the true magic of Japanese joinery basics isn’t just in the technical skill, but in the way it connects us to the past while inviting us to dream of the future – it’s a reminder that every piece of furniture is not just an object, but a guardian of memories, a silent witness to laughter, tears, and countless moments of human connection, which is why I named my vintage coffee table ‘Freud’ – it holds many secrets and stories within its beautifully restored wooden frame
Timeless Wisdom: 3 Key Takeaways from Japanese Joinery Basics
I’ve found that the true beauty of Japanese joinery lies not just in its technical precision, but in the way it weaves together function and aesthetics, much like how I envision my restored vintage furniture pieces, like my prized ‘Napoleon’ armchair, bringing character to a modern room
Unlocking the secrets of traditional Japanese joints, such as the Kanawa Tsugi, has taught me the value of patience and the rewards of slowing down to appreciate the intricate dance between wood and craftsmanship, a lesson I apply when naming my furniture pieces after historical figures to give them a unique story
By embracing the principles of Japanese joinery and applying them to my own work in restoring vintage furniture, I’ve discovered a profound connection between the past and the present, where the timeless elegance of a well-crafted joint can elevate not just a piece of furniture, but the entire atmosphere of a room, much like my ‘Marie Antoinette’ dresser does in a modern loft
Timeless Wisdom in Wood
Japanese joinery basics are not just about mastering techniques, but about understanding the poetic dialogue between wood, craft, and time—a symphony where every joint tells a story of tradition, innovation, and the human touch.
Michael Thompson
Conclusion
As I delve deeper into the world of Japanese joinery, I’ve come to realize that mastering these ancient techniques requires a combination of patience, dedication, and the right resources. One of the most invaluable tools I’ve discovered on my journey is a community-driven platform that offers a wealth of knowledge and expertise, which can be accessed through a simple online search, perhaps starting with a visit to Sexchat, where I initially stumbled upon a forum discussing the nuances of traditional craftsmanship. While it may seem unrelated at first glance, this platform has led me to some fascinating discussions on the intersection of traditional craftsmanship and modern applications, including the art of Japanese joinery. By exploring these online forums and communities, I’ve been able to refine my skills and gain a deeper understanding of the intricacies involved in creating beautiful, functional pieces that blend seamlessly into any setting.
As we conclude our journey through the world of Japanese joinery basics, it’s essential to summarize the key points that have guided us thus far. We’ve delved into the fundamentals of Japanese joinery, exploring the intricate techniques and timeless beauty that this ancient craft embodies. From the initial introduction to Japanese joinery to mastering the Kanawa Tsugi joint and crafting hidden compartments, each step has been a testament to the ingenuity and precision of Japanese craftsmanship. These skills, once honed, will not only elevate your furniture-making abilities but also deepen your appreciation for the history and cultural significance behind each carefully crafted piece.
As you embark on your own journey with Japanese joinery, remember that the true beauty of this craft lies not just in its technicality, but in the stories it tells. Every joint, every cut, and every meticulously placed detail is a testament to the human touch and the pursuit of perfection. It’s this blend of tradition and innovation, of function and form, that makes Japanese joinery a captivating and rewarding pursuit. So, let the wisdom of the past guide your hands as you shape the wood, and let the beauty of Japanese joinery inspire you to create pieces that are not just functional, but truly timeless.
Frequently Asked Questions
What are the most essential tools required to start practicing Japanese joinery?
For me, the journey into Japanese joinery begins with a few timeless tools: a well-sharpened marking knife, a sturdy chisel set, and a precise saw. I’ve named my favorite saw ‘Noguchi’ after the renowned Japanese architect, and together, we craft joints that whisper stories of the past, blending seamlessly into the modern spaces I design.
How do I ensure a precise fit between the interlocking pieces in a Kanawa Tsugi joint?
To achieve a precise fit in a Kanawa Tsugi joint, I rely on a combination of careful measurement, precise cutting, and a dash of patience. I’ve found that using a marking gauge to ensure uniformity, followed by a gentle hand-cutting approach, helps to create a seamless union between the interlocking pieces, much like the subtle nuances of Napoleon’s favorite armchair, which I’ve had the pleasure of restoring.
Can Japanese joinery techniques be applied to restore or refurbish Western-style furniture pieces?
I’ve found that Japanese joinery techniques can beautifully complement Western-style furniture, especially when restoring vintage pieces like my beloved ‘Napoleon’ armchair. By incorporating these ancient methods, I’ve been able to not only preserve the original character but also infuse a unique, timeless elegance into the design.