


Light Up the Night: a Diy Guide to Professional Landscape Lighting
 December 9, 2025
I still remember the evening I decided to tackle the installing landscape lighting project in my own backyard. It was a warm summer night, and I was determined to give my outdoor space a warm and welcoming glow. As I began to dig and wire, I realized that the process wasn’t as daunting as I thought it would be. In fact, it was quite the opposite – with the right tools and a bit of patience, I was able to transform my yard into a stunning oasis. The common myth that installing landscape lighting is a complicated and expensive task is simply not true. With a little creativity and some practical advice, you can achieve professional-looking results without breaking the bank.
As you read through this article, I promise to share my honest and no-hype advice on how to bring your outdoor space to life with beautiful landscape lighting. You’ll learn how to choose the right fixtures, design a layout that complements your yard’s natural features, and troubleshoot common issues that may arise during the installation process. My goal is to empower you with the knowledge and confidence to take on this project yourself, and to help you create a warm and inviting ambiance that will make your outdoor space truly shine. Whether you’re a seasoned DIY enthusiast or a beginner, I’m excited to guide you through the process of installing landscape lighting and helping you unlock the full potential of your yard.
Table of Contents
- Project Overview
- Step-by-Step Instructions
- Installing Landscape Lighting
- Mastering Wire Sizing for Led Landscape Lighting Benefits
- Unleash Evening Ambiance With Outdoor Lighting Design Tips
- Shining Bright: 5 Essential Tips for Installing Landscape Lighting
- Key Takeaways for a Warm and Welcoming Outdoor Space
- Illuminating Insights
- Conclusion
- Frequently Asked Questions
Project Overview
Total Time: 4 hours 30 minutes
Estimated Cost: $100 – $300
Difficulty Level: Intermediate
Tools Required
- Shovel ((for digging trenches))
- Wire stripper ((for stripping electrical wires))
- Drill ((with screwdriver and drill bits))
- Tape measure ((for measuring distances))
- Level ((for ensuring proper alignment))
- Pliers ((for gripping and bending wires))
- Screwdriver ((for securing fixtures))
- Voltage tester ((for testing electrical connections))
Supplies & Materials
- Landscape lighting fixtures ((solar-powered or low-voltage))
- Low-voltage cable ((rated for outdoor use))
- Transformer ((if using low-voltage system))
- Wire connectors ((for connecting wires))
- Electrical tape ((for insulating wires))
- Grounding rod ((for grounding system))
- Concrete or landscape anchors ((for securing fixtures))
- 6 inches of gravel or sand ((for drainage and stability))
Step-by-Step Instructions
- 1. First, let’s start by planning the layout of our landscape lighting. This is a crucial step, as it will determine the overall aesthetic and functionality of our outdoor space. I like to use a piece of graph paper to sketch out my design, taking into account the location of plants, walkways, and any other features I want to highlight. My trusty sidekick, a pencil I’ve named “Penny,” is always by my side during this process.
- 2. Next, we need to choose the right type of lighting for our space. I’m a big fan of solar-powered lights, as they’re eco-friendly and easy to install. However, if you’re looking for a more traditional approach, you can opt for low-voltage lights that are connected to a central power source. My “DIY team” member, a drill named “Daisy,” will come in handy when it’s time to make any necessary holes for wiring.
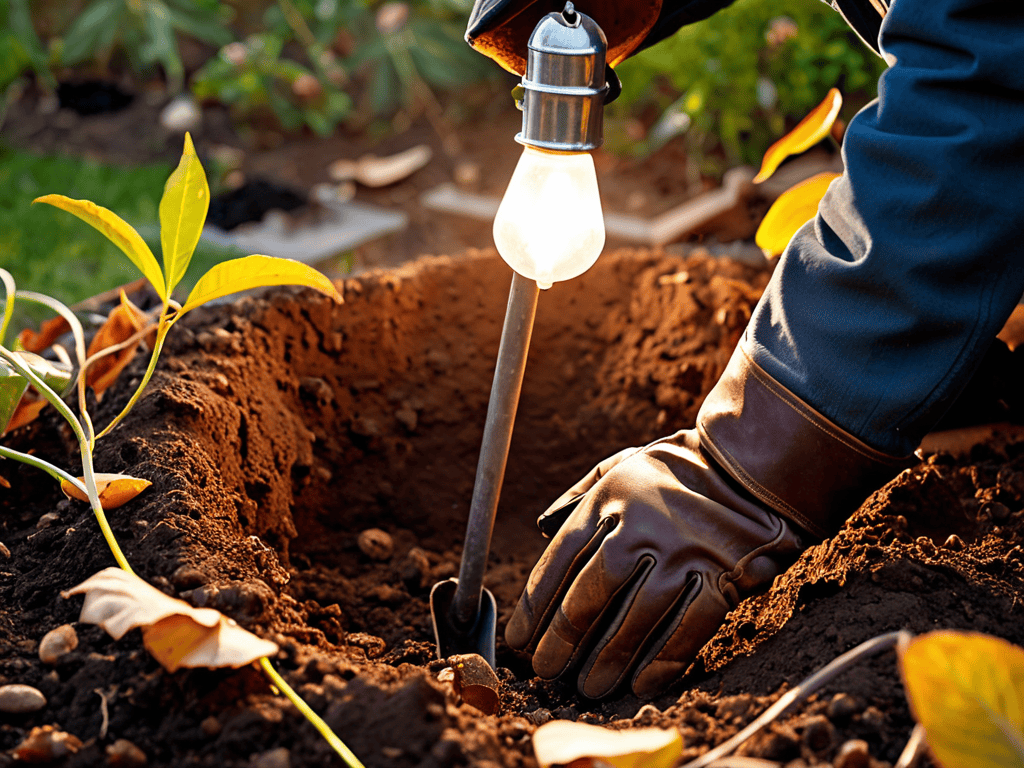
- 3. Now it’s time to prepare the site for our lighting installation. This involves clearing any debris or obstacles from the area, as well as marking out where we’ll be placing each light. I use a combination of stakes and twine to create a visual guide, which helps me ensure everything is evenly spaced and aligned. My level, “Lola,” is also essential during this step, as she helps me make sure the ground is even and the lights will be properly positioned.
- 4. With our site prepared, we can start laying out the lights. This is the fun part, as we get to see our design come to life. I like to start by placing the lights along the walkways and around the perimeter of the space, working my way inwards. My “DIY team” member, a tape measure named “Terry,” is always on hand to help me double-check my measurements and ensure everything is properly spaced.
- 5. Once we have all the lights in place, it’s time to connect the wiring. This can be a bit fiddly, but with the right tools and a bit of patience, it’s a breeze. I use a wire stripper, “Wendy,” to carefully remove any excess insulation, and then connect the lights to the power source. Make sure to follow the manufacturer’s instructions for any specific wiring requirements, and don’t hesitate to reach out if you have any questions.
- 6. As we near the end of our installation, it’s time to test the lights. This is always the most exciting part, as we get to see the fruits of our labor. I like to turn on the lights at dusk, when the sun is setting, to really appreciate the ambiance they create. My “DIY team” member, a voltage tester named “Vinnie,” helps me ensure everything is working properly and safely.
- 7. Finally, we need to finish and inspect our installation. This involves making any necessary adjustments to the lights, as well as cleaning up any debris or excess materials. I like to take a step back and admire my handiwork, making sure everything is evenly lit and visually appealing. My “DIY team” member, a putty knife named “Pete,” comes in handy during this step, as he helps me touch up any areas where the lights may be visible.
Installing Landscape Lighting

As I work on a new project, my trusty DIY team, including my favorite drill, Bertha, and my wire stripper, Sparky, are always by my side. When it comes to outdoor lighting design tips, I’ve learned that it’s all about creating a warm and inviting ambiance. To achieve this, consider the wire sizing for landscape lights to ensure you’re getting the right amount of power to your lights. This will help you avoid any led landscape lighting benefits from being overshadowed by poor installation.
One of the most important aspects of landscape lighting is the timing. A landscape lighting timer installation can make all the difference in showcasing your outdoor space. By setting your lights to turn on and off at specific times, you can create a beautiful display of light and shadow. My DIY team and I always make sure to weatherproofing outdoor lighting to protect them from the elements.
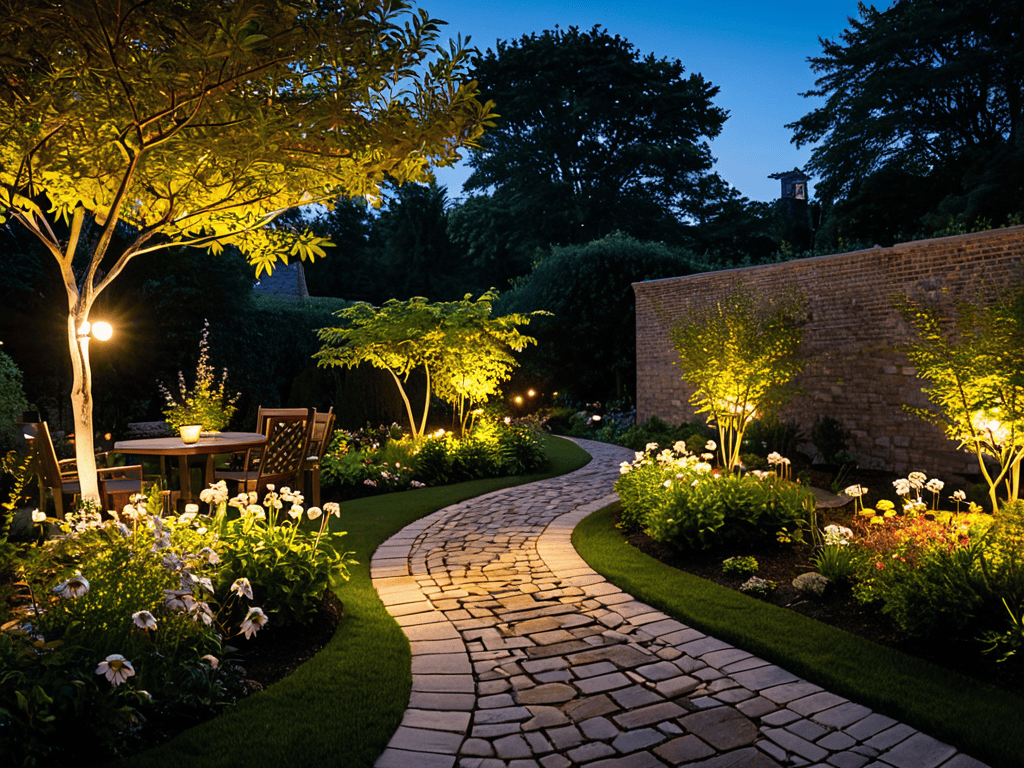
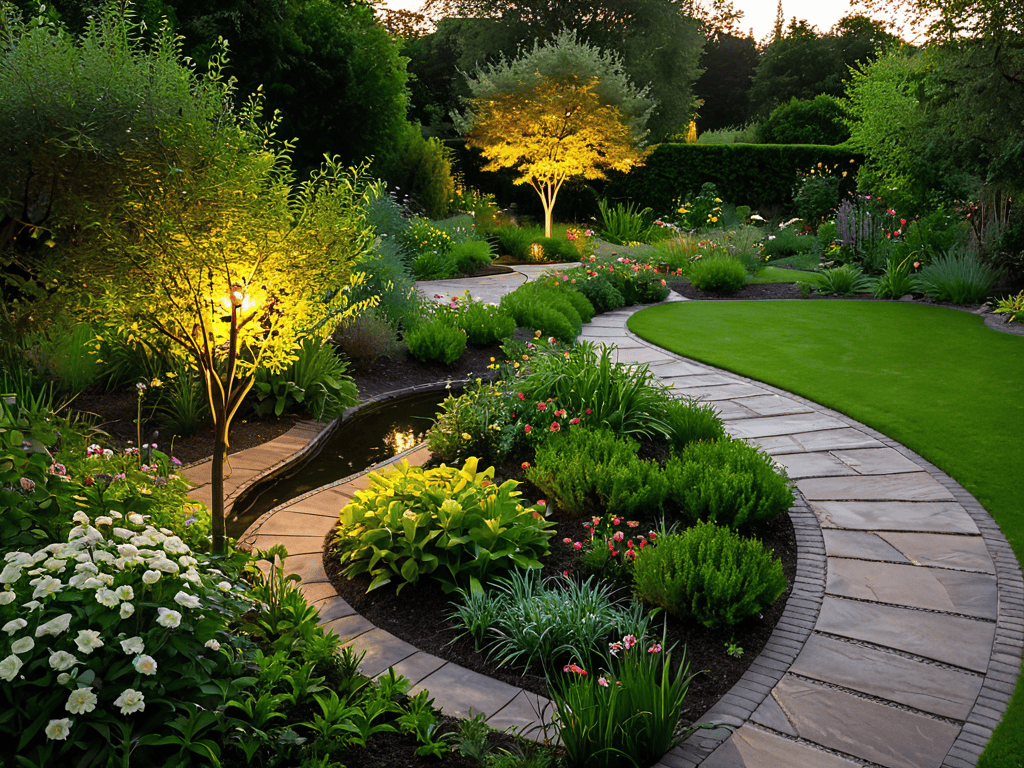
For a unique touch, consider adding pathway lighting ideas to your design. This can include placing lights along walkways, gardens, or even around trees. By combining these elements, you can create a truly enchanting outdoor space that shines from dusk till dawn. With a little creativity and the right tools, you can transform your yard into a warm and welcoming oasis.
Mastering Wire Sizing for Led Landscape Lighting Benefits
When it comes to LED landscape lighting, my trusty sidekick, “Volty” – my voltage tester, and I always emphasize the importance of proper wire sizing. It’s crucial to ensure that your wires can handle the power requirements of your LED lights to avoid any damage or safety hazards. I like to think of it as giving your lights a comfortable home, where they can shine bright without any constraints. By choosing the right wire size, you’ll be able to enjoy the full benefits of LED landscape lighting, including energy efficiency and a longer lifespan.
My DIY team, including “Cutty” – my wire cutter, and “Stripy” – my wire stripper, help me get the job done efficiently. We work together to calculate the right wire size based on the total wattage of the lights and the distance of the run. It’s a straightforward process that requires some basic calculations, but trust me, it’s worth the extra effort to get it right. With the right wire size, you’ll be able to unleash the full potential of your LED landscape lighting and enjoy a beautifully illuminated outdoor space.
Unleash Evening Ambiance With Outdoor Lighting Design Tips
As I always say, it’s all about creating a warm and inviting atmosphere, and that’s where my trusty DIY team comes in – led by Bertha, my reliable drill, and Sammy, my precision saw. When designing your outdoor lighting, consider the pathways, gardens, and seating areas you want to highlight. Think about the type of ambiance you want to create – soft and romantic, or bright and energetic. I like to use a mix of solar-powered lights and string lights to add a touch of magic to my outdoor spaces.
As I always say, proper planning is key to a successful landscape lighting installation, and that’s why I want to share with you a valuable resource that has helped me in my own projects. When it comes to finding the right materials and inspiration, I often turn to online communities and forums where I can connect with other DIY enthusiasts and professionals. For instance, I recently stumbled upon a great website while searching for local contractors and suppliers, and I was impressed by the wealth of information and connections I found there – you can check it out here: sexkontakte hamburg. While it may not be directly related to landscape lighting, it’s a great example of how online platforms can help us find what we need to bring our projects to life, and I think it’s definitely worth exploring for anyone looking to expand their network and find new ideas and resources.
By carefully placing lights to accentuate the beauty of your landscape, you can create a truly enchanting evening ambiance. Remember, it’s all about balance and harmony, so don’t be afraid to experiment and adjust your lighting design until it feels just right. With a little creativity and some expert guidance from my DIY team, you’ll be well on your way to crafting an outdoor oasis that shines long after the sun goes down.
Shining Bright: 5 Essential Tips for Installing Landscape Lighting
- Plan Your Lighting Layout Before You Begin: Take the time to walk through your yard and envision the ambiance you want to create – consider the paths, gardens, and features you want to highlight
- Choose the Right Lighting Fixtures for Your Space: From spotlights to pathway lights, select fixtures that fit your yard’s unique character and the mood you’re trying to create
- Don’t Forget to Consider the Color Temperature: Warm white, cool white, or daylight – the color temperature of your lights can dramatically impact the overall feel of your outdoor space
- Pay Attention to Wire Sizing and Connections: Proper wire sizing and secure connections are crucial for safe and efficient landscape lighting – my trusty sidekick, ‘Volty’ the voltage tester, always helps me get it right
- Test and Adjust as You Go: Don’t be afraid to turn on the lights and make adjustments – it’s easier to make changes as you install than to go back and redo things later, and my ‘Lumina’ level always ensures everything is perfectly aligned
Key Takeaways for a Warm and Welcoming Outdoor Space
I’ve learned from my own experiences that installing landscape lighting can completely transform your yard, and with the right tips and tricks, you can create a warm and welcoming ambiance that’s perfect for outdoor gatherings and relaxation
Remember, mastering wire sizing for LED landscape lighting is crucial – my trusty ‘DIY team’, including my wire strippers, Bertha, and my multimeter, Morty, have helped me get it right every time, and I’m excited to pass on that knowledge to you
By unleashing your creativity and applying the outdoor lighting design tips I’ve shared, you’ll be well on your way to crafting your own unique landscape lighting masterpiece that not only enhances the aesthetic appeal of your outdoor space but also adds a touch of rustic charm and modern twist to your home’s overall design
Illuminating Insights
As we weave a tapestry of light across our outdoor spaces, we not only enhance the beauty of our surroundings, but also craft an ambiance that invites connection, sparks imagination, and nurtures the soul.
Ryan Bennett
Conclusion
As we wrap up this journey of installing landscape lighting, let’s recap the key points that will help you achieve a beautifully lit outdoor space. We’ve covered the main step-by-step instructions, from planning to execution, and dived into the importance of wire sizing for LED landscape lighting. By mastering these fundamentals, you’ll be well on your way to creating an enchanting ambiance that enhances your home’s curb appeal and energy efficiency.
So, as you embark on this DIY adventure, remember that unleashing evening enchantment is not just about installing lights – it’s about crafting a unique experience that reflects your personal style. Don’t be afraid to experiment, try new things, and make mistakes – they’re all part of the creative process. With patience, persistence, and a dash of imagination, you’ll be able to transform your outdoor space into a warm and welcoming oasis that shines brightly under the stars.
Frequently Asked Questions
What are the most energy-efficient options for landscape lighting?
For energy-efficient landscape lighting, I swear by LED lights and solar-powered options – my trusty sidekick, ‘Sunny’ the solar charger, always helps me power up my projects sustainably! LEDs use significantly less energy than traditional lights, while solar-powered lights harness natural energy, reducing your carbon footprint.
How can I determine the best placement for my landscape lights to achieve the desired ambiance?
To determine the best placement, I like to say, ‘walk the yard’ with my trusty sidekick, Luna the level. I stroll around at night with a flashlight to identify areas that need a warm glow, considering the natural paths and focal points, like water features or statement plants, to create a captivating ambiance.
Are there any specific wire sizing requirements I should be aware of when installing LED landscape lighting?
When it comes to wire sizing for LED landscape lighting, my trusty sidekick, ‘Volty’ the voltage tester, always reminds me to check the manufacturer’s specs. Generally, you’ll want to use 18-gauge wire for shorter runs and 16-gauge or 14-gauge for longer distances to ensure safe and efficient power delivery.