


Building a Diy Solar Air Heater for a Green Home
 March 13, 2026
I still remember the first time I built a DIY solar air heater in my parents’ workshop. I was amazed by how something as simple as a wooden box and some old windows could turn into a device that warmed up our entire living room. The best part? It was made from materials we would have otherwise thrown away. This experience sparked a passion in me for upcycling and finding creative ways to reduce our energy consumption. As I delved deeper into the world of DIY solar air heaters, I realized that many people are misled into thinking that building one is a complex and expensive task.
In this article, I’ll share my personal experience and provide you with a step-by-step guide on how to build a DIY solar air heater that’s both effective and easy on the wallet. I’ll cut through the hype and give you practical advice on how to choose the right materials, design your heater, and install it in your home. Whether you’re a seasoned DIY enthusiast or just starting out, this guide will walk you through the process of creating a DIY solar air heater that will not only save you money but also help reduce your carbon footprint. So, let’s get started and turn some trash into treasure!
Table of Contents
Guide Overview: What You'll Need
Total Time: 4 hours 30 minutes
Estimated Cost: $50 – $100
Difficulty Level: Intermediate
Tools Required
- Drill Press (for precise hole drilling)
- Jigsaw (for cutting metal and wood)
- Utility Knife (with extra blades)
- Tape Measure (for accurate measurements)
- Level (to ensure proper alignment)
- Pliers (for gripping and bending)
- Screwdriver (flathead and Phillips)
Supplies & Materials
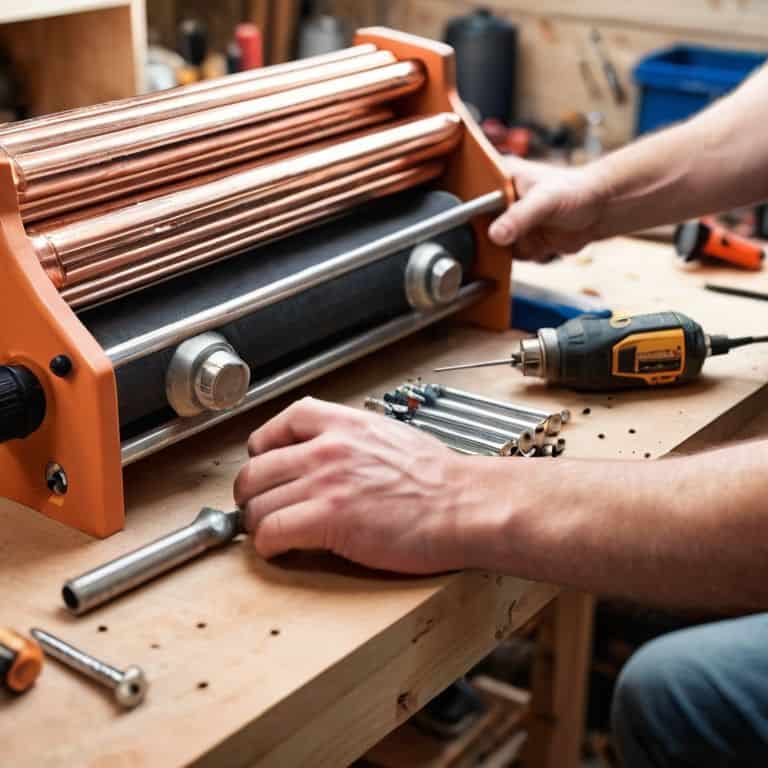
- 2-in x 6-in lumber (for frame construction)
- Plywood (1/4 inch thick, for back panel)
- Aluminum Flashing (for absorber plate)
- Black Paint (for absorber plate coating)
- Insulation (for reducing heat loss)
- Plexiglass (for glazing, 1/8 inch thick)
- Hinges (for door attachment)
- Screws (for assembly)
Step-by-Step Instructions
- 1. First, gather all the necessary materials for your DIY solar air heater, including a few vintage wooden crates that will serve as the base and frame of your project. I like to involve my trusty DIY team, including my favorite saw, Bertha, and my drill, Daisy, to help with the heavy lifting.
- 2. Next, disassemble the wooden crates into individual planks, and use these planks to create the frame of your solar air heater. This is where things can get a bit messy, but don’t worry, it’s all part of the process. My tape measure, Terry, is always by my side to ensure everything is measured to perfection.
- 3. Now it’s time to add some insulation to your frame. I recommend using recycled denim insulation, which is not only eco-friendly but also incredibly effective at keeping the heat in. Use my buddy, the staple gun, Stan, to secure the insulation in place.
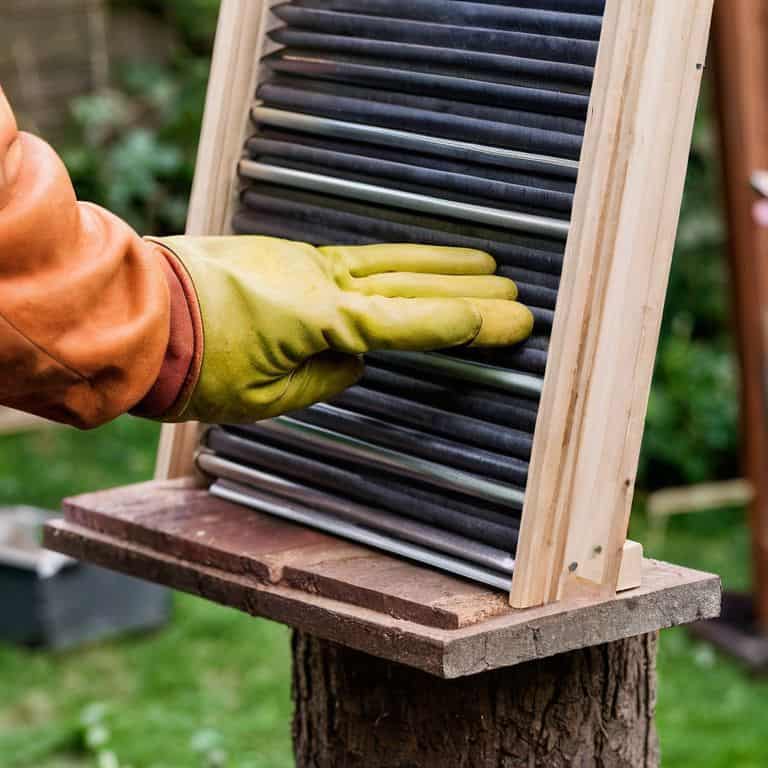
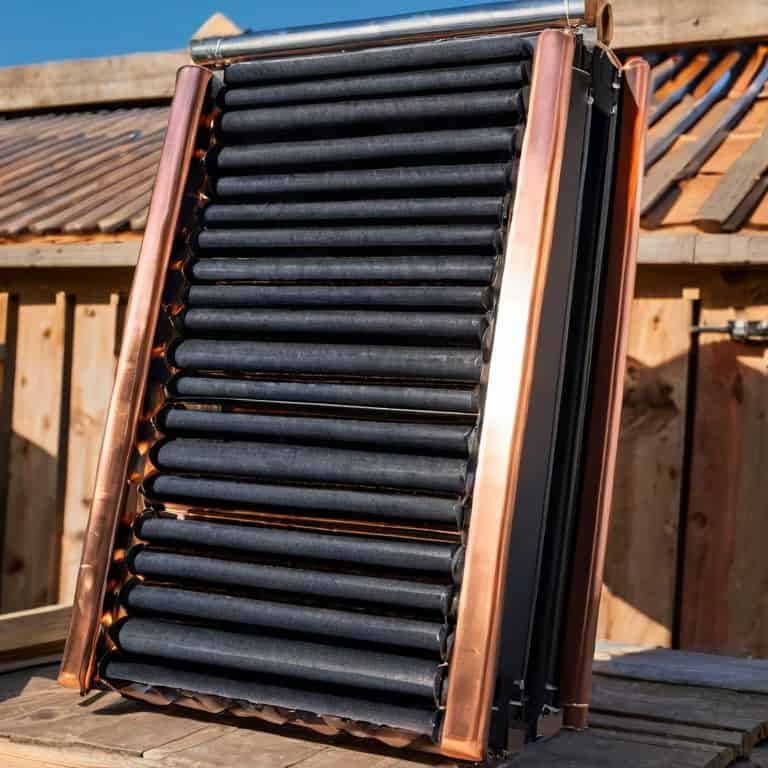
- 4. With your frame and insulation in place, it’s time to add the solar collector. This is the part of the project where you’ll be using a piece of plywood or oriented strand board (OSB), which will be covered in aluminum foil to reflect the sun’s rays. My scissors, Sally, are always sharp and ready to cut the foil to the perfect size.
- 5. Once you have your solar collector in place, it’s time to add the vents and ducts that will allow the warm air to circulate. This is where things can get a bit tricky, but don’t worry, just take your time and make sure everything is securely attached. My level, Larry, is always on hand to ensure everything is perfectly aligned.
- 6. Now it’s time to add a fan to your DIY solar air heater, which will help to circulate the warm air and increase the overall efficiency of the system. I recommend using a low-voltage fan, which will not only save you money on your energy bill but also reduce the risk of overheating.
- 7. Finally, it’s time to test your DIY solar air heater and make any necessary adjustments. This is the part of the project where you get to see the fruits of your labor, and I always feel a sense of pride and accomplishment when I see my projects come to life. Just remember to always follow safety precautions when working with electrical components, and don’t hesitate to reach out if you have any questions or need further guidance.
Unlocking Diy Solar Air Heater
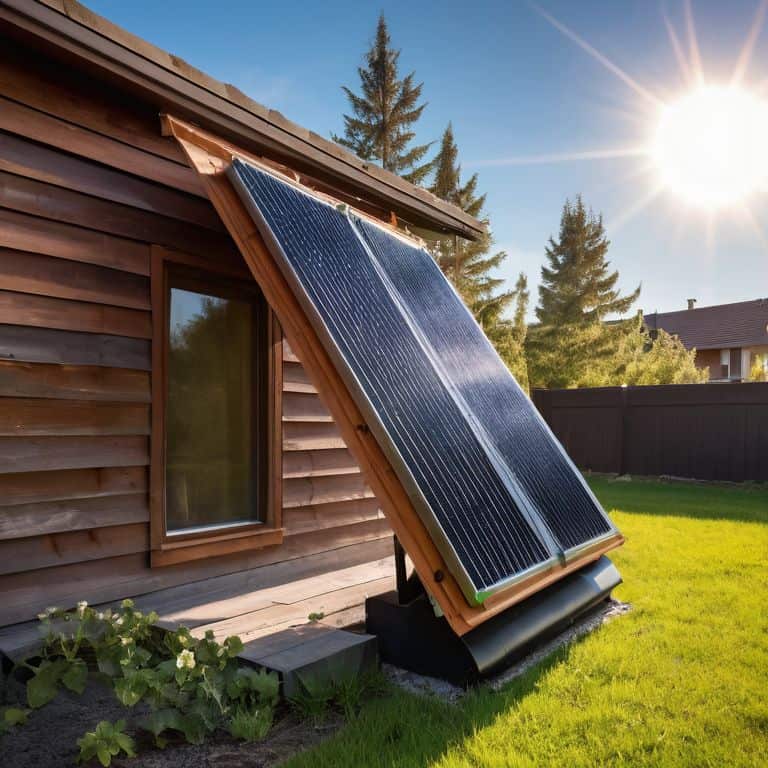
As I delve deeper into the world of solar panel air heater design, I’ve discovered that the key to unlocking maximum efficiency lies in the details. When building your own solar air heater, it’s essential to consider the orientation and positioning of the unit to maximize sun exposure. My trusty tool, “Sunny” the spirit level, has been instrumental in ensuring that my DIY projects are always perfectly aligned.
To take your solar air heater to the next level, I recommend exploring homemade solar air heater kits that include pre-cut materials and easy-to-follow instructions. These kits can be a great way to get started, especially if you’re new to DIY projects. Additionally, investing in a good solar air heater installation guide can help you navigate any tricky parts of the process and ensure a successful installation.
By following these tips and using high-quality materials, you can create a solar air heater that not only saves you money on energy costs but also adds a touch of rustic charm to your home. Remember to also consider solar air heater maintenance costs and plan for regular cleaning and upkeep to ensure your unit continues to run efficiently. With a little creativity and elbow grease, you can breathe new life into old materials and create something truly unique.
Boosting Solar Air Heater Efficiency Tips
To take my DIY solar air heater to the next level, I’ve learned a few tricks to boost its efficiency. One of my favorites is to add a layer of insulation to the back and sides of the heater – my trusty sidekick, “Sandy the Saw,” helped me cut the perfect fit. This simple step can increase the heat output by up to 20%. I also make sure to angle the heater to face direct sunlight, which can make a huge difference in its performance.
By implementing these tips, you can enjoy a cozier home while reducing your energy bills. My DIY team, including “Dusty the Drill” and “Hammerin’ Harry,” have been instrumental in helping me bring this project to life. With a little creativity and some rustic charm, you can create a solar air heater that’s not only functional but also a beautiful addition to your home.
Rustic Solar Panel Air Heater Design
As I dove deeper into the world of DIY solar air heaters, I discovered the beauty of rustic design. My trusty tool, “Sandy the Saw,” helped me transform reclaimed wood into a stunning solar panel frame. The combination of weathered wood and modern solar panels created a unique blend of old and new. I introduced “Rusty the Drill” to the team, and together we brought this vision to life.
The result was a solar air heater that not only warmed my space but also added a touch of rustic charm. The distressed wood and industrial-style screws gave it a vintage vibe, while the sleek solar panels provided a modern twist. My DIY team and I were thrilled with the outcome, and I couldn’t wait to share this design with my fellow DIY enthusiasts.
5 Essential Tips to Supercharge Your DIY Solar Air Heater
- Choose the right materials: Select durable, weather-resistant materials for your solar air heater’s frame and absorber plate to ensure it withstands the elements
- Optimize your collector’s angle: Experiment with different angles to find the sweet spot that maximizes sunlight exposure and heat absorption for your DIY solar air heater
- Insulate for success: Properly insulate your solar air heater to minimize heat loss and maintain efficiency, using materials like foam board or reflective insulation
- Maintain airflow: Ensure adequate airflow through your solar air heater by installing vents or using a fan to circulate warm air and prevent overheating
- Monitor and adjust: Keep an eye on your DIY solar air heater’s performance and make adjustments as needed to optimize its efficiency and effectiveness in warming your space
Key Takeaways from My DIY Solar Air Heater Project
I learned that with a few simple materials like old pallets, scrap wood, and some basic tools – like my trusty drill, Bertha, and my saw, Sammy – I can create a functional solar air heater that not only reduces energy costs but also adds a touch of rustic charm to my home
By applying the principles of upcycling and repurposing, I discovered that it’s possible to breathe new life into discarded items, giving them a second chance at becoming something truly unique and beautiful, which is a big part of what drives my passion for DIY projects
Through this project, I realized that DIY solar air heaters aren’t just about saving money on energy bills; they’re also an opportunity to get creative, experiment with different designs, and push the boundaries of what’s possible with sustainable, eco-friendly home improvements, which is why I love sharing my DIY adventures with all of you
Embracing Sustainability
As I always say, a DIY solar air heater is more than just a project – it’s a statement that we can breathe new life into old materials and harness the power of nature to create something truly remarkable.
Ryan Bennett
Wrapping Up Your DIY Solar Air Heater Journey
As we conclude this DIY solar air heater guide, let’s take a moment to reflect on the journey. We’ve covered the step-by-step process, from gathering materials to assembling the unit, and even dived into rustic solar panel air heater design to give your project a unique touch. Additionally, we’ve shared some valuable tips on boosting solar air heater efficiency, ensuring you get the most out of your creation. By now, you should be equipped with the knowledge and inspiration to transform your space while reducing your carbon footprint.
As you complete your DIY solar air heater project, remember that the true beauty lies not just in the functionality of your creation, but in the story behind it. Every reused material, every carefully crafted detail, tells a tale of innovation and dedication to a more sustainable future. So, don’t be afraid to experiment, to push the boundaries of what’s possible with DIY projects, and to share your experiences with others. In doing so, you’ll not only be creating something remarkable, but you’ll also be inspiring a community of like-minded individuals to join you in this journey of creative, eco-friendly living.
Frequently Asked Questions
How much does it cost to build a DIY solar air heater and what materials do I need to get started?
Ah, great question! To get started, you’ll need some basic materials like plywood, foam board, and PVC pipes, which should set you back around $50-$100. My trusty sidekicks, ‘Sawdy’ the saw and ‘Drilly’ the drill, will also come in handy. I’ve got a detailed list of materials and costs on my blog, so be sure to check it out for a more precise breakdown.
Can I use a DIY solar air heater in a small apartment or is it only suitable for larger homes?
Absolutely, my DIY solar air heater can work wonders in small apartments too. I’ve had readers install them in tiny balconies or even windowsills, and they’ve seen a significant reduction in their energy bills. Just scale down the design and materials to fit your space, and don’t forget to introduce my trusty sidekicks, like ‘Sandy the Saw’ and ‘Drilliam,’ to help you get the job done.
What are some common mistakes to avoid when building a DIY solar air heater to ensure it works efficiently and safely?
When building a DIY solar air heater, I’ve found that common mistakes to avoid include improper insulation, inadequate airflow, and using low-quality materials. My trusty sidekick, ‘Sandy the Saw,’ and I always double-check our measurements and sealing to ensure a safe and efficient system – it’s all about attention to detail, folks!