


Edible Gardens: Growing Your Own Food at Home
 June 18, 2025
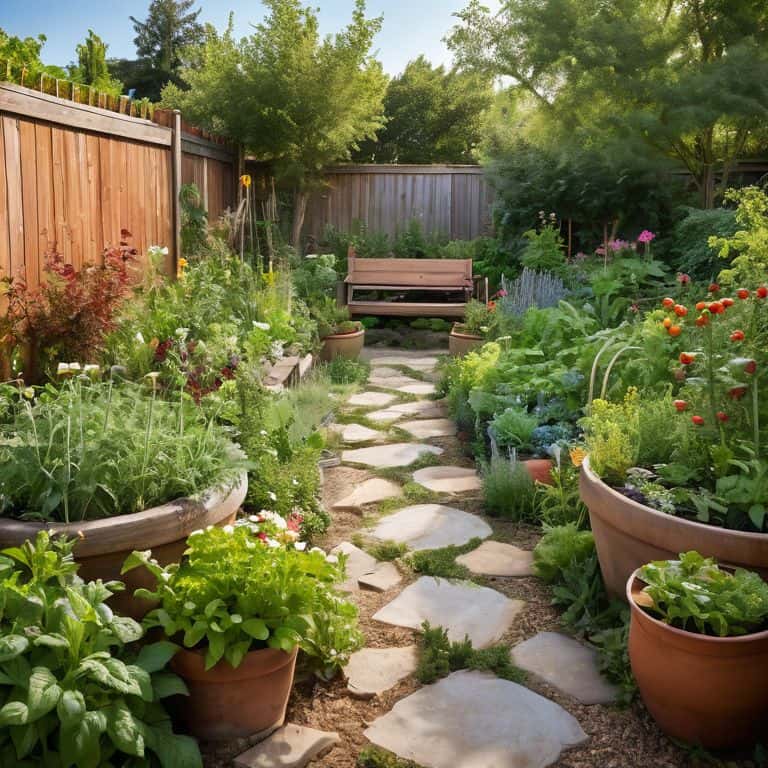
As I sit amidst my own edible garden, surrounded by the vibrant greens of freshly picked lettuce and the sweetness of ripening strawberries, I’m reminded of a common myth that often discourages people from cultivating their own little slice of heaven: that creating an edible garden is a daunting, time-consuming task. But the truth is, with the right guidance and a little patience, anyone can transform their outdoor space into a thriving oasis. I’ve seen it time and time again, from my childhood on a small organic farm in Oregon to my current work as an ecological garden designer, where I help people bring their own edible garden visions to life.
In this article, I’ll share my personal, tried-and-true tips for designing and maintaining a beautiful and productive edible garden. From choosing the right plants for your climate to clever ways to repurpose everyday items as garden tools, I’ll guide you through the process with honest, no-hype advice. My goal is to empower you to create a serene and sustainable edible garden that not only provides you with fresh, healthy produce but also becomes a peaceful retreat from the hustle and bustle of daily life. So, let’s get started on this journey together, and I’ll show you how to turn your outdoor space into a lush, thriving edible garden that brings you joy and nourishment for years to come.
Table of Contents
Guide Overview: What You'll Need
Total Time: 4 hours 30 minutes
Estimated Cost: $100 – $200
Difficulty Level: Intermediate
Tools Required
- Shovel (for digging and soil preparation)
- Rake (for leveling and smoothing soil)
- Gardening gloves (for protection while handling plants)
- Measuring tape (for measuring garden beds)
- Watering can or hose (for watering plants)
Supplies & Materials
- Topsoil (for filling garden beds)
- Compost (for enriching soil)
- Seeds or seedlings (for chosen edible plants)
- Fencing materials (for protecting garden from pests)
- Irrigation system (for efficient watering)
- 2-in x 6-in lumber (for building raised garden beds)
- Wood screws (for assembling raised garden beds)
- Soil test kit (for checking soil pH and nutrient levels)
Step-by-Step Instructions
- 1. First, let’s start by selecting the perfect location for our edible garden. This spot should receive at least six hours of direct sunlight a day and be close to a water source. As I always say, a good garden starts with a good foundation, and in this case, that means choosing a location that will allow our plants to thrive. I remember when I was a kid, my parents would always say that the key to a successful garden is finding the right spot, and I’ve found that to be true time and time again.
- 2. Next, we need to prepare the soil for our edible garden. This involves testing the pH level of the soil and adjusting it if necessary. Most vegetables and fruits prefer a slightly acidic to neutral soil pH, ranging from 6.0 to 7.0. I like to use my trusty soil tester, which I’ve named “Bertha,” to get an accurate reading. Once we have our soil pH adjusted, we can add organic matter like compost or well-rotted manure to give our plants a nutrient-rich environment to grow in.
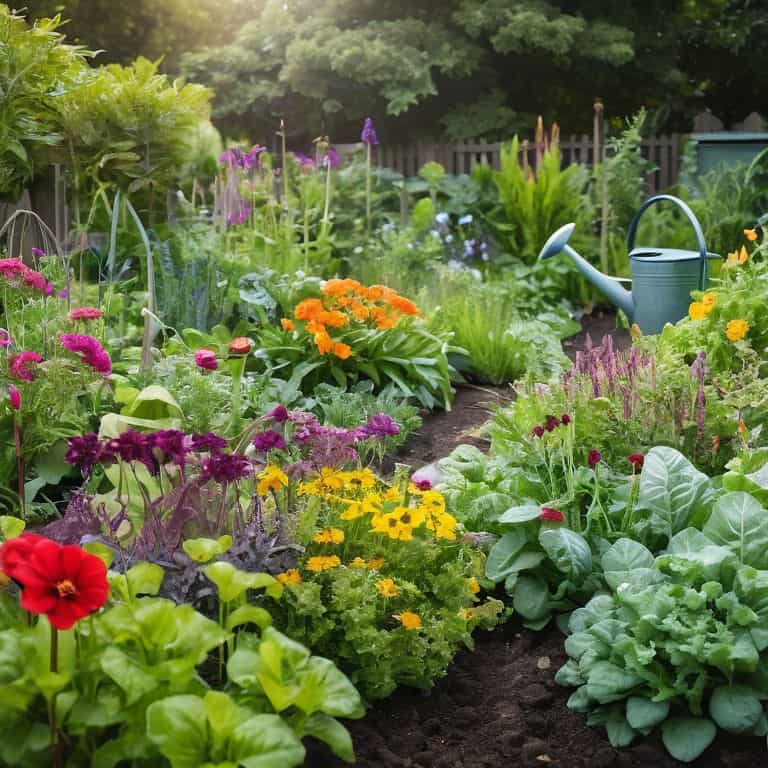
- 3. Now it’s time to choose the right plants for our edible garden. This will depend on the time of year, our climate, and the amount of space we have available. I like to start with a mix of easy-to-grow plants like tomatoes, cucumbers, and lettuce. My favorite gardening tool, a pair of pruning shears I’ve named “Snippy,” always comes in handy when it’s time to prune and train our plants. Remember to select varieties that are disease-resistant and suitable for our specific region.
- 4. With our plants chosen, it’s time to create a garden layout. This involves mapping out where each plant will go and how they will be spaced. A good rule of thumb is to plant taller plants towards the north so they don’t shade out smaller plants. I like to use a piece of graph paper and a pencil to sketch out my design, taking into account the mature size of each plant and leaving enough space for proper air circulation. My garden hose, which I’ve named “Hydro,” is always ready to provide our plants with the right amount of water.
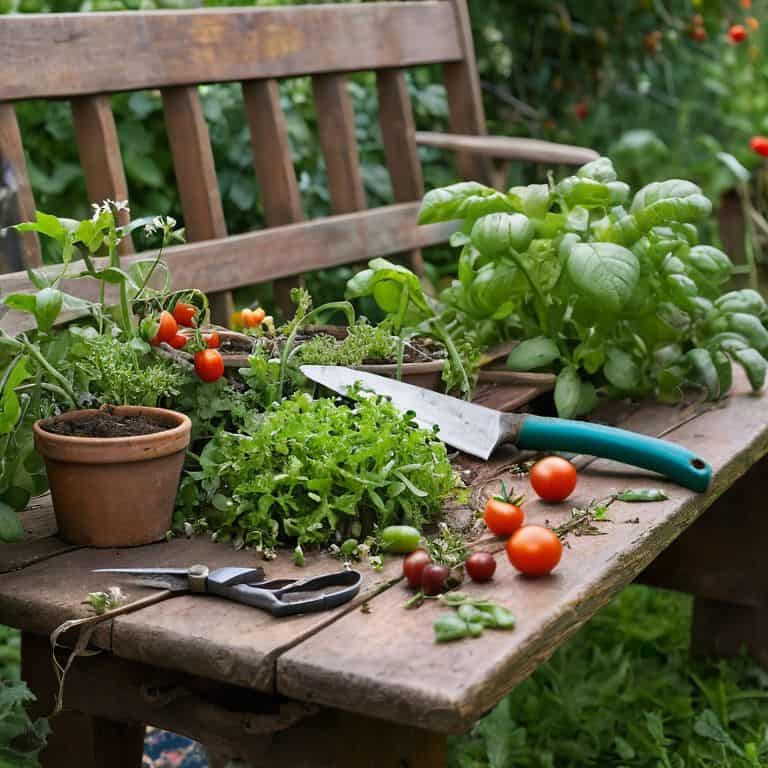
- 5. Once we have our layout, it’s time to start planting. This involves digging holes for our plants, adding a handful of compost or fertilizer, and gently placing the plant in the hole. I like to use my trowel, which I’ve named “Terry,” to scoop out the soil and make a comfortable home for our plants. Remember to water our plants well after planting and keep the soil consistently moist during the first few weeks.
- 6. As our plants begin to grow, it’s essential to provide support where needed. This can include installing trellises for climbing plants like peas or cucumbers, or using tomato cages to keep our indeterminate tomatoes upright. I like to use a combination of bamboo stakes and twine to create a sturdy support system for our plants. My favorite gardening glove, which I’ve named “Gracie,” always comes in handy when working with thorny or prickly plants.
- 7. Finally, let’s not forget to maintain our edible garden. This involves keeping the soil consistently moist, providing regular fertilization, and keeping an eye out for pests and diseases. I like to use a mixture of organic fertilizers like fish emulsion and compost tea to give our plants a boost. My watering can, which I’ve named “Wally,” is always ready to provide our plants with the right amount of water. By following these steps and staying committed to our garden’s care, we can enjoy a bountiful harvest and the many benefits that come with growing our own food.
Edible Garden Bliss
As I tend to my own small space edible gardening haven, I’m reminded of the joys of watching life burst forth from even the tiniest of plots. There’s something truly special about _nurturing_ a miniature ecosystem, where every sprout and leaf counts. My trusty garden tools, like Bertha the trowel and Sammy the pruner, seem to come alive in these intimate spaces, helping me coax forth a bounty of flavors and textures.
In designing these compact oases, I often turn to edible garden design ideas that prioritize _vertical growth_, making the most of every inch. This not only maximizes yields but also adds a touch of whimsy to the landscape. I’ve found that incorporating _companion planting_ techniques can work wonders, as certain combinations of vegetables and herbs seem to _dance_ together in perfect harmony. My favorite garden tool, a gentle sprayer named Lily, helps me keep these delicate relationships thriving.
As I explore the world of growing microgreens at home, I’m struck by the _diversity_ of flavors and colors that can be coaxed from even the smallest of seeds. Whether you’re cultivating a _vertical edible garden system_ or simply starting with a few pots on a sunny windowsill, the rewards of nurturing your own edible haven are well worth the effort. With a little patience and practice, you’ll be savoring the _fruits of your labor_ in no time, and perhaps even discovering new favorites among the _edible flower garden plans_ that bring a pop of color and delight to your table.
Small Space Edible Gardening
As I tend to my own edible garden, I’m reminded that even the smallest of spaces can be transformed into a lush oasis. I recall a particularly challenging project where I had to create a thriving garden on a tiny balcony. With a little creativity, we managed to pack in a variety of herbs and vegetables, all thriving in their designated spots. My trusty garden tool, “Diggy” the trowel, was instrumental in helping me plant each seedling with precision.
In small spaces, every inch counts, and that’s where the art of layering comes in. I like to think of it as creating a bonsai landscape, but instead of trees, we’re working with edible delights. By stacking planters, using trellises, and selecting compact varieties, even the most modest of areas can become a productive edible garden. My garden tool, “Sprouty” the watering can, always seems to bring out the best in my plants, and I’m sure yours will too with a little love and care.
Vertical Microgreens Delight
As I tenderly water my vertical microgreens, I’m reminded of the hiking trails I’ve wandered, where lush greenery clings to rocky faces. My trusty watering can, Bertha, seems to sense my fascination, pouring out just the right amount of nourishment. In small spaces, these compact gardens thrive, yielding a burst of peppery flavor and vibrant color. I’ve found that microgreens like kale and arugula adore the gentle trickle from Bertha, growing strong and resilient in their vertical haven.
In the stillness of morning, as dew clings to the leaves, I’ll often whisper words of encouragement to my microgreens, and to Winston, my faithful pruning shears. It’s a serene moment, one that never fails to fill me with a sense of wonder at the magic of edible gardening, even in the most unlikely of spaces.
Nurturing Your Edible Oasis: 5 Essential Tips
- Listen to the whispers of your soil: understanding its unique composition and adjusting your care accordingly is key to a thriving edible garden
- Water with love: my trusty watering can, Bertha, and I believe in gentle, consistent hydration to bring out the best flavors in your homegrown produce
- Companion planting is an art: pair your vegetables, fruits, and herbs in a way that fosters mutual growth and creates a resilient ecosystem, just like the interconnected trails I’ve hiked and drawn inspiration from
- Prune with precision and patience: my pruning shears, Sammy, and I take our time to carefully shape and guide the growth of our edible treasures, encouraging bushy growth and maximum yield
- Cultivate mindfulness in your garden: take a moment each day to breathe in the scents, feel the sun’s warmth, and connect with the natural world – it’s a ritual that will deepen your love for your edible garden and all its wonders
Nurturing Your Edible Oasis: 3 Key Takeaways
I’ve found that the simplest moments, like watching a sprout burst forth from the earth, can be the most profound reminders of the beauty in cultivating our own edible gardens
By embracing the art of small space edible gardening and experimenting with innovative techniques like vertical microgreens, we can transform even the most unlikely areas into thriving havens of freshness and flavor
As I sit amidst my own bonsai landscape, surrounded by the gentle rustle of leaves and the vibrant songs of birds, I’m reminded that the true magic of edible gardening lies not just in the harvest, but in the journey itself – the journey of nurturing, of growth, and of connection with the natural world
Sowing Wisdom
An edible garden is not just a plot of land, but a canvas of connection – where every seed sown, every sprout nurtured, and every harvest shared weaves a tapestry of community, wellness, and peace.
Dylan Thompson
Harvesting the Fruits of Your Labor
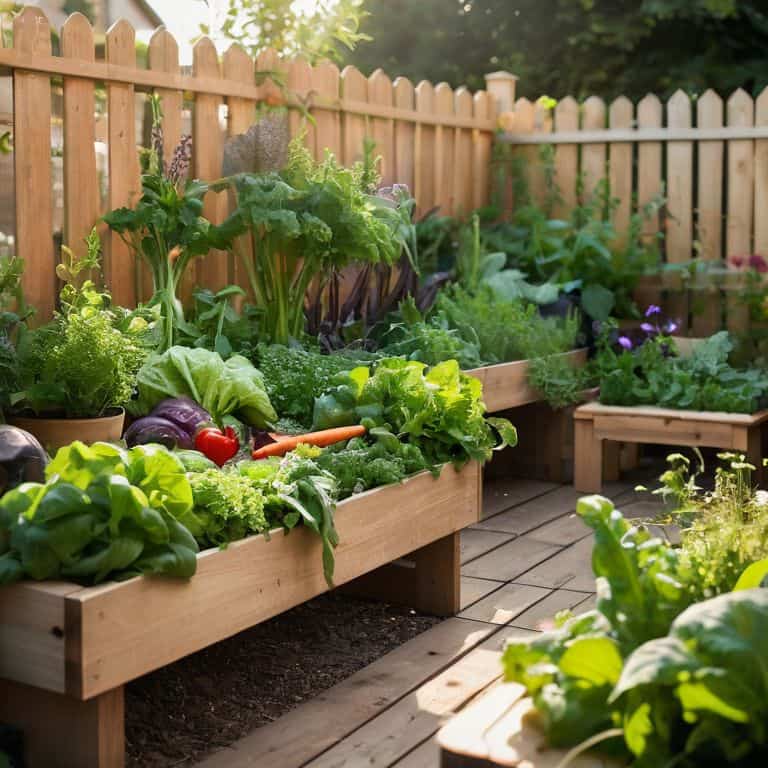
As we conclude our journey through the world of edible gardens, let’s take a moment to reflect on the key elements that make these spaces truly special. From the initial planning stages to the final harvest, it’s essential to remember that creating an edible garden is a personal and iterative process. We’ve explored the importance of choosing the right plants, making the most of small spaces with techniques like vertical microgreens, and cultivating a sense of community and connection through shared gardening experiences. By embracing these principles, you’ll be well on your way to creating a thriving edible oasis that brings joy, serenity, and fresh, delicious produce to your life.
As you tend to your edible garden, remember that the true magic lies not just in the flavors and textures of your homegrown produce, but in the sense of accomplishment and connection to nature that comes with nurturing your own little slice of heaven. So, take a deep breath, get your hands dirty, and let the rhythm of the garden guide you towards a more peaceful, more sustainable, and more delicious way of living. With every seed you sow and every harvest you reap, you’ll be cultivating a deeper appreciation for the natural world and your place within it.
Frequently Asked Questions
What are some beginner-friendly edible plants to start with in my garden?
For a beginner, I recommend starting with leafy greens like lettuce and kale, or cherry tomatoes – they’re as easy to grow as they are delicious. My trusty trowel, Bertha, always seems to whisper words of encouragement as I plant these tender shoots, and with a little love, they’ll thrive in no time.
How can I ensure my edible garden remains pest- and disease-free without using harsh chemicals?
To keep my edible garden thriving without harsh chemicals, I rely on my trusty sidekicks – a diverse array of plants, like marigolds and basil, that naturally repel pests. I also make sure to give my plants plenty of love, pruning them regularly with my faithful clippers, Bertha, and keeping the soil healthy with compost, all while keeping a watchful eye out for any signs of disease.
What are some creative ways to incorporate edible gardens into small or unusual outdoor spaces, such as balconies or rooftops?
For balconies or rooftops, I love using trellises or wall-mounted planters to train vining edibles like peas or cucumbers to thrive in tight spaces – my trusty pruner, Bertha, always helps me shape them to perfection.