


10 Easy Diy Wall Art Projects for Kids
 September 28, 2025

I still remember the thrill of creating my first DIY masterpiece as a kid – and now, I’m excited to share some fun and easy DIY wall art for kids ideas that your little ones can make and cherish! There’s a common myth that making art with kids has to be a messy, stressful experience, but I’m here to tell you that it’s quite the opposite. With the right guidance and a little creativity, you can unleash your child’s inner artist and create something truly special. I’ve seen it time and time again in my own life, from helping my parents in their workshop to now sharing my own DIY projects with the world.
In this article, I’ll be sharing my top tips and tricks for creating amazing DIY wall art for kids that will make your little ones beam with pride. You can expect to learn how to transform blank walls into masterpieces using everyday materials and simple techniques. From painting to decoupage, I’ll cover it all in a way that’s easy to follow and fun to implement. My goal is to inspire you to get creative with your kids and make something truly unique and special. So, let’s get started and turn those blank walls into a gallery of childhood memories!
Table of Contents
Guide Overview: What You'll Need
Total Time: 1 hour 15 minutes
Estimated Cost: $15 – $30
Difficulty Level: Easy
Tools Required
- Scissors (sharp and dedicated to cutting paper)
- Glue Stick (washable)
- Paintbrushes (various sizes)
- Pencil (for marking walls)
- Level (for ensuring straight lines)
- Ruler (for measuring and drawing straight edges)
Supplies & Materials
- Construction Paper (various colors)
- Cardstock (for heavier art pieces)
- Markers or Crayons (washable)
- Paint (watercolor or tempera)
- Canvas or Poster Board (for more durable art pieces)
- Frames or Hanging Kits (for displaying finished art)
Step-by-Step Instructions
- 1. First, let’s start by gathering our materials, which I like to call my DIY dream team. This includes my trusty sidekicks, a pencil named Pete, a ruler named Romy, and a pair of scissors named Sammy. We’ll also need some cardboard, paint, glue, and any other decorative items we want to add to our masterpiece.
- 2. Next, we need to decide on a theme for our wall art. This could be anything from a favorite cartoon character to a _magical forest_. Let your little ones’ imagination run wild and see what they come up with. I always say, the crazier the idea, the more creative freedom we have to work with.
- 3. Now it’s time to get started on our design. Using Pete the pencil, lightly sketch out the main elements of our theme onto the cardboard. Don’t worry too much about perfection at this stage – we can always make adjustments later. My DIY team and I like to call this stage the “_rough draft_,” where we get to see our ideas start to take shape.
- 4. With our design sketched out, it’s time to add some color to our project. We can use paint, markers, or even colored pencils to bring our wall art to life. I like to let my little helpers take the lead on this step, as it’s a great way to encourage their self-expression and creativity.
- 5. Once our paint or markers are dry, we can start adding any additional decorative elements to our design. This could be anything from glitter to stickers, or even some natural materials like leaves or twigs. My DIY team and I love this stage, as it’s where we get to see our project really start to _come together_.
- 6. Now it’s time to add a coat of varnish to protect our wall art and make it last longer. This is an important step, as it will help our masterpiece withstand the test of time. I like to use a water-based varnish, as it’s easy to apply and dries quickly. My trusty sidekick, Romy the ruler, helps me make sure the varnish is applied evenly.
- 7. Finally, it’s time to hang our wall art and admire our handiwork. We can use a sturdy piece of string or a picture frame to hang our masterpiece, depending on the size and weight of our project. I always feel a sense of pride and accomplishment when I see our finished wall art hanging on the wall, knowing that we created something truly unique and special together.
Diy Wall Art for Kids
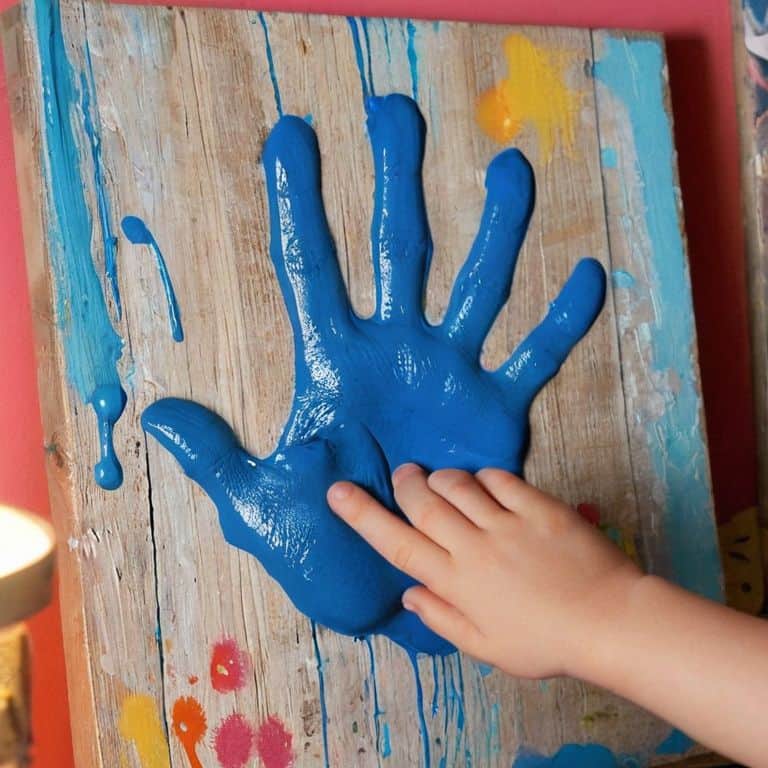
As I reflect on my own childhood, I realize that handprint art projects were some of my favorites. There’s something special about capturing a moment in time through a tiny hand or footprint. When it comes to decorating your little one’s room, consider incorporating kids room decor ideas that make use of recycled materials. Not only is it eco-friendly, but it also teaches children the value of creativity and resourcefulness.
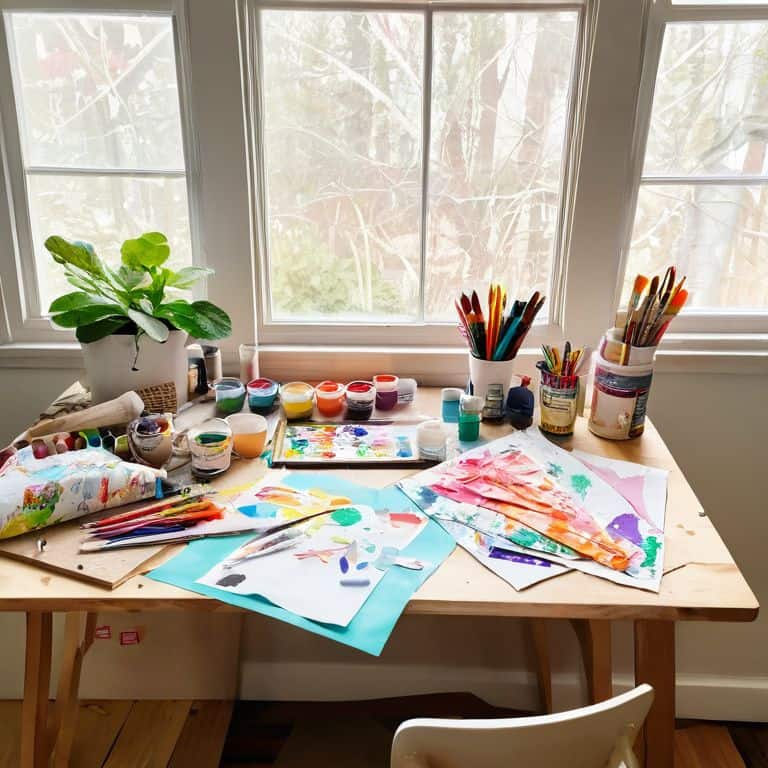
When working on easy canvas painting for kids, it’s essential to have the right kid friendly art supplies. I always make sure to have a variety of washable paints, colorful markers, and sturdy brushes on hand. This way, my mini-Picassos can express themselves freely without worrying about making a mess. For a unique touch, try using recycled materials like old CDs, fabric scraps, or newspaper clippings to add texture and depth to your artwork.
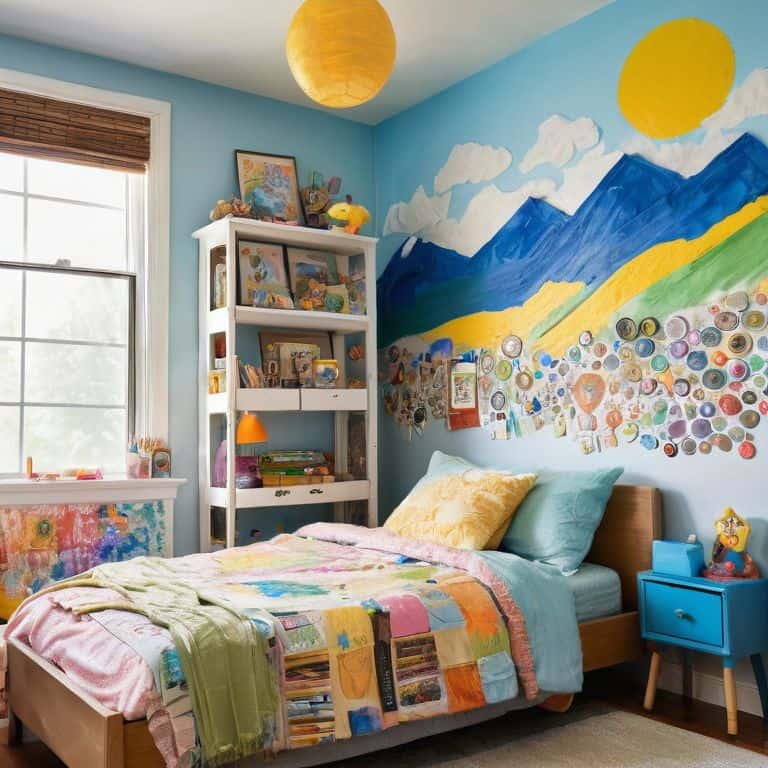
To take your child’s room to the next level, consider creating a wall mural ideas for nursery that reflects their personality. You can use a combination of paint, stickers, and decals to bring your design to life. Remember to involve your child in the process, and let them take the lead on designing their own space. This will not only make the experience more enjoyable but also give them a sense of ownership and pride in their creations.
Handprint Art Projects Unleashed
I just love handprint art projects – they’re a great way to capture your little ones’ tiny prints and create something truly special. My trusty sidekick, a paint-splattered pal I call “Brushy,” always gets a workout when we’re making handprint art. From adorable animals to sweet sentiments, the possibilities are endless. I’ve found that using a mix of paint and markers can add some really cool textures and details to your designs.
With a few simple supplies, you can unleash your child’s creativity and make some amazing handprint art to display proudly in your home. I like to think of it as a fun way to freeze time and remember those tiny hands and feet when they were small. My DIY team, including “Stampy” the stamp maker, always helps me come up with new and exciting ideas to try with my readers.
Recycled Material Crafts Shine
I love seeing the spark in kids’ eyes when they create something amazing from discarded materials. My trusty tool, “Sandy the Sandpaper,” always comes in handy for smoothing out rough edges. For this project, gather your mini-me’s and collect various recycled materials like old CDs, cardboard tubes, and fabric scraps. Let their imagination run wild as they transform these items into unique pieces of art. With a little glue, scissors, and creativity, they can turn a plain wall into a vibrant gallery showcasing their masterpieces.
Unleashing Creativity: 5 Essential Tips for DIY Wall Art with Kids
- Let Their Imagination Run Wild: Encourage your little ones to think outside the box and come up with their own unique ideas for DIY wall art
- Get Creative with Materials: From recycled paper and cardboard to natural elements like leaves and twigs, experiment with different textures and materials to add depth and visual interest
- Make it a Team Effort: Work alongside your kids to create a collaborative masterpiece, teaching them about color, texture, and composition along the way
- Keep it Simple and Safe: Ensure that the materials and tools you’re using are kid-friendly and non-toxic, and always supervise your little ones during the creative process
- Display Their Masterpieces with Pride: Once your DIY wall art is complete, make sure to hang it proudly in your home, encouraging your kids to take ownership of their creations and celebrate their artistic achievements
Key Takeaways to Unleash Your Mini-Picasso
I’ve learned that with a little creativity, you can transform your kids’ artwork into stunning DIY wall art that’s both personalized and eco-friendly, just like my trusty sidekick, a vintage hammer I’ve named ‘Hammy’
By involving your kids in the DIY process, you’ll not only create beautiful wall art, but also teach them valuable skills like upcycling and the importance of sustainability – my drill, ‘Drilly’, always gets a kick out of helping with this part!
Remember, the most important aspect of DIY wall art for kids is to have fun and encourage their imagination, so don’t be afraid to experiment with different materials and techniques, and always keep my ‘DIY team’ – including ‘Sawdy’ the saw and ‘Painty’ the paintbrush – by your side to help bring your vision to life
Embracing Creativity
There’s something truly special about watching a child’s imagination unfold on a blank wall, and that’s why I believe DIY wall art for kids is more than just a fun activity – it’s a way to nurture their creativity, foster self-expression, and create lifelong memories, one brushstroke at a time.
Ryan Bennett
Unleashing the Inner Artist: A Lasting Legacy
As we’ve explored the world of DIY wall art for kids, it’s clear that these projects offer more than just a fun activity – they provide an opportunity for creative expression and a sense of accomplishment. From handprint art projects to recycled material crafts, each piece is a unique reflection of a child’s imagination and skill. By following these steps and encouraging their creativity, you’ll not only be decorating their room but also fostering a lifelong love for art and self-expression.
So, as you and your little ones embark on this creative journey, remember that the true beauty of DIY wall art lies not just in the end result, but in the process itself. It’s about embracing imperfections, trying new things, and watching your child’s confidence grow with each new creation. With a little patience, imagination, and a lot of fun, you’ll be creating priceless masterpieces that will be cherished for years to come.
Frequently Asked Questions
What are some easy and safe materials for kids to use when creating DIY wall art?
I love seeing kids get creative with DIY wall art. For safe and easy materials, I recommend using washable paints, colorful markers, and recycled items like cardboard, paper towel rolls, or fabric scraps. My trusty sidekick, a scissors named ‘Snippy,’ always helps me prep these materials for little hands to craft with.
How can I help my child come up with their own unique ideas for DIY wall art projects?
I love seeing kids’ creativity shine! To help your little one come up with unique DIY wall art ideas, try asking open-ended questions like “What’s your favorite color?” or “What makes you happy?” Let them explore and gather inspiration from nature, books, or even our DIY team’s projects – my trusty tool, Bertha the brush, always says, “Inspiration is everywhere, you just have to look!
Are there any specific DIY wall art projects that are suitable for younger kids, such as toddlers or preschoolers?
For younger kids, I love projects like finger painting or using oversized stamps made from everyday items like sponges or foam sheets. My trusty tool, ‘Stampy,’ always comes in handy for these fun sessions! These activities are perfect for toddlers and preschoolers, allowing them to express their creativity while creating adorable wall art.