


Building a Diy Playground in Your Backyard: Safety Tips and Creative Ideas
 October 3, 2025
As I stand in my own backyard, surrounded by the vibrant greens of my carefully crafted bonsai landscape, I’m reminded of the countless hours I spent as a child playing in our family’s organic farm. My parents always encouraged us to explore and appreciate the natural world, and I believe that’s where my passion for creating serene outdoor spaces began. When it comes to building a DIY backyard playground, many people think it’s a daunting task that requires a lot of space and money. However, I’m here to tell you that with a little creativity and some practical advice, you can turn your backyard into a thriving playground that your kids will love.
In this article, I’ll share my personal experience and expertise as an ecological garden designer to guide you through the process of creating a DIY backyard playground that’s not only fun but also sustainable and safe. I’ll provide you with honest and practical tips on how to design and build a playground that fits your budget and meets your family’s needs. From choosing the right materials to incorporating natural elements, I’ll cover it all. My goal is to empower you to create a backyard oasis that brings joy and wonder to your children, and becomes a haven for the whole family to connect with nature and each other.
Table of Contents
- Guide Overview: What You'll Need
- Step-by-Step Instructions
- Cultivating Joy Diy Backyard Playground
- Nurturing Adventure: 5 Essential Tips for Your DIY Backyard Playground
- Nurturing Nature: 3 Key Takeaways for Your DIY Backyard Playground
- Sowing Wonder
- Cultivating Wonder: A Lasting Legacy
- Frequently Asked Questions
Guide Overview: What You'll Need
Total Time: 4 hours 30 minutes
Estimated Cost: $500 – $1000
Difficulty Level: Intermediate
Tools Required
- Cordless Drill (with screwdriver and drill bits)
- Impact Wrench (for tightening bolts)
- Tape Measure (for measuring lumber and playground area)
- Square (for ensuring accurate corners)
- Level (for leveling playground equipment)
- Wrench (for tightening and loosening bolts)
- Saw (for cutting lumber to size)
- Sand (for safety surfacing)
Supplies & Materials
- 2-in x 6-in lumber (for building playground frame)
- 2-in x 4-in lumber (for building playground support beams)
- Plywood (for building playground platforms)
- Swing Set Hardware (including chains, seats, and hooks)
- Climbing Wall Holds (for adding climbing wall feature)
- Safety Surfacing Material (such as wood chips or rubber mulch)
- Concrete (for anchoring playground equipment)
- Wood Sealant (for protecting lumber from weathering)
Step-by-Step Instructions
- 1. First, let’s start by assessing our backyard canvas, taking note of the existing landscape, sunlight patterns, and any obstacles that might impact our playground design. As I always say, a successful garden or playground begins with a deep understanding of the land itself, much like how I approach my bonsai landscapes, carefully selecting each branch and stone to harmonize with nature.
- 2. Next, we’ll brainstorm a whimsical theme for our playground, perhaps inspired by a favorite childhood story or the natural surroundings. I find that talking to my trusty garden tools, like my pruning shears, Bertha, helps stimulate my creativity. For a DIY backyard playground, consider themes that encourage exploration and imagination, such as a miniature forest, a pirate’s cove, or a fairy garden, where children can engage with nature’s wonders.
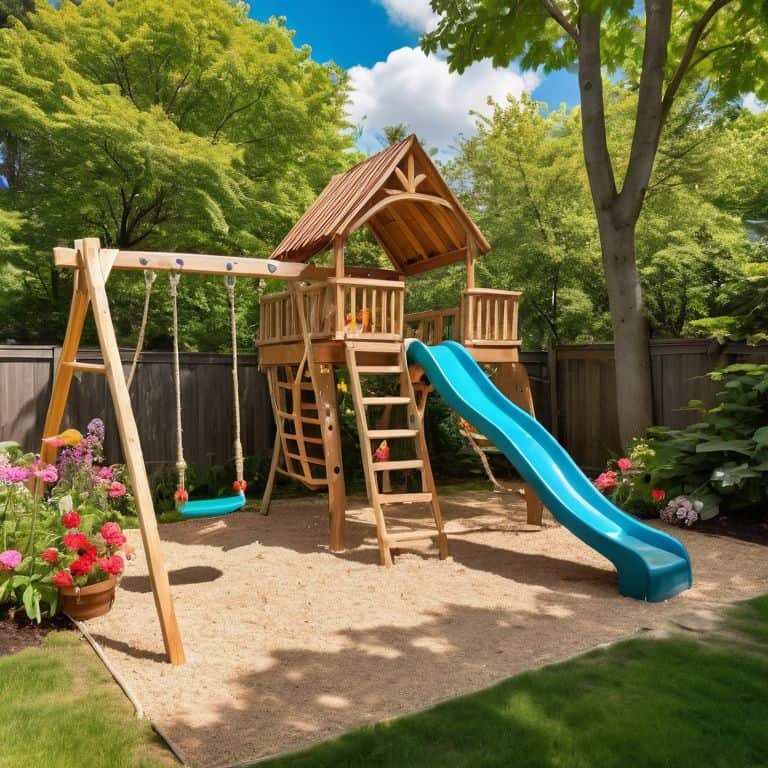
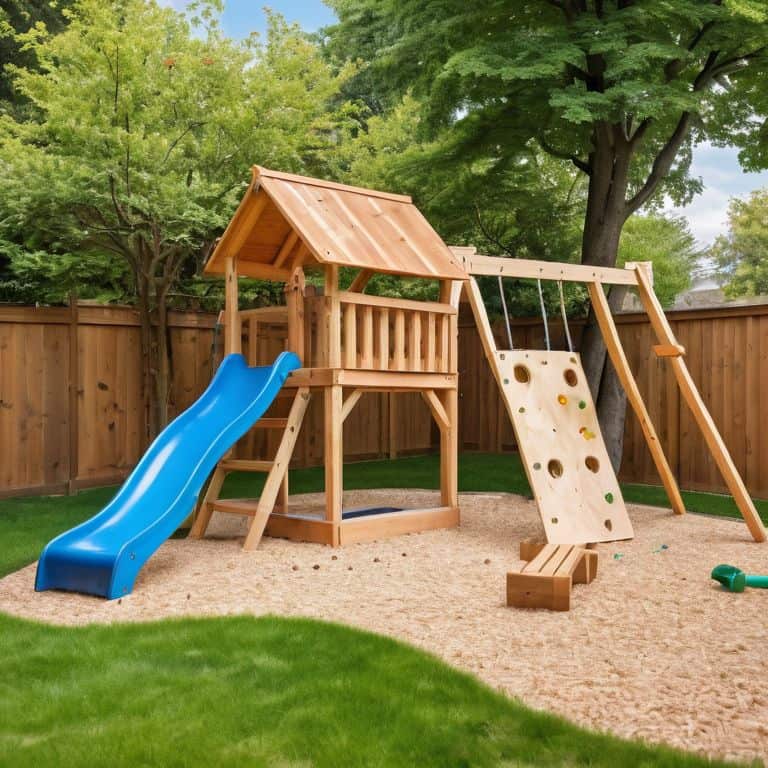
- 3. With our theme in mind, it’s time to choose the perfect playground equipment. This could include a treehouse, a sandbox, a swing set, or a climbing wall, depending on the age and interests of the children. Remember, the goal is to create a space that fosters physical activity and creative play, while also ensuring safety and durability. My shovel, Sammy, always reminds me to consider the long-term benefits of our choices.
- 4. Now, let’s prepare the site by clearing any debris, leveling the ground, and marking out the areas for each playground feature. This step is crucial for creating a smooth and even surface, essential for safety and accessibility. As I work, I often think about the rolling hills of my childhood farm, where my parents taught me the importance of soil conservation and proper land preparation.
- 5. Once the site is ready, we can begin constructing our playground features. For a treehouse, this might involve building the platform, framing the structure, and adding roofing and siding. Don’t forget to involve the kids in the process, teaching them about sustainable building practices and the value of recycling materials. My shovels, rakes, and trowels – all named and well-loved – are always up for the task, and I encourage you to give your tools names too, as it makes the work more enjoyable and personal.
- 6. After the main structures are built, it’s time to add the finishing touches, such as installing swings, slides, and climbing bars, and incorporating natural elements like plants, rocks, and water features. Consider using recycled materials for mulch or decorative elements, promoting eco-friendly practices in your DIY project. This is where the real magic happens, and our backyard playground begins to feel like an enchanting oasis.
- 7. Finally, let’s bring our playground to life with vibrant colors and textures, adding a splash of paint here, a sprinkle of fairy dust there (or perhaps just some glittering sand), and lots of greenery. The final step is to stand back, admire our handiwork, and watch as children’s faces light up with joy and wonder. As I sit amidst my bonsai creations, surrounded by the serenity of nature, I’m reminded that the true beauty of a DIY project lies not just in its completion, but in the journey itself, and the memories we create along the way.
Cultivating Joy Diy Backyard Playground
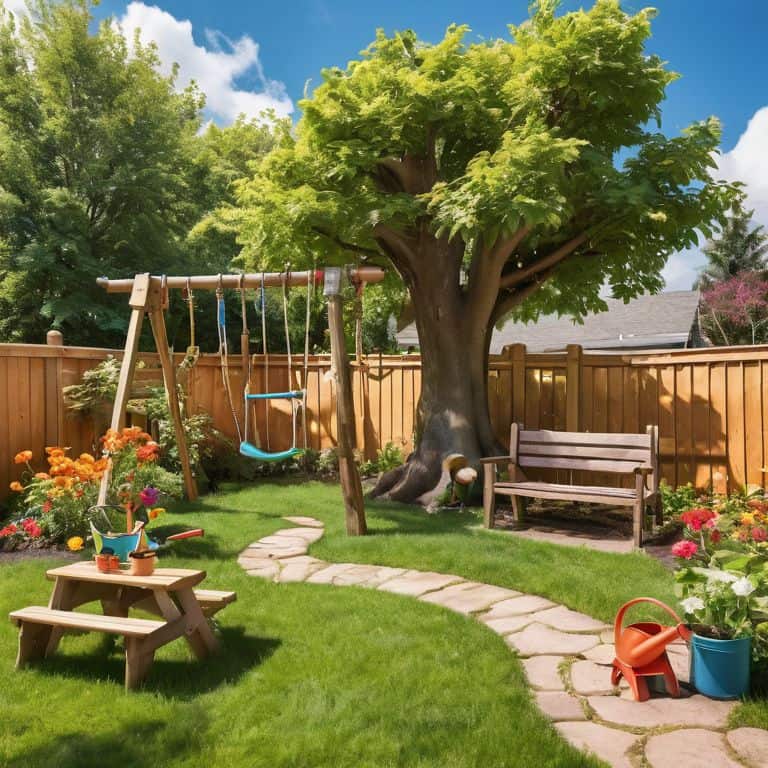
As I tend to my own garden, I often think about how backyard playground ideas on a budget can bring joy to families. With a little creativity, you can create a whimsical space that sparks imagination and wonder. I recall the countless hours I spent as a child, exploring the rolling hills and forests surrounding our organic farm, and how those experiences shaped my love for nature and design. When crafting your own playground oasis, consider incorporating natural playground equipment, such as logs, rocks, and plants, to blur the lines between play and exploration.
When designing your playground, don’t forget to prioritize outdoor playground safety tips. A well-planned space can help prevent accidents and ensure a fun experience for all. I always advise my clients to consider playground surfacing options that are soft and forgiving, such as wood chips or rubber mulch, to provide a safe landing in case of falls. As I work in my garden, I often chat with my trusty tools, like my pruning shears, Bertha, and my shovel, Sammy, about the importance of creating a safe and nurturing environment.
As you bring your backyard playground to life, remember to have fun and be creative! Consider adding a backyard obstacle course that encourages kids to climb, crawl, and explore. With a little imagination, you can transform your yard into a vibrant play space that fosters connection with nature and inspires a sense of adventure. As I gaze out at my own bonsai landscape, I’m reminded of the beauty that can be created with a little patience and dedication.
Navigating Nature Outdoor Safety Tips
As I tenderly prune the branches of my bonsai trees with my trusty shears, Bertha, I’m reminded of the importance of safety in our DIY backyard playgrounds. Just as a well-placed rock can guide water through my miniature landscapes, clear guidelines can help navigate potential hazards. Soft landing surfaces, like wood chips or mulch, can cushion falls, while careful placement of play equipment can prevent collisions. I recall my childhood on the organic farm, where my parents taught me to respect the power of nature and take necessary precautions.
When designing your playground, consider the unique characteristics of your yard, just as I consider the unique needs of each plant in my bonsai garden. With a little creativity and foresight, we can create a safe and enchanting outdoor space where our children can thrive, surrounded by the beauty of nature. My trowel, Terra, and I are always happy to help you get started on this journey.
Sowing Seeds of Wonder Budget Friendly Ideas
As I carefully prune my bonsai trees, I ponder the magic of creating wonder on a budget. My trusty shears, Bertha, and I work in harmony to craft a whimsical playground oasis. Repurposed materials like old pallets and wooden crates can become a fantastical fort or a nature-inspired maze. I recall my childhood days on the farm, where imagination knew no bounds, and the great outdoors was our playground. With a little creativity, you can transform your backyard into a thriving wonderland without breaking the bank.
By embracing the art of reuse and recycle, you’ll not only save money but also teach your little ones valuable lessons about sustainability and resourcefulness. My gardening gloves, Gus, and I have worked with families to create enchanting spaces using natural elements like leaves, twigs, and rocks. These budget-friendly ideas will help you sow seeds of wonder, nurturing a deeper connection between your children and the natural world.
Nurturing Adventure: 5 Essential Tips for Your DIY Backyard Playground
- Embrace the Art of Repurposing: Transform old pallets, logs, and natural elements into unique playground features that inspire creativity and reduce waste
- Listen to the Landscape: Observe the natural contours and lighting of your yard to create a seamless integration of play areas with the surrounding environment
- Weave a Tapestry of Textures: Incorporate a variety of materials such as wood, stone, and plants to create a sensory-rich experience that invites exploration and discovery
- Invite the Senses to Play: Incorporate elements that stimulate the senses, like wind chimes, water features, or a sensory garden, to create a holistic play experience
- Cultivate Community: Design your DIY backyard playground with flexibility and inclusivity in mind, ensuring that it remains a vibrant hub of activity and connection for years to come
Nurturing Nature: 3 Key Takeaways for Your DIY Backyard Playground
Embrace the beauty of imperfection and let your backyard playground be a reflection of your family’s unique personality, where every DIY element tells a story of love and laughter
By incorporating native plants and repurposed materials, you can create a harmonious balance between nature and nurture, fostering a sense of wonder and curiosity in your little ones
As you tend to your backyard oasis, remember that the true magic lies not in the end result, but in the journey itself – the countless moments of joy, the lessons learned, and the memories forged amidst the dirt, sweat, and tears of creation, with my trusty garden tools, Bertha the trowel and Sammy the pruner, by your side
Sowing Wonder
As we craft our DIY backyard playgrounds, let us not forget that we are not just building spaces for play, but nurturing sanctuaries where childhood wonder and the beauty of nature entwine, forever changing the landscape of our children’s imaginations.
Dylan Thompson
Cultivating Wonder: A Lasting Legacy
As we conclude our journey to create a whimsical playground oasis, let’s reflect on the key elements that bring this vision to life. From the initial planning stages to the final touches, we’ve explored the importance of budget-friendly ideas and outdoor safety tips to ensure a space that’s both enchanting and secure. By embracing the process and getting our hands dirty, we’ve not only crafted a unique playground but also nurtured a sense of community and connection with nature. As we look back on our accomplishments, it’s clear that the true magic lies not just in the end result, but in the journey itself, where every moment of creation is an opportunity to grow and learn.
As you step back to admire your handiwork, remember that your DIY backyard playground is more than just a physical space – it’s a sanctuary of wonder, where children can explore, imagine, and thrive. It’s a testament to the power of human creativity and the impact we can have on the lives of those around us. So let’s cherish these moments, tend to our creations with love, and watch as they flourish into vibrant hubs of joy and connection, inspiring a new generation to appreciate the beauty of nature and the simple pleasures in life.
Frequently Asked Questions
What are some creative ways to repurpose old materials for a DIY backyard playground?
As I prune my bonsai with trusty ‘Snippy’ scissors, I ponder creative reuse. Consider repurposing old pallets as climbing walls, or transforming wooden crates into cozy reading nooks, like the one I built with ‘Hammerin’ Hank’ in my own backyard oasis.
How can I ensure the playground is safe and accessible for children of different ages and abilities?
To ensure the playground is safe and accessible for all, I consider the diverse needs of children with varying ages and abilities. My trusty companion, a well-worn tape measure named Terra, helps me assess the space. I incorporate features like wheelchair-accessible pathways, sensory-friendly zones, and age-specific play areas, all while maintaining a watchful eye on potential hazards, just as I do when pruning my bonsai trees with my shears, Luna.
What are some tips for incorporating educational elements, such as gardens or nature-based activities, into the DIY backyard playground design?
As I tenderly prune my bonsai trees with my trusty shears, Bertha, I ponder the wonders of weaving education into our DIY backyard playgrounds. Let’s incorporate sensory gardens, perhaps a mini-ecosystem or two, and nature-based activities that foster curiosity and exploration, allowing our little ones to flourish amidst the beauty of the great outdoors.