


Building a Family-friendly Indoor Garden
 November 3, 2025
I still remember the day I turned my tiny apartment’s corner into a lush oasis – it was like a breath of fresh air had swept through the entire space. I’ve always been passionate about DIY projects, and creating a DIY indoor garden is one of the most rewarding experiences I’ve had. There’s a common myth that indoor gardens are only for those with a green thumb or a lot of space, but I’m here to tell you that’s just not true. With a little creativity and the right tools, anyone can bring a touch of nature indoors and create their own DIY indoor garden.
In this article, I’ll share my personal story of how I got started with indoor gardening, and provide you with honest, no-hype advice on how to create your own thriving indoor garden. I’ll walk you through the process of choosing the right plants, selecting the perfect containers, and providing the proper care for your new indoor oasis. My goal is to inspire you to think outside the box and see the potential for beauty in even the smallest of spaces. So, let’s get started on this journey to create a DIY indoor garden that will bring joy and serenity to your life.
Table of Contents
Guide Overview: What You'll Need
Total Time: 2 hours 30 minutes
Estimated Cost: $50 – $100
Difficulty Level: Intermediate
Tools Required
- Trowel for handling soil and plants
- Pruning Shears for trimming plants
- Measuring Tape for measuring spaces
- Level for ensuring shelves are even
- Drill for making holes for drainage
Supplies & Materials
- 6 inches deep Planters for holding plants and soil
- Potting Soil specifically designed for indoor plants
- Indoor Plant Seeds or Seedlings choose your preferred plants
- Shelves or a Bookcase for displaying plants
- Watering Can for watering plants
- Peat Moss for improving soil structure
Step-by-Step Instructions
- 1. First, let’s start by gathering our materials, which will include a few old wooden crates or pallets, some soil, a variety of plants, and my trusty DIY team, including my drill, Bertha, and my saw, Sammy. We’ll also need some nails, a hammer, and a few other basic tools to get the job done.
- 2. Next, we’ll need to disassemble the pallets and clean them up to create the base of our indoor garden. This is where my sandpaper, Sally, comes in handy – she helps me smooth out the rough edges and get the wood ready for its new life. Don’t worry if the pallets are a bit worn or weathered, that’s all part of the rustic charm we’re going for.
- 3. Now it’s time to build the frame of our garden using the pallet wood. I like to use a simple design, with a few crates stacked on top of each other to create a tiered effect. My drill, Bertha, is instrumental in this step, helping me screw the pieces together and create a sturdy base for our plants.
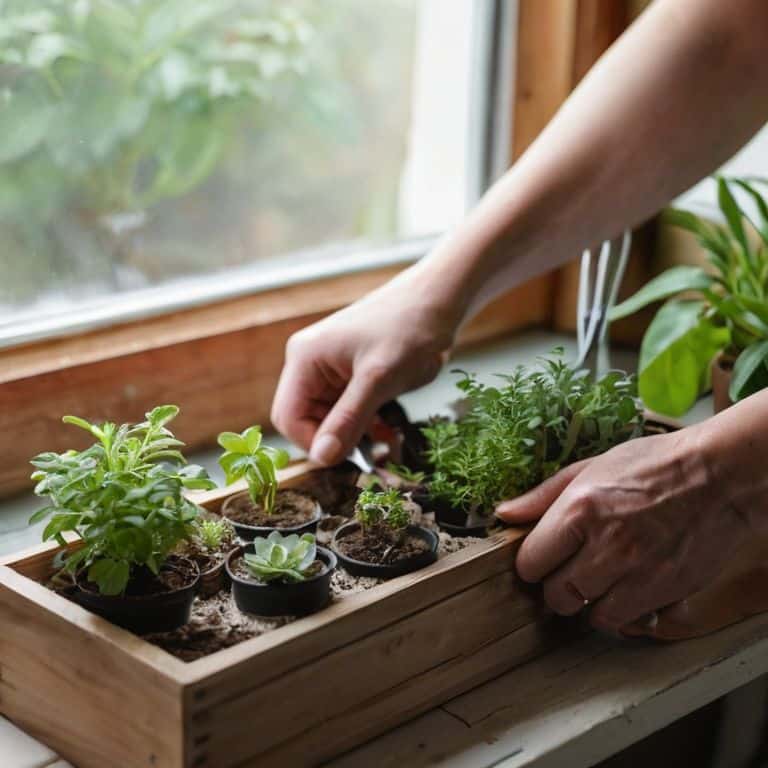
- 4. With the frame in place, we can start adding the soil and plants. I like to use a mix of herbs, succulents, and wildflowers to create a unique and thriving ecosystem. Don’t be afraid to get creative and experiment with different combinations – after all, that’s what DIY is all about. My trowel, Terry, is perfect for scooping and spreading the soil, and my watering can, Wendy, helps me give our new plants a good drink.
- 5. Once our plants are in place, it’s time to add some decorative touches. I like to use old bricks, stones, or pebbles to create a beautiful border around the garden, and maybe even add a few solar-powered lights to give it a warm glow in the evening. My level, Larry, helps me make sure everything is straight and even, and my paintbrush, Paula, is perfect for adding a few coats of varnish to protect the wood.
- 6. Now that our indoor garden is taking shape, it’s time to add some personal touches. Maybe you want to include a few favorite decorative items, like seashells or vintage gardening tools, or perhaps you’d like to create a cozy seating area nearby. My saw, Sammy, is great for cutting a few extra pieces of wood to create a bench or stool, and my drill, Bertha, can help me attach some comfortable cushions.
- 7. Finally, let’s put the finishing touches on our DIY indoor garden. Take a step back and admire your handiwork – you should be proud of yourself for creating something truly unique and beautiful. With a little bit of love and care, your indoor garden will thrive, and you’ll be enjoying fresh herbs and peaceful ambiance in no time. My DIY team and I are thrilled to have been a part of your creative journey, and we can’t wait to see what you come up with next.
Diy Indoor Garden Magic
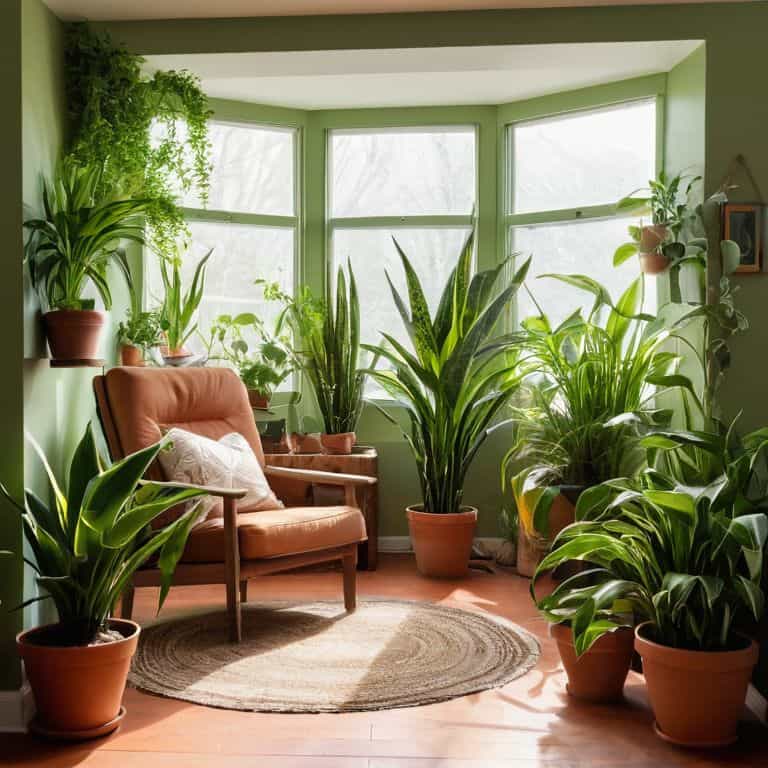
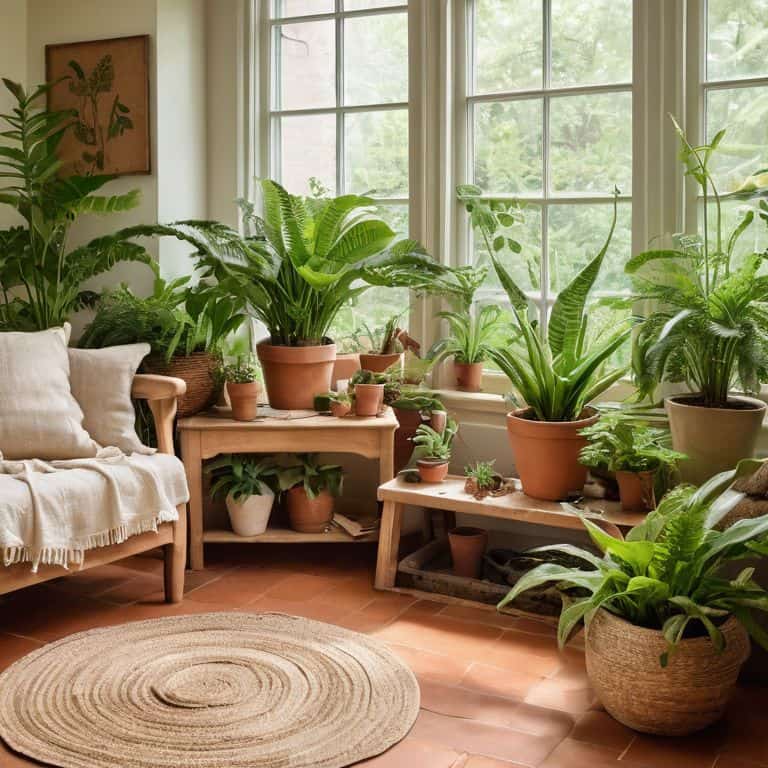
As I delve into the world of indoor gardening, I’m reminded of the importance of choosing low maintenance indoor plants that can thrive in a variety of conditions. This is especially crucial for beginners, as it allows them to build confidence and develop their green thumb. When selecting plants, consider factors like lighting, temperature, and humidity to ensure you’re creating an environment that’s conducive to growth.
In my experience, indoor gardening for beginners can be overwhelming, but it doesn’t have to be. By starting small and focusing on a few key elements, such as best pots for indoor gardens, you can set yourself up for success. I like to use vintage planters that add a touch of rustic charm to my space. My trusty tools, including my drill, Bertha, and my sandpaper, Sandy, help me upcycle these planters and give them a unique character.
When it comes to bringing your indoor garden to life, small space gardening ideas can be a game-changer. Consider using self watering indoor planters or implementing an indoor garden lighting system to maximize growth and minimize maintenance. By incorporating these elements, you’ll be well on your way to creating a thriving oasis that brings joy and serenity to your space.
Low Maintenance Plants for Beginners
When it comes to choosing the perfect plants for your indoor garden, I always recommend starting with low-maintenance options. My personal favorites include succulents and air plants – they’re practically impossible to kill! My trusty sidekick, a pruning shear I’ve lovingly named “Snippy,” always comes in handy when giving them a trim. These plants are perfect for beginners, as they can thrive in a variety of lighting conditions and don’t require constant watering.
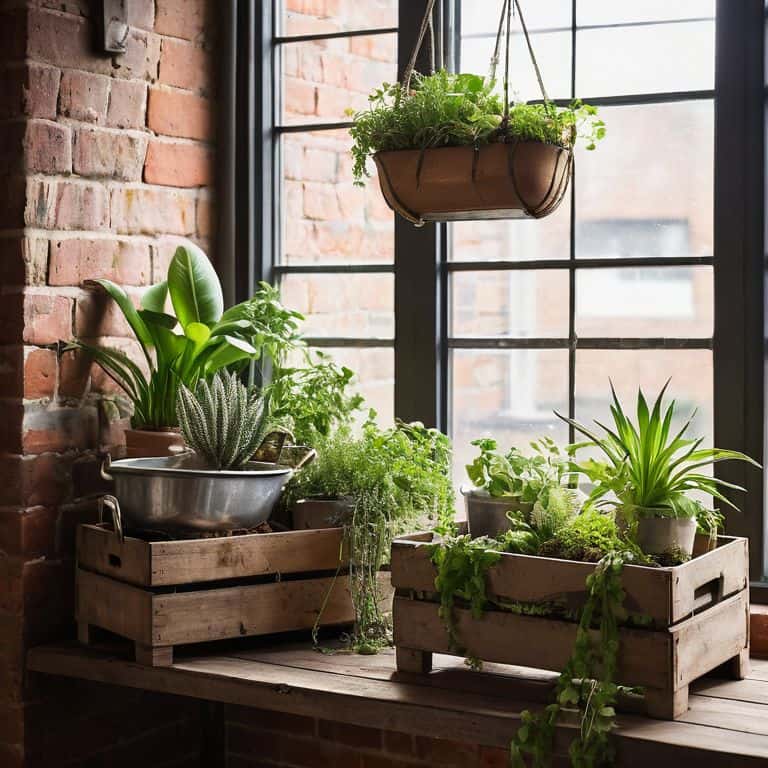
I’ve found that using upcycled planters, like old mason jars or wooden crates, adds a touch of rustic charm to your indoor garden. My drill, “Drilliam,” is always ready to help me create unique planters from discarded materials. With these plants and a little creativity, you’ll be well on your way to creating a lush oasis that’s all your own.
Upcycled Pots for Small Space Charm
I just love giving old, discarded items a new lease on life, and upcycled pots are a perfect example of this. My trusty DIY team, including my drill, Bertha, and my sandpaper, Sandy, help me transform vintage containers into unique planters. From antique teacups to wooden crates, the possibilities are endless. With a little creativity, these one-of-a-kind pots can add a touch of rustic charm to even the smallest of spaces.
By repurposing old items, you can create a truly personalized indoor garden that reflects your style. Plus, it’s a great way to reduce waste and get creative with materials you might otherwise throw away. My favorite upcycled pot to date is an old boot that I turned into a planter for a tiny succulent – it’s the perfect addition to my desk and always sparks conversation.
Sowing Success: 5 Essential Tips for Your DIY Indoor Garden
- Let there be light: Choose the right spot for your indoor garden, considering the amount of natural light it receives and the type of plants that’ll thrive in those conditions
- Get creative with containers: Repurpose old jars, bottles, or wooden planters to add a touch of personality to your space and make your garden truly one-of-a-kind
- Water you waiting for: Develop a watering schedule that works for you and your plants, and don’t be afraid to get a little messy – after all, that’s what my trusty sidekick, ‘Drippy’ the watering can, is for
- Feed your greens: Use organic fertilizers like compost or manure tea to give your plants the nutrients they need to grow strong and healthy – my ‘Green Thumb’ gardening gloves are always ready for the task
- Prune and pamper: Regularly prune your plants to maintain their shape and encourage growth, and don’t forget to show them some love – a little TLC can go a long way in keeping your indoor garden happy and thriving, just like my ‘Pruney’ pruning shears always keep my plants in check
Bringing it All Together: 3 Key Takeaways
Embracing the magic of upcycling allows you to transform any space into a lush oasis, where every piece tells a story of creativity and sustainability
By choosing low-maintenance plants and upcycling old materials into unique pots, you can create a stunning indoor garden that not only purifies the air but also reflects your personal style
With a little imagination and the help of my trusty DIY team – including my favorite tools, Bertha the drill and Sammy the sandpaper – you can turn any corner of your home into a thriving indoor garden, perfect for relaxation and self-expression
Sowing Wisdom
As I always say, a DIY indoor garden is more than just a pretty space – it’s a reflection of our ability to nurture, to transform, and to find beauty in the unexpected, one upcycled pot at a time.
Ryan Bennett
Bringing Your DIY Indoor Garden to Life
As we’ve explored the world of DIY indoor gardens, we’ve covered the essential steps to create your own lush oasis, from choosing the right plants to upcycling old pots for a unique touch. We’ve also delved into the magic of low maintenance plants and the charm of small spaces, discovering how these elements can come together to create a truly one-of-a-kind indoor garden. By embracing the concept of upcycling and getting creative with materials, you can add a personal touch to your space that reflects your style and personality, making your DIY indoor garden a true reflection of your rustic with a modern twist aesthetic.
As you embark on your DIY indoor garden journey, remember that the true beauty lies not just in the end result, but in the process of creation itself. Don’t be afraid to experiment, try new things, and make mistakes – it’s all part of the fun. With every seed you plant and every pot you upcycle, you’re not just bringing life to your space, you’re also cultivating a sense of pride and accomplishment that comes from creating something with your own hands. So go ahead, get your hands dirty, and watch your space transform into a vibrant, thriving oasis that inspires you every day.
Frequently Asked Questions
What are some creative ways to use upcycled materials as planters in a small indoor space?
I just love repurposing old items as planters – it adds such character to a space. I’ve used everything from vintage boots to mason jars and even an old wooden ladder as a trellis. My trusty DIY team, including my drill, Bertha, and sandpaper, Sammy, help me breathe new life into these upcycled gems, perfect for small indoor spaces.
How can I ensure my DIY indoor garden gets enough light if I don't have a lot of natural sunlight?
No worries if natural sunlight is scarce – I’ve got a trick up my sleeve! Meet ‘Lumi,’ my trusty LED grow light. It’s a game-changer for low-light areas. Place it 6-8 inches above your plants, and adjust the spectrum for optimal growth. My DIY team, including ‘Sawyer’ the saw and ‘Drilla’ the drill, helped me install it in my own upcycled planter boxes.
What are some tips for choosing the right plants for a low-maintenance indoor garden that fits my busy lifestyle?
For a low-maintenance indoor garden, I swear by plants like snake plants and spider plants – they’re practically indestructible! My trusty tool, ‘Pruning Pam’, helps me keep them tidy. Choose plants that fit your busy schedule, and don’t forget to consider lighting and watering needs. I share more faves on my blog, from succulents to air plants, to help you bring some green joy into your space!