


Crafting Cozy Diy Throw Pillows Together
 October 20, 2025
I still remember the day I stumbled upon an old, tattered fabric in my parents’ workshop, and my mind started racing with ideas to breathe new life into it. That’s when I discovered my passion for creating unique DIY throw pillows from scratch. The common myth that making DIY throw pillows is a time-consuming and expensive task has always frustrated me. In reality, with the right tools and a bit of creativity, you can create stunning DIY throw pillows that reflect your personal style without breaking the bank. I’ve made it my mission to inspire others to see the potential in discarded items, and that’s why I’m excited to share my guide on creating beautiful DIY throw pillows.
In this article, I’ll walk you through a step-by-step process of transforming old fabrics into stunning pieces of home decor. You’ll learn how to choose the perfect fabric, measure, cut, and sew your DIY throw pillows with ease. My goal is to provide you with honest and practical advice, so you can confidently create your own DIY throw pillows that add a touch of warmth and personality to your living space. Whether you’re a seasoned DIY enthusiast or a beginner, this guide is designed to help you unlock your creativity and make your home decor vision a reality.
Table of Contents
Guide Overview: What You'll Need
Total Time: 1 hour 15 minutes
Estimated Cost: $15 – $30
Difficulty Level: Easy
Tools Required
- Sewing Machine (optional)
- Scissors (sharp)
- Measuring Tape
- Pillow Insert (various sizes)
- Fabric (of your choice, 1 yard or 3 feet by 2 feet)
Supplies & Materials
- Thread (to match your fabric)
- Zipper or Pillow Closure (optional)
- Pillow Forms (various sizes, e.g., 12 inches by 12 inches, 16 inches by 16 inches)
- Fabric Glue (optional)
- Batting or Interfacing (optional, for extra stability)
Step-by-Step Instructions
- 1. First, let’s start by gathering our materials, including old fabrics, a sewing machine, and some basic sewing tools. I like to introduce my trusty sidekicks, like “Stitchy” my sewing machine and “Cutty” my scissors, to help get the job done. We’ll also need some polyester fiberfill for stuffing, and a few other embellishments like buttons or ribbons to give our throw pillows a personal touch.
- 2. Next, we’ll need to _sort and clean_ our fabrics, making sure they’re free of any stains or debris. This is a crucial step, as we want our throw pillows to look their best. I like to use a mixture of old and new fabrics to give my pillows a unique, _eclectic feel_. Once our fabrics are clean and dry, we can start cutting them into the desired shapes and sizes for our pillows.
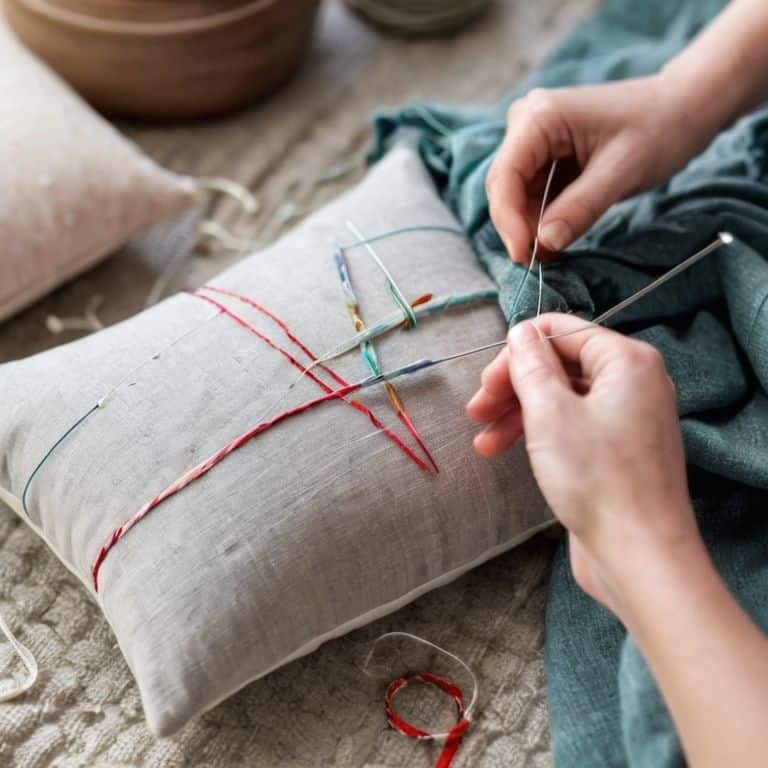
- 3. Now it’s time to start sewing our pillow covers, using a simple running stitch to piece together our fabric fragments. This is where the magic happens, and our old fabrics start to take on new life. I like to use a combination of solid colors and patterns to add some visual interest to my pillows. Don’t worry if your stitches are a little uneven – it’s all part of the charm.
- 4. With our pillow covers sewn, it’s time to add some fluffy filling. I like to use a generous amount of polyester fiberfill to give my pillows a plush, inviting texture. Simply fill your pillow cover with the desired amount of filling, and then sew the opening shut using a _hidden stitch_. This will keep everything secure and prevent any filling from escaping.
- 5. Next, we’ll add any embellishments we like, such as buttons, ribbons, or appliques. This is a great way to add some personality to our pillows and make them truly one-of-a-kind. I like to use a hot glue gun to attach my embellishments, as it provides a strong bond and dries quickly.
- 6. Now it’s time to _add the finishing touches_ to our pillows, such as a few decorative stitches or a sprinkle of fabric paint. This is where we can really let our creativity shine and make our pillows truly special. I like to use a combination of bold colors and subtle patterns to add some visual interest to my pillows.
- 7. Finally, we can _fluff and arrange_ our pillows in our desired setting, whether that’s a cozy reading nook or a stylish living room. I like to mix and match different patterns and textures to create a unique, _eclectic look_ that reflects my personal style. With our DIY throw pillows complete, we can sit back and admire our handiwork, knowing that we’ve created something truly special and one-of-a-kind.
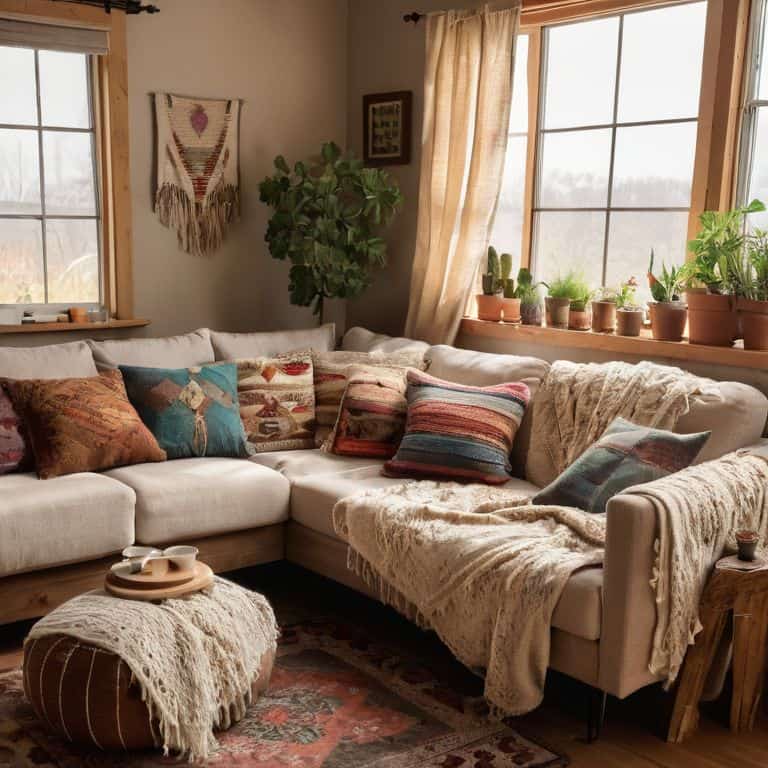
Transforming Spaces With Diy Throw Pillows
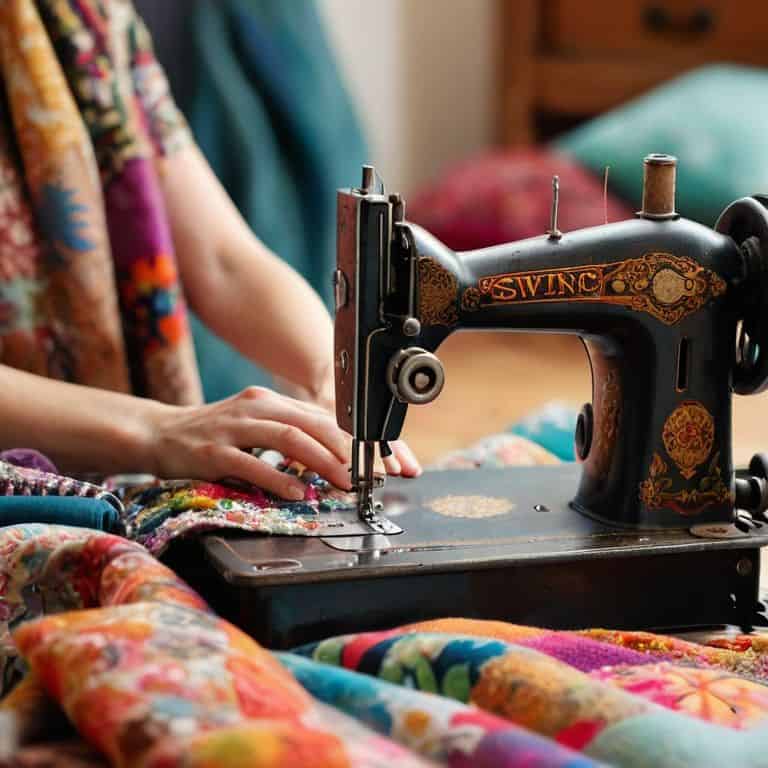
As I always say, the right decorative touches can make or break a room’s ambiance. That’s why I love experimenting with unique fabric combinations to create one-of-a-kind upcycled fabric pillow ideas. By mixing and matching different patterns and textures, you can add a personal touch to your space that reflects your individuality. My trusty sidekick, a vintage sewing machine I’ve named “Bertha,” has helped me bring many of these ideas to life.
When it comes to sewing, I’ve found that easy sewing patterns for beginners are essential for building confidence and skill. Don’t be afraid to start with simple designs and gradually move on to more complex projects. For instance, you can begin with a basic envelope pillow cover and then experiment with more intricate patterns, like ruffles or tufting. Remember, the key to creating beautiful handmade pillows is to have fun and not be too hard on yourself if things don’t turn out perfectly at first.
To take your pillow-making game to the next level, consider exploring decorative pillow filling options like down alternative or buckwheat hulls. These can add a unique feel and texture to your finished pillows. Additionally, don’t forget to think about measuring and sizing for custom pillows to ensure they fit seamlessly into your space. With a little practice and patience, you’ll be well on your way to crafting stunning, handmade pillow gift ideas that will impress friends and family alike.
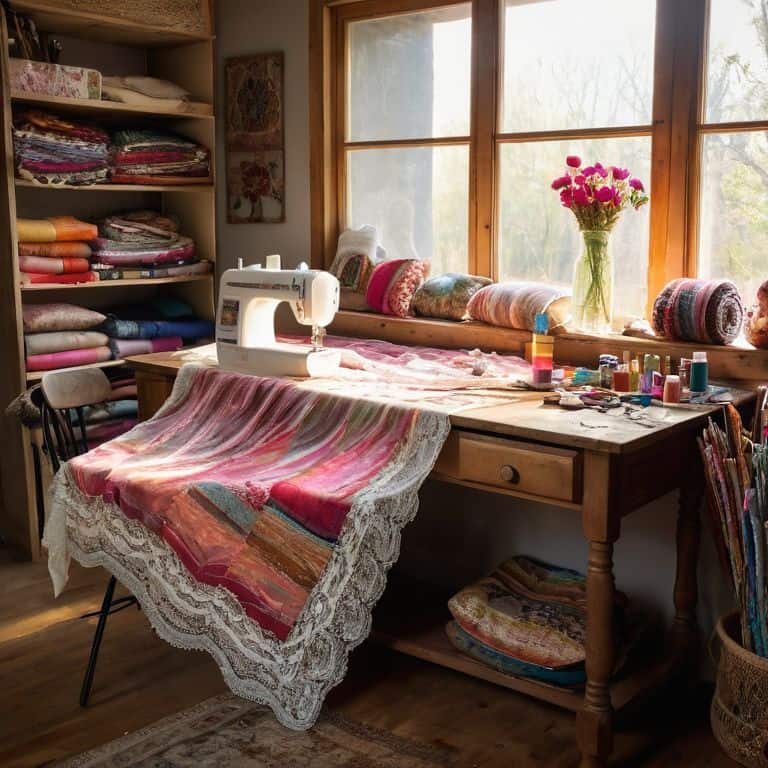
Easy Sewing Patterns for Unique Decor
When it comes to creating unique decor with DIY throw pillows, the sewing pattern can make all the difference. My trusty sewing machine, Bertha, and I have experimented with a variety of easy sewing patterns that can add a touch of personality to any room. From simple stripes to intricate geometrics, the options are endless. I recommend starting with a basic envelope pattern, which is perfect for beginners and allows for a clean finish without any visible seams.
With a little practice, you can move on to more complex patterns like chevrons or herringbone, which can add a nice texture and visual interest to your pillows. My DIY team, including my scissors, Sammy, and my sewing needles, Nina and Nico, are always ready to help me bring new designs to life. By mixing and matching different patterns and fabrics, you can create one-of-a-kind throw pillows that reflect your personal style and add a cozy touch to your living space.
Upcycled Fabric Pillow Ideas for Beginners
As a beginner, it’s exciting to explore the world of upcycled fabric pillow ideas. My trusty sidekick, a vintage sewing machine I’ve named “Bertha,” and I have worked on numerous projects that breathe new life into old fabrics. Consider repurposing vintage scarves, denim jeans, or even old t-shirts to create unique and personalized pillow covers. These materials not only add a touch of character to your space but also tell a story.
For a rustic twist, try pairing distressed fabrics with modern patterns or bold colors. My DIY team, including “Sawyer” the saw and “Hammerstein” the hammer, have helped me transform old pallet wood into one-of-a-kind pillow bases. The possibilities are endless, and with a little creativity, you can craft stunning upcycled fabric pillows that reflect your personal style and add warmth to any room.
5 Essential Tips to Elevate Your DIY Throw Pillow Game
- Choose fabrics that tell a story, like vintage scarves, old denim, or repurposed clothing, to add a personal touch to your throw pillows
- Experiment with different textures and patterns to create a unique and inviting atmosphere in your living space
- Don’t be afraid to mix and match different sewing patterns and techniques, like embroidery or appliqué, to give your pillows a one-of-a-kind look
- Pay attention to the little details, like adding a decorative trim or a handmade button, to take your DIY throw pillows from basic to brilliant
- Remember, the beauty of DIY lies in its imperfections, so don’t stress if your stitches aren’t perfect or your fabric isn’t flawless – it’s all part of the charm
Key Takeaways to Revitalize Your Space
By embracing DIY throw pillows, you can add a personal touch to your home decor and make each room truly unique, reflecting your personality and style
Upcycling old fabrics into throw pillows not only reduces waste but also allows you to create one-of-a-kind pieces that tell a story, combining rustic charm with modern design elements
With simple sewing patterns and a little creativity, anyone can transform their living space into a cozy retreat that exudes warmth and character, making DIY throw pillows an accessible and rewarding project for crafters of all skill levels
The Beauty of DIY
With every stitch and every seam, DIY throw pillows tell a story of transformation, turning discarded fabrics into cherished pieces that weave love, laughter, and memories into the very fabric of our homes.
Ryan Bennett
Bringing Your DIY Vision to Life
As we’ve explored the world of DIY throw pillows, from transforming spaces with unique decor to uncovering the potential of upcycled fabrics, it’s clear that the journey is just as important as the destination. We’ve delved into easy sewing patterns and upcycled fabric pillow ideas that can turn any room into a reflection of your personal style. The key takeaway is that with a little creativity and some basic DIY skills, you can breathe new life into old, discarded materials and create something truly special.
So, as you embark on your own DIY adventures, remember that the true beauty lies not just in the end result, but in the process of creation itself. Don’t be afraid to experiment, to try new things, and to see the potential in everyday objects. With my trusty DIY team by your side – including my loyal tools, Bertha the sewing machine and Sammy the staple gun – you’ll be well on your way to turning your house into a home that reflects your unique spirit and style. Happy crafting, and I look forward to seeing the amazing things you create!
Frequently Asked Questions
What are some creative ways to repurpose old clothing or fabric scraps to make unique DIY throw pillows?
I love repurposing old clothing and fabric scraps to create one-of-a-kind throw pillows. Try turning vintage denim jackets into rugged pillow covers or transforming grandma’s old scarves into colorful, eclectic accents. My trusty DIY team, led by ‘Sawyer’ the sewing machine, can’t wait to help you bring these unique designs to life!
How do I choose the right fabric and sewing pattern to match my home decor style when making DIY throw pillows?
When choosing fabric and sewing patterns for your DIY throw pillows, consider the style and vibe you want to achieve – my trusty sidekick, a vintage sewing machine named Bertha, always helps me get it just right. Think about the colors, textures, and patterns that already exist in your space and try to complement them with your fabric selection and stitching style.
Can I use a sewing machine or do I need to sew my DIY throw pillows by hand for a more rustic look?
Absolutely, you can use a sewing machine for a quicker finish, but for a truly rustic look, I recommend hand-stitching with my trusty friend, ‘Stitchy’ – my vintage sewing needle. It adds a personal touch and unique character to your DIY throw pillows.