


Step-by-step Guide to Tiling Your Fireplace Surround
 December 12, 2025
I still remember the first time I tackled a tiling fireplace surround project – it was a game-changer for our living room, and I’m excited to share my hands-on experience with you. The common myth that tiling a fireplace surround is a daunting, expensive task that requires professional help is simply not true. With the right tools and a bit of patience, you can achieve a rustic charm makeover that will leave your friends and family in awe. My trusty DIY team, including my beloved drill, Bertha, and my tape measure, Terry, have been with me every step of the way, and I’m eager to introduce them to you as we dive into this project.
In this article, I’ll walk you through the step-by-step process of tiling a fireplace surround, from preparation to completion. You’ll learn how to choose the perfect tiles, prepare the surface, and lay the tiles with ease. I’ll share my top tips and tricks for achieving a professional-looking finish, and by the end of this guide, you’ll be confident in your ability to tackle this project and give your living room a fresh new look. Whether you’re a seasoned DIY enthusiast or a beginner, this guide is designed to provide you with the practical advice and inspiration you need to succeed.
Table of Contents
- Guide Overview: What You'll Need
- Step-by-Step Instructions
- Tiling Fireplace Surround Magic
- Fireplace Surround Materials Heat Resistant Options Revealed
- Hearth Tile Design Rustic Charm Meets Modern Style
- Tiling Like a Pro: 5 Essential Tips for a Stunning Fireplace Surround
- Key Takeaways for a Rustic Tiling Fireplace Surround
- Tiling Wisdom
- Bringing it all Together: A Beautifully Tiled Fireplace Surround
- Frequently Asked Questions
Guide Overview: What You'll Need
Total Time: 4 hours 30 minutes
Estimated Cost: $100 – $300
Difficulty Level: Intermediate
Tools Required
- Notched Trowel (for applying adhesive)
- Tile Cutter (or a wet saw for larger tiles)
- Grout Float (for spreading grout)
- Grout Sponge (for cleaning excess grout)
- Level (to ensure even installation)
- Pencil and Marker (for marking tile positions)
- Spacers (for maintaining even grout lines)
- Safety Gloves (for protecting hands from cuts and abrasions)
- Measuring Tape (for measuring the fireplace surround area)
- Pry Bar (for removing old tile or adhesive)
Supplies & Materials
- Tile Adhesive (also known as thinset)
- Grout (choose a color that matches your tile)
- Fireproof Tile (specifically designed for high-heat areas)
- Backer Board (for creating a stable surface)
- Caulk (for sealing edges and joints)
- Sealant (optional, for protecting the tile and grout from stains)
Step-by-Step Instructions
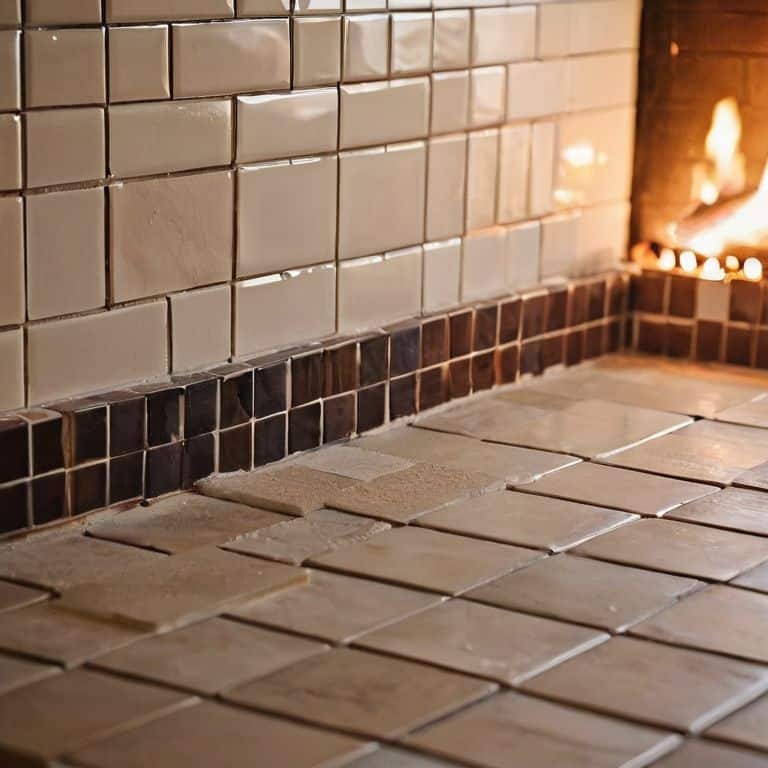
- 1. First, let’s start by preparing the area around the fireplace, which is crucial for a successful renovation. I like to think of this step as the foundation of our project, where we set the stage for the transformation to come. My trusty sidekick, a level named “Lily,” helps me ensure the surface is even and ready for tiling.
- 2. Next, we need to choose the right tiles for our fireplace surround, considering factors like durability and aesthetic appeal. I’m a fan of rustic, vintage-inspired tiles that add a touch of warmth and character to the space. My tile cutter, “Terry,” is always up for the task of cutting these tiles into the perfect sizes and shapes.
- 3. Now it’s time to apply the adhesive, also known as thinset, to the back of the tiles and the fireplace wall. This is where my spreader, “Spike,” comes in handy, helping me achieve a smooth and even layer. It’s essential to follow the manufacturer’s instructions for the correct amount of adhesive to use.
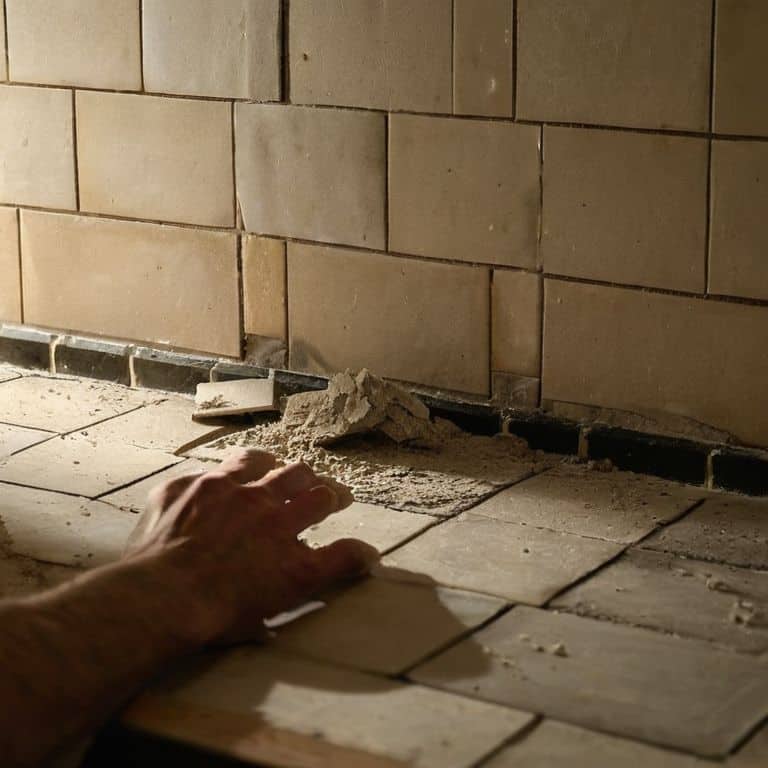
- 4. With the adhesive in place, we can start installing the tiles, beginning from the center and working our way outwards. This pattern helps maintain symmetry and visual appeal. My trusty trowel, “Tina,” is perfect for scooping up and applying the right amount of thinset to each tile.
- 5. As we continue installing the tiles, it’s crucial to use spacers to maintain even grout lines. My spacer, “Sparky,” ensures that the gaps between the tiles are consistent, which will make the grouting process much easier later on. Remember to press each tile firmly into place to secure it.
- 6. Once all the tiles are installed, we need to allow the thinset to dry completely, following the manufacturer’s recommended drying time. This step is critical, as it affects the overall stability and durability of the tile installation. During this time, I like to prepare my grout, “Gracie,” for the next step.
- 7. After the thinset has dried, it’s time to grout the tiles, using a grout float to spread the grout evenly and press it into the gaps between the tiles. My damp cloth, “Daisy,” helps me wipe away excess grout from the surface of the tiles, leaving a clean and polished finish. This step requires patience, as we need to work in small sections to achieve a seamless look.
Tiling Fireplace Surround Magic
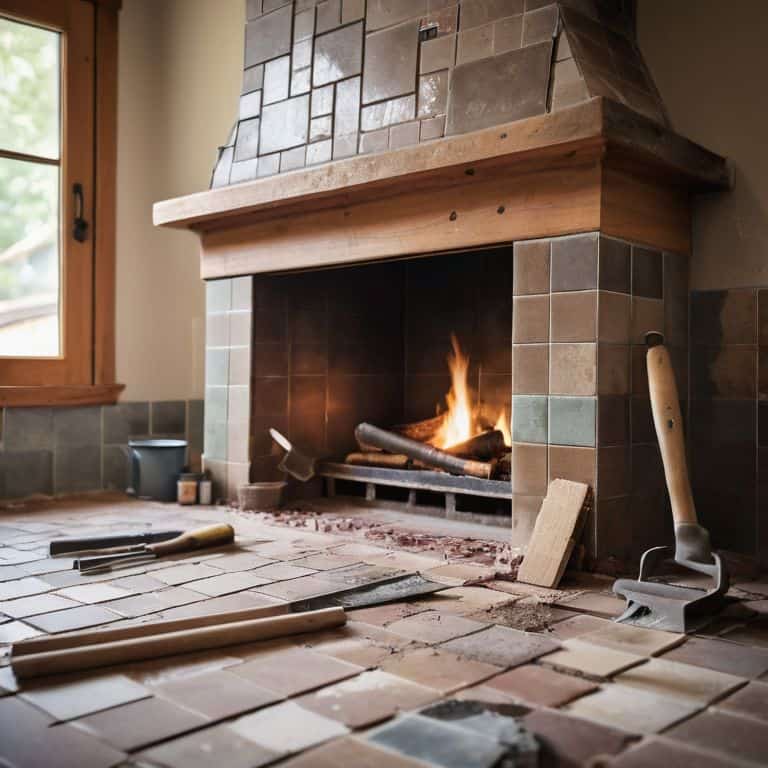
As I worked on my latest hearth tile design project, I realized that the key to a successful fireplace renovation lies in the details. Choosing the right fireplace surround materials can make all the difference in achieving a rustic charm that’s both modern and inviting. My trusty DIY team, including my favorite tile cutter, Bertha, and my reliable adhesive spreader, Sammy, helped me bring this vision to life.
When it comes to selecting heat resistant tile options, it’s essential to consider the safety and durability of the materials. I opted for a beautiful ceramic tile that not only added a touch of elegance to the space but also provided peace of mind. My tile adhesive for fireplaces of choice was a specialized formula designed to withstand high temperatures, ensuring a long-lasting bond between the tile and the surround.
To add a personal touch to your diy fireplace renovation tips, consider experimenting with unique fireplace tile pattern ideas. I chose a classic herringbone pattern, which added a sense of sophistication to the overall design. With a little creativity and the right tools, you can transform your hearth into a cozy gathering spot that’s perfect for relaxing and enjoying quality time with loved ones.
Fireplace Surround Materials Heat Resistant Options Revealed
When it comes to choosing materials for your fireplace surround, it’s essential to prioritize heat resistance. I’ve worked with a variety of materials, but my favorites are ceramic, porcelain, and natural stone tiles. My trusty tool, “Bertha the tile cutter,” has helped me cut through these materials with ease. Ceramic and porcelain tiles are not only durable but also offer a wide range of design options, from rustic to modern. Natural stone tiles, such as marble or slate, add a touch of sophistication and can withstand high temperatures.
I’ve found that these materials can be mixed and matched to create a unique look that reflects your personal style. For a more rustic feel, consider combining natural stone with ceramic tiles. My other tool, “Sandy the sanding block,” helps me smooth out any rough edges, ensuring a seamless finish. By choosing the right materials and using the right tools, you can create a beautiful and functional fireplace surround that will be the centerpiece of your home.
Hearth Tile Design Rustic Charm Meets Modern Style
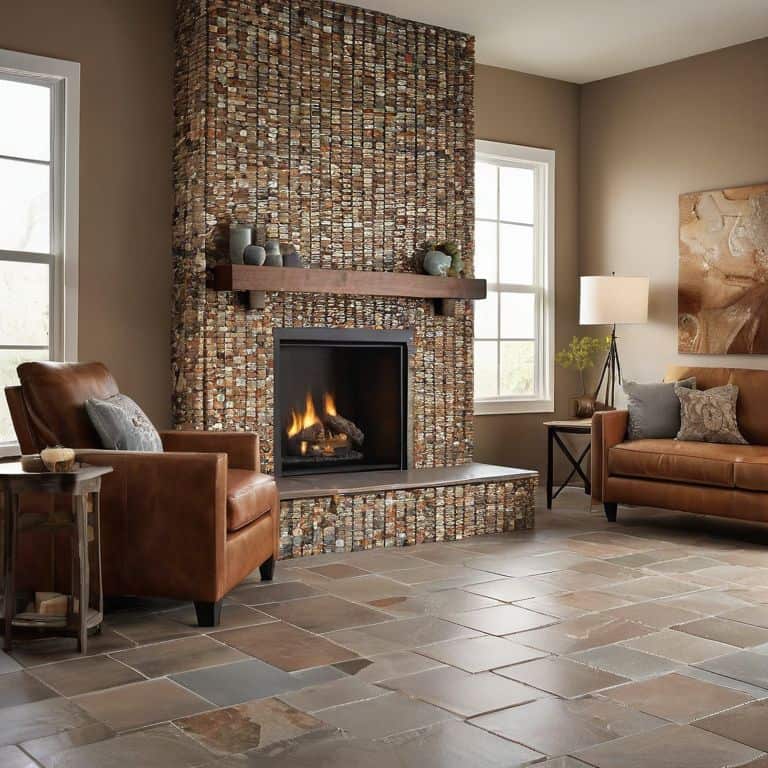
As I worked on my latest tiling fireplace surround project, I couldn’t help but think about the perfect blend of rustic charm and modern style. My trusty DIY team, including my favorite tile cutter, Bertha, and my grinder, Gracie, helped me bring this vision to life. I chose a mix of earthy tones and sleek, modern tiles to create a unique look that would complement any room.
The result was nothing short of magical – a hearth that exuded warmth and character, with a touch of sophistication. I love how the rustic elements, like the reclaimed wood mantel, paired perfectly with the modern tile surround, creating a space that’s both cozy and contemporary. It’s this kind of transformation that gets me excited about upcycling and DIY projects, and I hope it inspires you to experiment with your own hearth tile design.
Tiling Like a Pro: 5 Essential Tips for a Stunning Fireplace Surround
- Measure Twice, Tile Once: Double-Check Your Dimensions to Ensure a Seamless Fit
- Choose the Right Adhesive: Select a Heat-Resistant Tile Adhesive to Withstand the High Temperatures
- Pattern Play: Experiment with Different Tile Patterns to Add Visual Interest to Your Fireplace Surround
- Grout Like a Pro: Use a Grout Float and Clean Excess Grout Immediately to Achieve a Professional Finish
- Seal the Deal: Apply a Tile Sealer to Protect Your Surround from Stains and Spills, and Make Cleaning a Breeze
Key Takeaways for a Rustic Tiling Fireplace Surround
As you embark on your tiling fireplace surround project, remember that the right materials can make all the difference – from heat-resistant tiles to the perfect adhesive, each choice contributes to a safe and beautiful outcome.
Combining rustic charm with modern style is all about balance – don’t be afraid to mix and match different tile patterns, colors, and textures to create a unique look that reflects your personality and complements your home’s décor.
With the right mindset and tools, including my trusty DIY team, you can transform your hearth into a cozy, inviting space that’s perfect for snuggling up by the fire – so don’t hesitate to get creative and make this project your own.
Tiling Wisdom
As I always say, a beautifully tiled fireplace surround is not just about the tiles, it’s about weaving a story of warmth and character into the heart of your home, one piece at a time.
Ryan Bennett
Bringing it all Together: A Beautifully Tiled Fireplace Surround
As we’ve explored the world of tiling a fireplace surround, I hope you’ve gained a deeper understanding of the process and the endless possibilities it holds. From choosing the perfect heat resistant materials to designing a unique hearth tile pattern that blends rustic charm with modern style, every step is an opportunity to add your personal touch. By following the steps outlined in this guide, you’ll be well on your way to creating a stunning focal point in your home that’s both functional and visually appealing.
As you embark on your own tiling journey, remember that the true magic happens when you combine creativity with experimentation. Don’t be afraid to think outside the box and try new things – it’s often the unexpected twists that lead to the most beautiful and unique results. With every tile you place, you’re not just building a fireplace surround, you’re crafting a warm and inviting space that will be the heart of your home for years to come.
Frequently Asked Questions
What are the best types of tile to use for a fireplace surround to ensure heat resistance and durability?
For a fireplace surround, I swear by natural stone tiles like slate or travertine, and my trusty sidekick ‘Sandy the Trowel’ agrees. They’re not only heat-resistant but also add a touch of rustic charm. Ceramic or porcelain tiles with a high-gloss finish are also great options, and I often introduce them to my ‘DIY team’ as the perfect blend of durability and style.
How do I prepare the surface around my fireplace for tiling to ensure a strong and even bond?
To get a strong bond, I always make sure to clean and prep the surface around my fireplace thoroughly. I use my trusty scraper, ‘Scorch,’ to remove any old adhesive or debris, and then give it a good wipe with a damp cloth. My drill, ‘Daisy,’ helps me score the surface for better adhesion, ensuring a solid foundation for my tiles.
Can I tile over an existing fireplace surround, or does it need to be completely removed before starting the project?
Absolutely, you can tile over an existing fireplace surround, but it’s crucial to assess its condition first. My trusty sidekick, ‘Scraper Sam,’ can help remove old adhesive or debris. Ensure the surface is level, sturdy, and clean before beginning – it’s a game-changer for a successful makeover.