


The Art of Diy Candle Making: Adding Warmth and Ambiance
 July 16, 2025
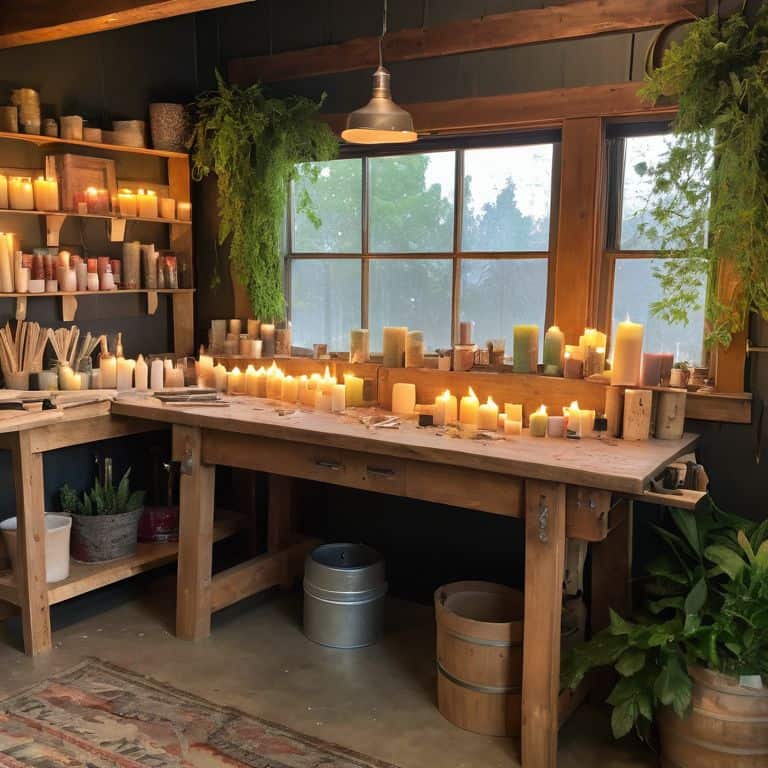
I still remember the first time I tried my hand at DIY candle making. I was a teenager, watching my parents work their magic in our family’s workshop, and I was determined to create something beautiful of my own. The process was messy, and my first attempts were far from perfect, but there was something special about transforming raw wax into a warm, flickering masterpiece. As I delved deeper into the world of DIY candle making, I realized that many people are intimidated by the process, believing it to be too complicated or time-consuming. But the truth is, with the right guidance and a little patience, anyone can create their own unique candles.
In this article, I’ll share my personal approach to DIY candle making, focusing on simple, practical techniques that will help you get started. I’ll introduce you to my trusty “DIY team” – a set of tools that have become essential to my creative process. From preparing the wax to adding the perfect scent, I’ll guide you through each step, providing honest, no-hype advice on how to overcome common challenges and achieve professional-looking results. Whether you’re a seasoned crafter or a beginner, my goal is to inspire you to see the beauty in DIY candle making and to empower you to create something truly special.
Table of Contents
Guide Overview: What You'll Need
Total Time: 2 hours 30 minutes
Estimated Cost: $20 – $50
Difficulty Level: Easy / Intermediate
Tools Required
- Double Boiler (or a microwave-safe bowl)
- Colorant (optional)
- Thermometer (for temperature control)
- Mold (to shape the candle)
- Melting Pot (for melting wax)
- Wick (made of cotton, paper, or another material)
- Heat-Resistant Surface (for cooling and hardening the candle)
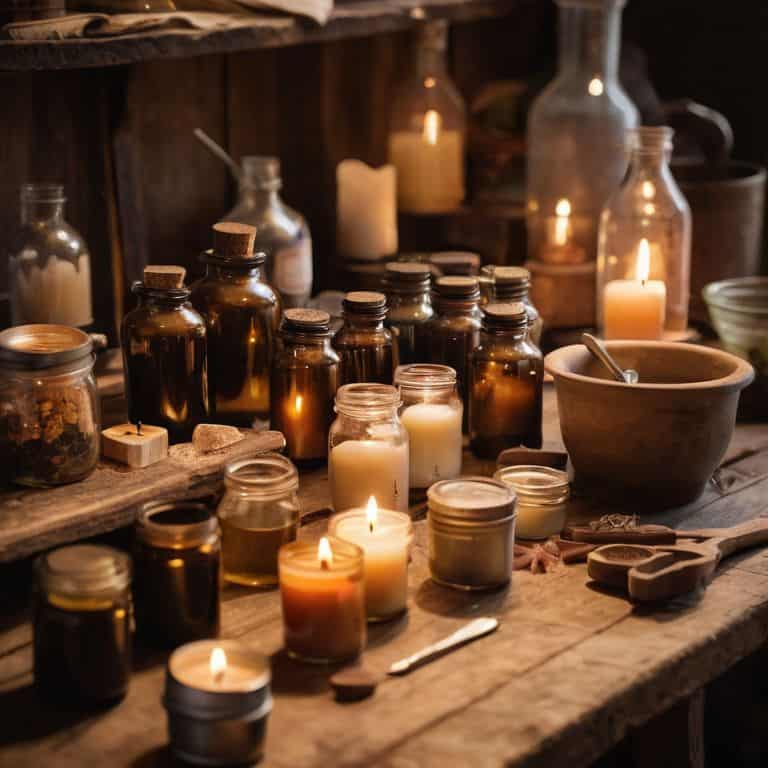
Supplies & Materials
- Wax (available in various types, such as soy, beeswax, or paraffin)
- Wick Tabs (for securing the wick to the bottom of the mold)
- Fragrance Oils (optional, for scented candles)
- Rubber Spatula (for stirring and pouring the wax mixture)
- Candle Mold (made of silicone, plastic, or metal, in various shapes and sizes, typically 6 inches in diameter and 8 inches in height)
Step-by-Step Instructions
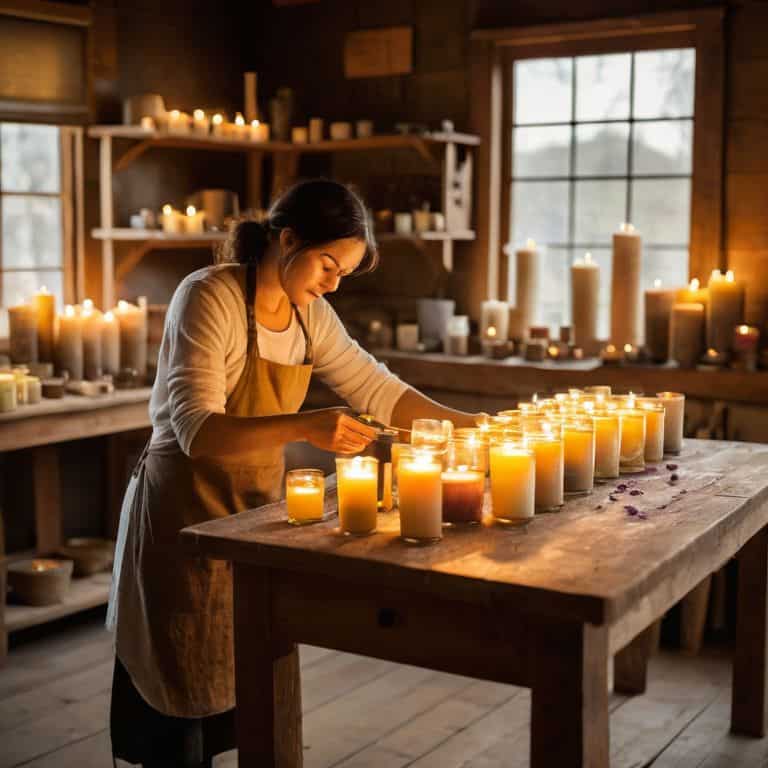
- 1. First, let’s start by gathering all the necessary materials, including wax, a wick, a melting pot, and some colorful dyes to give our candle a unique touch. I like to use my trusty tool, “Meltie,” to heat up the wax to the perfect temperature.
- 2. Next, we need to prepare the melting pot by making sure it’s completely clean and dry. This is where my “Scrubber” tool comes in handy, helping me get rid of any residue from previous projects. Now, let’s move on to the fun part – creating the perfect blend of wax and fragrance.
- 3. Now it’s time to melt the wax, and I use my “Heatster” tool to get the job done. It’s essential to monitor the temperature closely to avoid overheating the wax. Once the wax is fully melted, we can add the fragrance oils and stir well to combine.
- 4. With the wax mixture ready, it’s time to add the wick and shape our candle. I use my “Wickie” tool to carefully place the wick in the center of the mold, making sure it’s straight and even. Then, I pour the wax mixture into the mold, creating a beautiful, rustic design.
- 5. As the wax cools and solidifies, we can start to see our candle take shape. It’s essential to be patient and let it cool completely, as this will help prevent any air bubbles from forming. Once it’s solid, we can remove the candle from the mold and trim the wick to the desired length.
- 6. To add a personal touch to our candle, we can use decorative herbs or spices to create a unique pattern or design. I like to use my “Sprinkler” tool to sprinkle the herbs evenly over the surface of the candle, giving it a cozy, homemade feel.
- 7. Finally, our DIY candle is complete, and it’s time to light it up and enjoy the warm, flickering glow. I’m proud of what we’ve accomplished, and I hope you are too! Remember, the most important thing is to have fun and be creative with the process, and don’t be afraid to experiment with different color combinations and fragrances to make your candle truly one-of-a-kind.
Diy Candle Making Magic
As I work on my latest soy wax candle recipes, I’m reminded of the importance of experimentation in the creative process. I love trying out new essential oils for candle scent, combining different fragrances to create unique and inviting aromas. My trusty DIY team, including my favorite tool, Bertha the melting pot, and my measuring spoons, Maude and Mabel, are always by my side as I concoct new blends.
When it comes to candle making safety tips, I always stress the importance of caution when working with heat and flammable materials. It’s crucial to have a well-ventilated workspace and to never leave your melting pot unattended. By following these simple guidelines, you can ensure a fun and safe experience as you explore the world of hand-poured candles. My hand poured candle techniques have been honed over years of practice, and I’m excited to share them with you.
As you continue to experiment with different custom candle colorants and candle fragrance blending techniques, remember to let your imagination run wild. Don’t be afraid to try new combinations and see what unique creations you can come up with. With a little patience and practice, you’ll be crafting beautiful, one-of-a-kind candles that reflect your personal style and add a touch of warmth to any room.
Essential Oils for Unique Scents
When it comes to infusing your candles with unique scents, essential oils are the way to go. My trusty sidekick, a dropper named Daisy, helps me get just the right amount. I love experimenting with different combinations – like lavender and eucalyptus for a refreshing twist or cinnamon and orange for a cozy feel.
I’ve found that a few drops can completely transform the ambiance of a room. My favorite part? Watching the wax absorb the fragrance, knowing that soon it’ll be filling my home with warmth and character. Whether you’re aiming for a calming atmosphere or an invigorating boost, essential oils offer endless possibilities to make your DIY candles truly one-of-a-kind.
Soy Wax Recipes for Warmth
As I experiment with different soy wax recipes, I’m always amazed by the unique characteristics each one brings to the table. My trusty sidekicks, Melty and Moldy, are always by my side as we concoct new blends. For a warm and inviting glow, I love combining soy wax with essential oils like vanilla and cinnamon. The result is a candle that fills the room with a cozy, comforting aroma, perfect for snuggling up on a chilly evening.
I’ve also been playing around with adding herbs and spices to my soy wax recipes, and the outcomes are nothing short of magical. A sprinkle of dried lavender or a pinch of nutmeg can completely transform the ambiance of a space, transporting you to a rustic retreat or a warm summer evening. My DIY team and I are always excited to see what new creations we can come up with, and I invite you to join us on this journey of discovery, where the possibilities are endless and the magic is real.
Flickering Wisdom: 5 Essential Tips for DIY Candle Making
- Always prepare your melting pot by ensuring it’s completely dry, as any moisture can affect the quality of your candle
- Experiment with different wick sizes to find the perfect fit for your DIY candle, as this can greatly impact the burn time and overall performance
- Keep your workspace well-ventilated when working with essential oils and wax, and consider wearing a mask to avoid inhaling any fumes
- Don’t be afraid to get creative with your color combinations – a little experimentation can go a long way in creating unique and personalized candles
- Remember to trim your wick to the recommended length before each use to ensure a clean, even burn and prevent any excess soot from forming
Key Takeaways to Illuminate Your Space
Embracing the art of DIY candle making allows you to transform simple materials into warm, cozy beacons that personalize your home with unique scents and rustic charm
By experimenting with different soy wax recipes and essential oils, you can conjure up an array of candles that not only illuminate your space but also tell a story of craftsmanship and creativity
Remember, the true magic of DIY candle making lies not just in the end product, but in the journey itself – the process of creation, the joy of upcycling, and the satisfaction of turning the ordinary into something extraordinary with the help of my trusty DIY team, including my favorite tools, Bertha the melter and Sammy the snipper
Embracing the Flame
As we craft our own candles, we’re not just melting wax, we’re kindling a sense of self-expression and creativity, transforming a simple space into a warm and inviting sanctuary, one flicker at a time.
Ryan Bennett
Embracing the Warmth of DIY Candle Making
As we’ve explored the world of DIY candle making, we’ve discovered the magic that happens when we combine simple ingredients like soy wax and essential oils to create something truly unique. From the soothing ambiance of a warmly lit room to the satisfaction of crafting something with our own hands, DIY candle making offers a journey of discovery and creativity. We’ve delved into the step-by-step process, experimented with various soy wax recipes for warmth, and even touched upon the art of using essential oils for unique scents. Each of these elements contributes to a richer understanding and appreciation of this DIY craft.
As we conclude our journey into the heart of DIY candle making, remember that the true beauty lies not just in the final product, but in the process of creation itself. It’s about embracing the imperfections, learning from mistakes, and igniting the artisan within. So, don’t be afraid to experiment, to try new recipes, and to push the boundaries of what’s possible with DIY candle making. For in the end, it’s not just about making candles – it’s about crafting a piece of yourself and sharing that warmth with the world.
Frequently Asked Questions
What are the safest ways to melt and handle wax when making DIY candles?
When working with wax, safety first is my motto. I always use a double boiler or a dedicated wax melter to avoid direct heat. My trusty thermometer, Bertha, helps me monitor the temperature. I also make sure to handle the melted wax with my favorite heat-resistant spatula, Sammy, and never leave it unattended.
How can I achieve specific colors or textures in my homemade candles?
To get creative with colors and textures, I introduce you to my trusty sidekicks, ‘Meltie’ the thermometer and ‘Colorista’ the dye kit. Experiment with different pigments, like vibrant dyes or natural herbs, and add unique textures with ingredients like dried flowers or crushed botanicals – the possibilities are endless, and I love seeing what my DIY team and I can come up with!
What are some tips for ensuring my DIY candles have a consistent and even burn?
To achieve a consistent burn, I swear by my trusty friend, ‘Melty’ – my thermometer. Monitor the wax temperature, and ensure your wick is centered and trimmed to the right size. My ‘Cutting Queen’ tool helps me get the wick just right. This combo will give you a smooth, even burn every time, making your handmade candles truly special.