






A No-nonsense Guide to Hanging Shelves on Plasterboard Without the Stress
 September 29, 2026
I remember standing in my studio last month, staring at a gorgeous, reclaimed oak piece I’d just finished upcycling, only to realize I had absolutely no idea where to put it. I was staring at a perfectly blank, stubborn wall, feeling that familiar pang of doubt: what if it just falls? A lot of people will tell you that plasterboard is too flimsy for anything more than a tiny picture frame, but I’m here to tell you that’s a total myth. Once you master the actual secret of how to hang a shelf on plasterboard, those empty walls suddenly become a blank canvas for your most meaningful treasures.
I’ve spent years combining my interior design background with a lot of trial and error, and I’ve even had a few “oops” moments where my DIY team—led by my trusty drill, Barnaby—had to clean up a bit of dust! In this guide, I’m going to strip away the technical jargon and give you the honest, no-nonsense steps to securing your shelves with total confidence. We’ll walk through choosing the right anchors and making sure your new display stays exactly where you put it, turning those plain walls into something truly special.
Guide Overview
Tools & Supplies
- Drill/Driver for creating pilot holes
- Spirit level to ensure the shelf is straight
- Pencil for marking drill points and shelf position
- Measuring tape for accurate spacing
- Plasterboard anchors (Wall plugs) 6-10 pieces
- Screws compatible with anchors 6-10 pieces
- Shelf and brackets 1 set
Step-by-Step Instructions
- 1. First things first, we need to gather our crew! I’ve called my trusty drill, ‘Dusty,’ and my level, ‘Steady Eddie,’ over to the workspace. Before we even touch the wall, you’ll need to grab your shelf, a pencil, a spirit level, and—most importantly—the right kind of hollow wall anchors. Since plasterboard is essentially just compressed gypsum, it doesn’t have the strength to hold a screw on its own, so those anchors are going to be your absolute best friends in this project.
- 2. Now, let’s get our measurements dialed in. Hold your shelf up against the wall exactly where you want it to live, and use ‘Steady Eddie’ to make sure it’s perfectly straight. Once you’re happy with the position, take your pencil and mark the exact spots where the bracket holes need to go. I like to double-check my marks a few times because there’s nothing more heartbreaking than realizing your beautiful new shelf is slightly crooked after you’ve already drilled the holes.
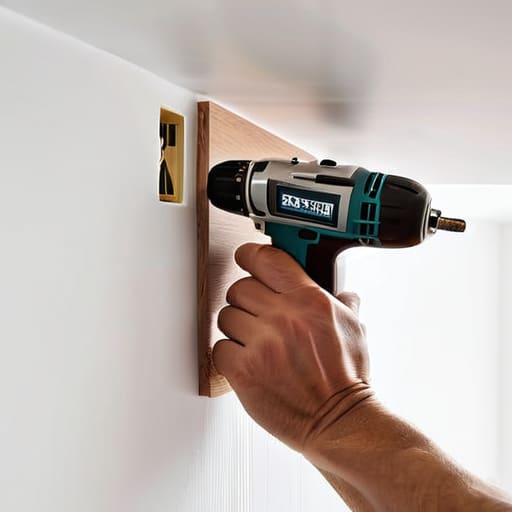
- 3. It’s time to let ‘Dusty’ do the heavy lifting! Using a drill bit that matches the size of your wall anchors, carefully drill your holes into the marked spots. Go slow and don’t push too hard; you want a clean, precise hole without crumbling the plasterboard around the edges. If you feel any sudden resistance, you might have hit a stud, which is actually a fantastic bonus because it means your shelf will be extra secure!
- 4. Next, we’re going to prep those holes for the anchors. Take your wall plugs and gently press them into the holes you just drilled. If they feel a bit snug, don’t panic—just give them a light tap with a hammer until they are flush with the wall. You want them to sit perfectly flat so that when we attach the shelf, everything feels solid and intentional rather than wobbly and rushed.
- 5. Now for the most satisfying part: bringing the shelf home! Line up your shelf brackets with the anchors and drive your screws through the bracket and into the plugs. I always recommend giving the screws a final tighten with a screwdriver to ensure everything is locked in place. Once you’re done, give the shelf a little experimental wiggle to make sure it’s sturdy and ready to hold your favorite vintage finds or a few leafy plants.
- 6. Finally, let’s do one last check for perfection. Place ‘Steady Eddie’ on top of your newly installed shelf to confirm it’s still level. If it looks good, you are officially ready to start decorating! There is something so incredibly rewarding about seeing a blank wall transform into a curated little corner of your home, and I can’t wait to see what treasures you choose to display on yours.
Finding the Hidden Strength Essential Stud Finder Usage for Shelving
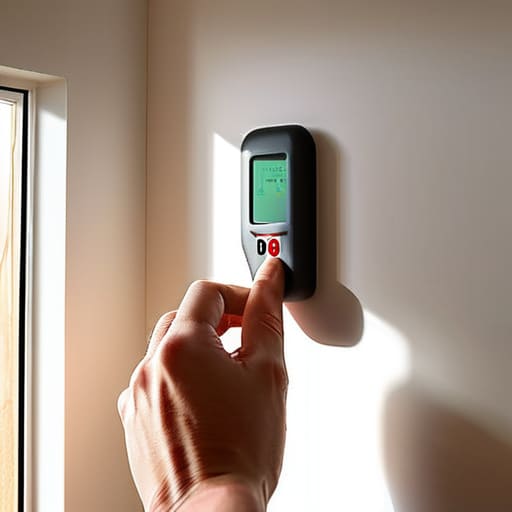
Now, before we get too carried away with the fun part, I want to talk about something that can make or break your project: finding that hidden strength behind your walls. While it’s tempting to just start drilling, I always tell my DIY team—especially my trusty little stud finder, “Barnaby”—that we need to know exactly what we’re working with first. Proper stud finder usage for shelving is the secret sauce to making sure your beautiful new display doesn’t end up as a pile of rubble on the floor. If you can hit a wooden stud, you’re golden, but if you’re stuck in the “empty” space, you’ll need to be much more strategic.
If your design calls for a more ambitious setup, like some heavy duty shelf brackets installation for a collection of vintage books, you can’t just rely on luck. If you can’t find a stud where you need it, don’t sweat it! Just make sure you’re choosing the best wall anchors for plasterboard to handle the load. I’ve learned the hard way that using the wrong plug is a recipe for disaster, so always check your hardware before you make that first hole.
Choosing Your Foundation a Plasterboard Weight Capacity Guide
Before we get our hands dirty, we need to talk about the most important part of any project: knowing exactly what your walls can handle. It’s easy to get excited and want to pile every vintage book collection you own onto a new shelf, but we don’t want a sudden trip to the floor! Think of your plasterboard like the foundation of a house; it’s sturdy, but it has its limits. This plasterboard weight capacity guide is all about matching your dream design with the reality of your walls.
If you’re planning on a heavy duty shelf brackets installation for something substantial like a reclaimed timber mantle, you really want to aim for those wooden studs we talked about earlier. However, if you’re just hanging a few lightweight succulents or some framed photos, you can safely rely on anchors. The secret is finding the best wall anchors for plasterboard based on the specific weight of your decor. Taking a quick moment to weigh your items now will save you from the heartbreak of seeing your beautiful creations come crashing down later!
Pro-Tips from the Workshop: My Secret Sauce for Success
- Always double-check your math before you drill; there’s nothing more heartbreaking than realizing your beautiful shelf is two inches too far to the left after you’ve already made the holes!
- Meet “Barnaby,” my trusty spirit level—never trust your eyes alone when working with plasterboard, because even a tiny tilt becomes a massive eyesore once your decor is sitting on top.
- Don’t be afraid to go heavy-duty; if you’re planning on displaying a collection of vintage ceramic mugs, skip the basic plastic plugs and reach for those heavy-duty metal toggle bolts instead.
- Keep a little bit of painter’s tape handy to mark your drill points; it prevents the drill bit from skidding across your pristine wall and keeps your layout looking sharp and professional.
- Remember that plasterboard is a bit of a delicate soul, so always drill your pilot holes slightly smaller than your fixings to ensure a snug, secure fit that won’t wiggle loose over time.
Bringing Your Vision to Life
Before you go racing off to hang those heavy vintage books, let’s do a quick mental check. Remember, the secret to a successful project lies in the prep work—from using your stud finder to locate that hidden structural strength to picking the right wall plugs for your specific load. I always tell my DIY team, including my trusty drill, Barnaby, that measure twice and drill once is the golden rule for a reason! By matching your shelf’s weight to the capacity of your plasterboard and ensuring you have a solid foundation, you’re not just putting up a piece of wood; you’re building something that is actually meant to last.
At the end of the day, don’t let a little bit of plasterboard intimidate you. Every empty wall is just a blank canvas waiting for a bit of soul and personality. Whether you’re displaying heirloom ceramics or upcycled finds from a local flea market, these shelves are the vessels for your unique story. I truly believe that transformation is everywhere if you just have the courage to pick up a tool and try. So, grab your gear, clear some space, and let’s turn those plain walls into something that feels like home. I can’t wait to see what you create!
Now, before you go grabbing your heavy-duty drill and getting too carried away, I always like to take a quick moment to double-check my measurements and plan out the visual flow of the room. If you’re feeling a little stuck on how to balance your new shelving with the rest of your decor, I’ve found that browsing through some fresh lifestyle inspiration can really help clear the mental fog. I actually stumbled upon some wonderful design ideas over at casualmichigan.com that helped me visualize how to mix those rustic wooden textures with a more modern, clean aesthetic. It’s all about finding that perfect harmony between function and style so your project feels like a natural part of your home rather than just something stuck to a wall.