


Diy Window Treatments to Maximize Warmth and Style
 August 14, 2025

I still remember the first time I decided to ditch the boring, mass-produced curtains in my living room and opted for DIY window treatments instead. It was a game-changer – the way the natural light poured in, highlighting the rustic wooden accents and vintage decor, completely transformed the space. I’ve since become obsessed with giving my windows a personal touch, and I believe that with a little creativity, anyone can turn their windows into a stunning focal point. There’s something special about breathing new life into old, discarded materials and turning them into unique pieces that reflect your personality.
In this article, I’ll share my honest, no-hype guide to creating your own DIY window treatments. I’ll walk you through the process of selecting the perfect materials, from reclaimed wood to vintage fabrics, and provide you with practical tips and tricks for bringing your vision to life. Whether you’re a seasoned DIY enthusiast or a beginner looking to add some personality to your space, I’ll show you how to create beautiful, functional window treatments that elevate your home’s style without breaking the bank. By the end of this article, you’ll be equipped with the knowledge and inspiration to turn your windows into a reflection of your unique taste and style.
Table of Contents
- Guide Overview: What You'll Need
- Step-by-Step Instructions
- Transforming Spaces With Diy Window Treatments
- Bringing It All Together: 5 Essential Tips for DIY Window Treatment Success
- Key Takeaways for a Beautifully Transformed Space
- A Window to Creativity
- Embracing the Beauty of DIY Window Treatments
- Frequently Asked Questions
Guide Overview: What You'll Need
Total Time: 2 hours 30 minutes
Estimated Cost: $50 – $100
Difficulty Level: Intermediate
Tools Required
- Measuring Tape (for accurate measurements)
- Level (to ensure straight hangs)
- Drill (with screwdriver and drill bits)
- Saw (for cutting wood or other materials)
- Pencil (for marking measurements)
- Ladder (for reaching high windows)
Supplies & Materials
- 2-in x 4-in lumber (for making wooden blinds)
- Curtain Rods (available in various lengths)
- Fabric (for making curtains or drapes)
- Ribbon or Trim (for decorative edges)
- Wall Anchors (for securing rods or blinds)
- Screws (for assembling or attaching treatments)
Step-by-Step Instructions
- 1. To start creating your own DIY window treatments, gather your materials, including fabric of your choice, a sewing machine, measuring tape, and my trusty sidekick, Betsy the scissors. I like to introduce my tools as part of my DIY team, and Betsy has been with me since the beginning, helping me cut through even the toughest fabrics with ease.
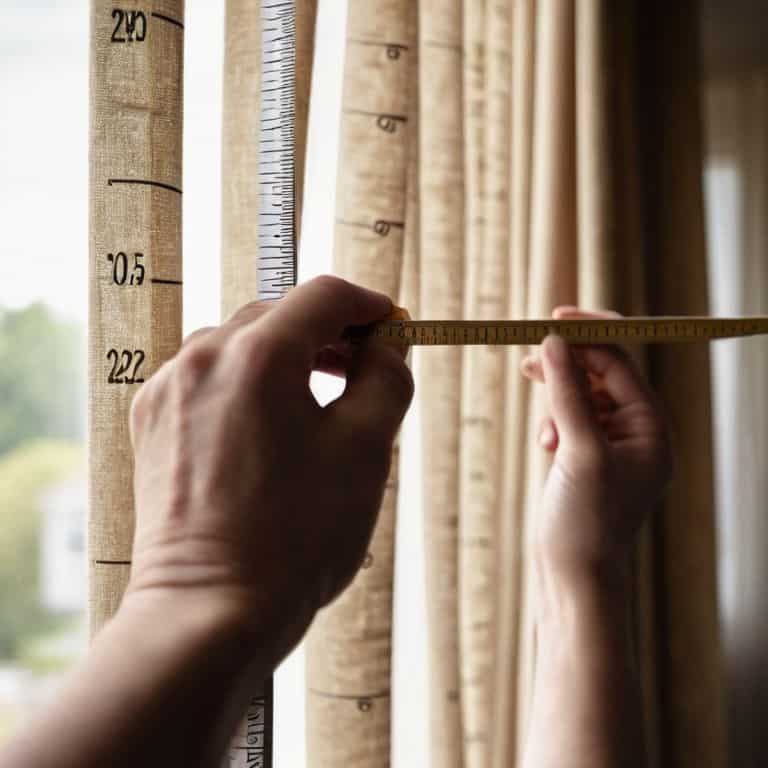
- 2. Next, measure your windows to determine the size of your window treatment. This is a crucial step, as you want to ensure a snug fit that will make your handmade treatment look professional. My tape measure, Terry, is always by my side for this step, providing accurate measurements that I can rely on.
- 3. Now, it’s time to choose your design. Will you go for a classic, elegant look or something more modern and bold? I love experimenting with different patterns and colors to create a unique piece that reflects my personality. For this step, I often consult with Penny the pencil, who helps me sketch out my ideas and bring them to life.
- 4. With your design in mind, start cutting out your fabric. This is where Betsy comes in handy again, gliding through the fabric with precision and ease. Remember to cut a little extra around the edges to account for seam allowance, and don’t hesitate to get creative with your cuts – after all, it’s all about transforming something ordinary into something extraordinary.
- 5. Once you have your fabric cut out, it’s time to start sewing. My sewing machine, Sally, is a workhorse, and I’ve named her after my grandmother, who taught me the art of sewing. Feed your fabric through Sally, and watch as your window treatment begins to take shape. Don’t worry if it’s not perfect – imperfections are what make handmade pieces special.
- 6. As you sew, add any embellishments you like – ribbons, tassels, or even a few strategically placed buttons can make all the difference. I love this part of the process, as it’s where you can really let your personality shine and add a touch of whimsy to your design. My button jar, Bertha, is always filled with an assortment of colorful buttons, just waiting to be used.
- 7. Finally, hang your window treatment and step back to admire your handiwork. There’s something incredibly satisfying about seeing a project come together, and I feel a sense of pride and accomplishment every time I complete a new piece. My trusty hammer, Hammy, is always on hand to help me hang my creations, and I love the way the finished product looks, with the light streaming through the fabric and casting a warm glow over the room.
Transforming Spaces With Diy Window Treatments
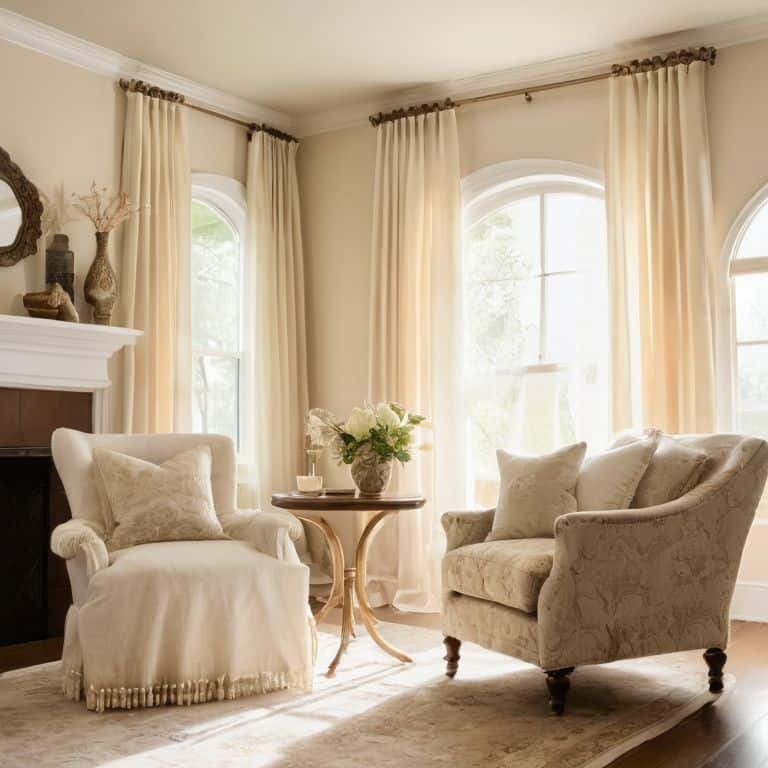
As I work on my latest project, I love seeing how custom curtain designs can completely transform a room. It’s amazing how a simple change can make a space feel more intimate and cozy. I’ve been experimenting with different window valance ideas, from flowing fabrics to more structured designs, and I’m excited to share my findings with you. By adding a personal touch to your windows, you can create a unique ambiance that reflects your personality.
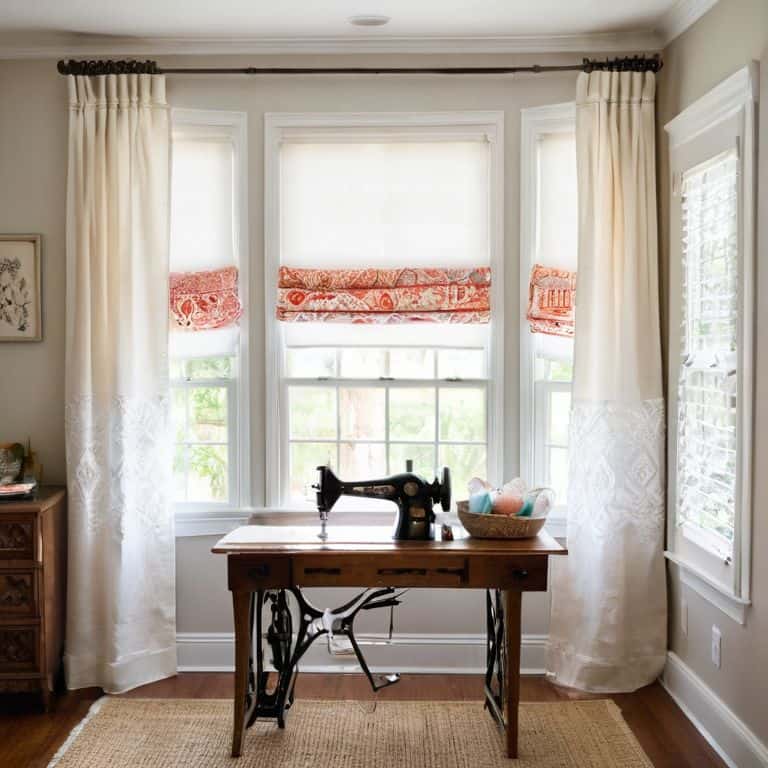
When it comes to choosing the right materials, I always consider the functional aspects of window coverings. Thermal curtain materials, for instance, can make a big difference in regulating the temperature in your home. And, if you’re looking for a more traditional approach, DIY plantation shutters can add a touch of elegance to any room. I’ve found that these types of shutters work particularly well in smaller spaces, where window treatment styles for small rooms can be a challenge.
By getting creative with your window coverings, you can not only enhance the aesthetic of your space but also make it more energy efficient. I’ve been exploring different ways to repurpose old materials to create unique window treatments, and I’m excited to share my discoveries with you. Whether you’re looking to reduce your energy bills or simply add some personality to your windows, I’m confident that you’ll find inspiration in my DIY adventures.
Reimagining Windows With Custom Curtain Designs
I love how a custom curtain design can completely reimagine a window’s personality. My trusty sewing machine, Bertha, and I have had a blast experimenting with different fabrics and patterns to create one-of-a-kind window treatments. From flowing whites to rich velvets, the right fabric can elevate a room’s ambiance and frame the view outside. By choosing a design that reflects your personal style, you can turn a ordinary window into a stunning focal point that draws the eye and sparks conversation. Whether you’re aiming for rustic charm or modern sophistication, a handmade curtain can add a touch of warmth and character to any space.
Thermal Curtain Materials for Energy Efficiency
When it comes to choosing the right materials for my DIY thermal curtains, I always look for fabrics that not only add a touch of style but also provide excellent insulation. My trusty sidekick, a vintage sewing machine I’ve named Bertha, helps me bring these materials to life. I’ve found that thick, heavy fabrics like velvet, fleece, or even upcycled wool blankets work wonders in keeping the cold out and the warmth in. Additionally, I like to add a layer of thermal lining to my curtains, which can be made from materials like cotton, polyester, or even recycled plastic bottles.
By using these materials, I’ve noticed a significant reduction in heat loss during the winter months, and my spaces feel cozier than ever. My DIY team, including my favorite scissors, Sammy, and my measuring tape, Marty, all play a crucial role in helping me measure, cut, and sew the perfect thermal curtains for my windows.
Bringing It All Together: 5 Essential Tips for DIY Window Treatment Success
- Measure Twice, Cut Once: The Importance of Accurate Measurements in DIY Window Treatments
- Get Creative with Fabrics: Mixing and Matching Patterns, Textures, and Colors for a Unique Look
- Lighten Up: Understanding the Role of Lighting in Enhancing Your DIY Window Treatments
- Tool Time: Introducing My DIY Team – Meet Bertha the Sewing Machine, Sammy the Saw, and Their Friends
- Repurpose with Flair: Turning Vintage Finds into One-of-a-Kind Window Treatments that Tell a Story
Key Takeaways for a Beautifully Transformed Space
I’ve learned that with a little creativity, DIY window treatments can completely revamp the ambiance of a room, making it feel more personalized and inviting
By choosing the right materials and designs, such as thermal curtains or repurposed wood shutters, you can not only add aesthetic value but also improve the energy efficiency of your space
My DIY team, including my trusty sidekicks ‘Sawyer’ the saw and ‘Drilly’ the drill, and I are living proof that upcycling and creative problem-solving can lead to unique, functional, and beautiful window treatments that reflect your personal style
A Window to Creativity
As I always say, DIY window treatments are more than just a way to filter the light – they’re an opportunity to frame your view, to tell a story, and to infuse your space with a piece of your soul.
Ryan Bennett
Embracing the Beauty of DIY Window Treatments
As I reflect on our journey through the world of DIY window treatments, I’m reminded of the countless ways we can breathe new life into our living spaces. From repurposed materials to custom curtain designs, we’ve explored the transformative power of handmade touches. By embracing the DIY spirit, we not only save money but also infuse our homes with personality and character. Whether you’re a seasoned crafter or a beginner, I hope this guide has inspired you to experiment with different materials, textures, and styles to create a look that’s truly yours.
As you embark on your own DIY window treatment adventure, remember that it’s all about unleashing your creativity and having fun. Don’t be afraid to try new things, make mistakes, and learn from them. With every project, you’ll develop your skills, and your home will become a reflection of your unique perspective. So, go ahead, get creative, and watch your space come alive with the beauty of DIY window treatments. My trusty DIY team, including my faithful hammer, Bertha, and my sewing machine, Maude, can’t wait to see what you create next!
Frequently Asked Questions
What are some creative ways to repurpose old materials for DIY window treatments?
I love breathing new life into old materials. For DIY window treatments, consider repurposing vintage lace, old pallets, or even mason jars to create unique curtain ties or macrame details. My trusty DIY team, including my drill, Bertha, and sandpaper, Sam, can’t wait to help you transform these discarded gems into one-of-a-kind window decor.
How can I ensure my DIY window treatments are both functional and aesthetically pleasing?
For me, it’s all about striking a balance between form and function. I like to think about the purpose of the room and the style I’m aiming for, then choose materials and designs that fit the bill. My trusty DIY team, including my favorite sewing machine, Bertha, help me bring it all together!
What are the most energy-efficient materials to use for DIY thermal curtains?
I swear by using thick, heavy fabrics like velvet or fleece for my DIY thermal curtains – they’re total game-changers for keeping the warmth in and the chill out. My trusty team, including my scissors, Bertha, and sewing machine, Maude, help me bring these energy-efficient designs to life.