


Top 5 Stylish Diy Roman Shades for a Cozy Home
 March 24, 2026
I still remember the first time I attempted to create DIY Roman shades for my small apartment. I was frustrated with the lack of natural light and the bland, cookie-cutter window treatments that seemed to suck the personality out of my space. As I delved into the world of DIY window treatments, I realized that many people believed creating your own Roman shades was a daunting, impossible task – a myth that I’m excited to debunk. With the right tools and a bit of creativity, you can transform your windows into stunning focal points that add warmth and character to any room.
In this article, I’ll share my personal experience and expertise to guide you through the process of creating your own DIY Roman shades. You’ll learn how to measure, cut, and assemble the perfect shade for your windows, using repurposed materials and clever design hacks to add a touch of rustic charm. My trusty DIY team, including my beloved drill, Bertha, and my staple gun, Stan, will also make an appearance, as we work together to bring your window transformation to life. By the end of this journey, you’ll be equipped with the knowledge and confidence to create beautiful, functional Roman shades that not only filter the light but also tell a story of your own unique style and creativity.
Table of Contents
Guide Overview: What You'll Need
Total Time: 3 hours 45 minutes
Estimated Cost: $50 – $100
Difficulty Level: Intermediate
Tools Required
- Measuring Tape for accurate measurements
- Level to ensure even installation
- Drill with screwdriver and drill bits
- Utility Knife (with extra blades)
- Saw for cutting 2-in x 4-in lumber
- Pencil for marking fabric and wood
Supplies & Materials
- Fabric of choice for shade material
- 2-in x 4-in lumber for headrail and bottom rail
- Basswood or PVC for shade slats
- Roman shade kit including cord and pulley system
- Decorative trim optional for finishing touches
- Wall anchors for securing headrail to wall
Step-by-Step Instructions
- 1. To start creating your DIY Roman shades, you’ll need to gather your materials, including fabric of your choice, wooden dowels, a sewing machine, and my trusty sidekick, Betsy the staple gun. Make sure you have all the necessary tools and materials before proceeding to avoid any last-minute trips to the hardware store.
- 2. Next, measure your window to determine the size of your Roman shade. This is a crucial step, as you want to ensure a seamless fit that complements your window’s dimensions. Use a tape measure to record the width and length of your window, taking note of any obstacles, such as window handles or blinds.
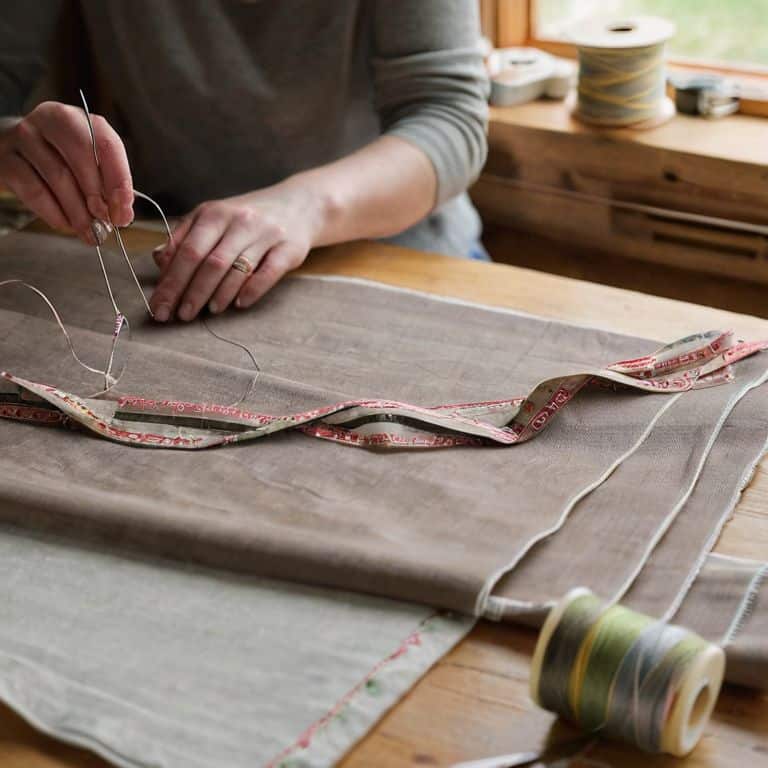
- 3. Now it’s time to cut your fabric into the required size, leaving a little extra around the edges for hemming. I like to use my vintage scissors, Bertha, for this task, as she gives a clean cut every time. Remember to iron your fabric before cutting to remove any wrinkles and ensure accuracy.
- 4. With your fabric cut to size, it’s time to create the pocket channels for the wooden dowels. This is where my sewing machine, Suzzy, comes into play. Fold the fabric over several times to create a channel, and then sew along the edge to secure it in place. Make sure your channels are evenly spaced to achieve a uniform look.
- 5. After creating the pocket channels, it’s time to insert the wooden dowels. I use my trusty drill, Daisy, to make holes at the top and bottom of each dowel for the cord to pass through. This step requires patience, as you need to ensure the dowels are securely in place and the cord is properly threaded.
- 6. To add some rustic charm to your Roman shades, consider adding a decorative trim or valance. This can be as simple as sewing a ribbon along the top edge or attaching a piece of vintage lace. My upcycling spirit loves finding unique ways to repurpose old materials, so don’t be afraid to get creative and experiment with different designs.
- 7. Finally, hang your DIY Roman shades and test the mechanics. Pull the cord gently to ensure the shades move smoothly up and down. Make any necessary adjustments to the cord or dowels to achieve a smooth operation. Stand back and admire your handiwork – you’ve successfully transformed your window with a beautiful, one-of-a-kind Roman shade.
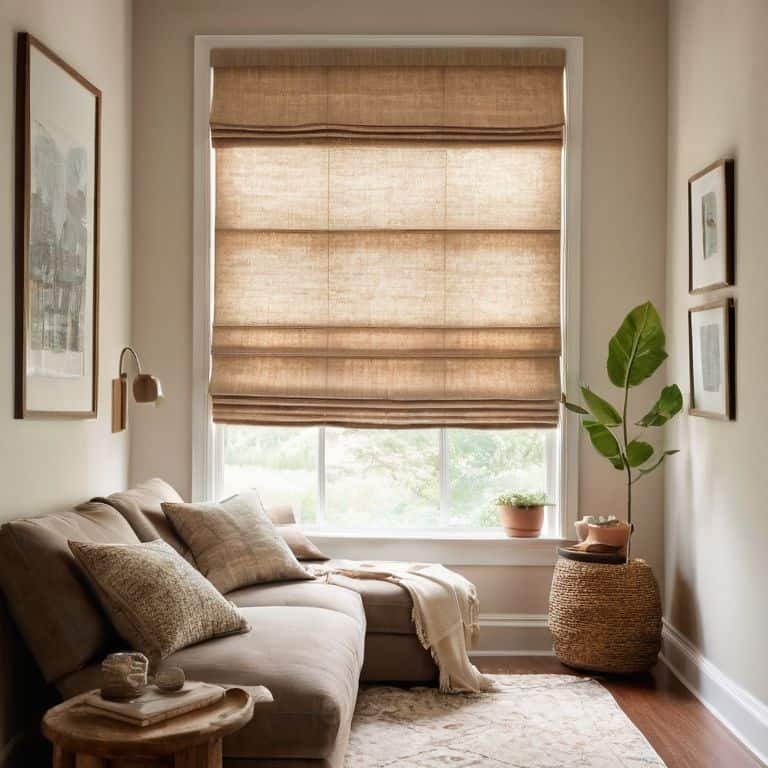
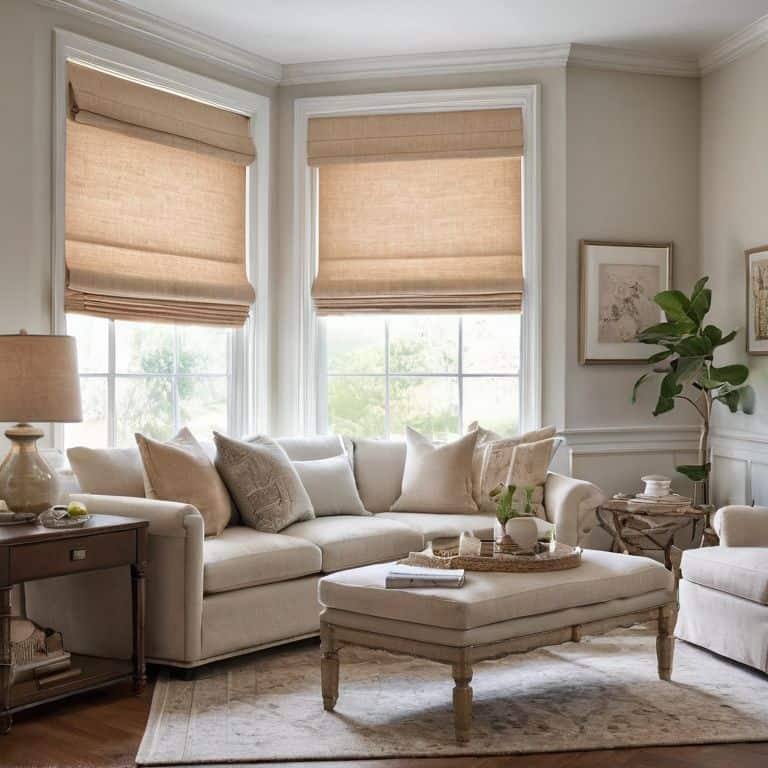
Elevate With Diy Roman Shades
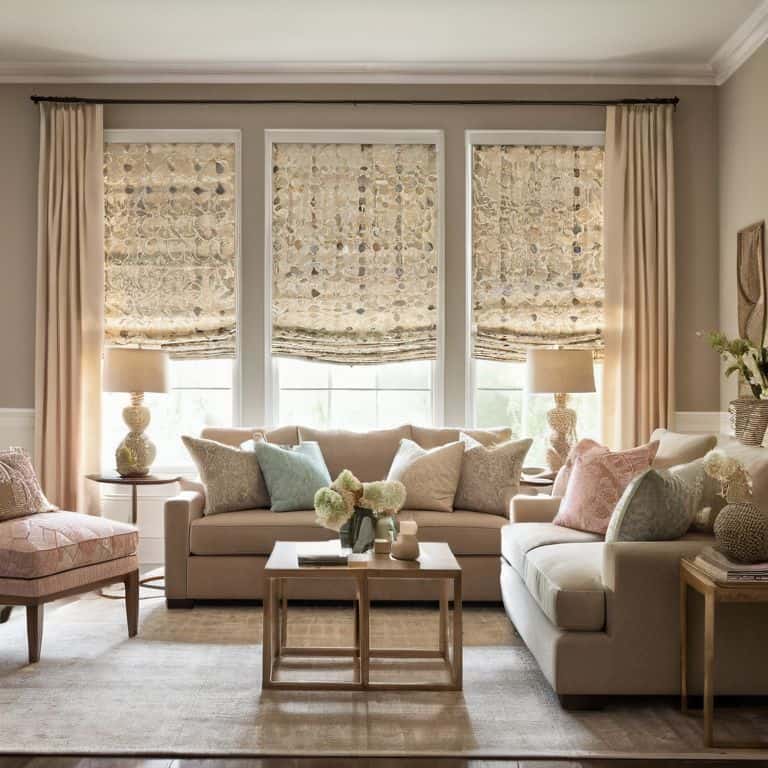
As I always say, the right custom window shade ideas can make or break the ambiance of a room. When it comes to elevating your space with Roman shades, it’s all about striking a balance between form and function. I love experimenting with different Roman shade fabric selection to add a touch of personality to each room. From bold patterns to subtle textures, the right fabric can completely transform the look and feel of your shades.
To take your window treatments to the next level, consider investing in a motorized Roman shade kit. Not only do these kits provide a sleek and modern look, but they also offer a convenient and effortless way to control the amount of light entering your room. Plus, they’re a great option for those hard-to-reach windows. When selecting a kit, be sure to measure for Roman shades carefully to ensure a precise fit.
For those on a budget, don’t worry – you can still achieve a high-end look without breaking the bank. Look for budget friendly shade options like affordable fabrics or DIY-friendly materials. With a little creativity and some handy DIY window treatment tutorials, you can create beautiful and functional Roman shades that enhance your space without draining your wallet.
Mastering Roman Shade Fabric Selection
When it comes to choosing the perfect fabric for my DIY Roman shades, I like to think about the overall vibe I want to achieve in the room. My trusty sidekick, a vintage seam ripper I’ve named “Rippy,” always comes in handy during this process. I consider the color palette, texture, and pattern that will complement the space. For a rustic touch, I often opt for natural fibers like linen or cotton, while a more modern look might call for a bold, geometric print. My fabric selection process is all about finding that perfect balance between form and function.
I also love experimenting with different fabric weights and opacity levels to achieve the desired amount of light filtration. My DIY team, including “Sawyer” the saw and “Stitch” the sewing machine, help me bring my vision to life. By selecting the right fabric, I can add an extra layer of depth and visual interest to my Roman shades, making them a true showstopper in any room.
Unleashing Custom Window Shade Ideas
Now that we’ve explored the basics of DIY Roman shades, it’s time to unleash our creativity and push the boundaries of what’s possible. I love experimenting with different materials and techniques to create one-of-a-kind window shades. My trusty DIY team, including my favorite drill, Bertha, and my reliable saw, Sammy, are always ready to help me bring my visions to life. By combining rustic elements with modern twists, we can create truly unique pieces that reflect our personal style.
Some of my favorite custom window shade ideas include incorporating vintage fabrics, adding natural textures like wood or bamboo, and playing with bold colors and patterns. The possibilities are endless, and I encourage you to think outside the box and come up with your own innovative designs. With a little imagination and some DIY magic, you can transform your windows into stunning works of art that elevate your entire space.
5 Essential Tips to Nail Your DIY Roman Shades
- Measure Twice, Cut Once: The importance of accurate measurements cannot be overstated, especially when working with fabric and wooden dowels – my trusty measuring tape, ‘Mae’, is always by my side to ensure precision
- Choose the Right Fabric: Selecting a fabric that complements your room’s decor and meets your light-filtering needs is crucial, and I always introduce my readers to ‘Fiona’, my fabric scissors, which help me make precise cuts
- Add a Touch of Rustic Charm: Incorporating natural materials like wood or bamboo into your Roman shades can add a unique, earthy feel to your space – I love using ‘Bucky’, my jigsaw, to create intricate designs
- Don’t Forget the Finishing Touches: Adding decorative elements like tassels or ribbons can elevate your DIY Roman shades from functional to fashionable, and ‘Whiskers’, my hot glue gun, is always ready to help me add those special details
- Experiment and Have Fun: DIY projects are all about trial and error, so don’t be afraid to try new things and make mistakes – my ‘DIY team’, including ‘Sawyer’, my circular saw, and ‘Drilliam’, my drill, are always up for a creative challenge
Key Takeaways for a Beautifully Transformed Space
I’ve learned that with a little creativity, DIY Roman shades can completely revitalize a room, and it’s amazing to see how this simple project can add a touch of rustic charm to any window
By mastering the art of selecting the perfect fabric for your Roman shades, you can elevate your space from bland to grand, and I always recommend considering the natural light and color palette of the room when making your selection
Unleashing your custom window shade ideas and getting creative with the design process is where the real magic happens – don’t be afraid to experiment and try out new things, and remember, my trusty DIY team, including my favorite tools, Bertha the drill and Sammy the sandpaper, are always here to help you bring your vision to life
A Reflection on DIY Roman Shades
There’s something truly special about transforming a window with DIY Roman shades – it’s not just about filtering the light, it’s about framing a view, setting a mood, and telling a story of your own unique style.
Ryan Bennett
Embracing the Beauty of DIY Roman Shades
As I look back on our journey of creating DIY Roman shades, I’m reminded of the transformative power of upcycling and DIY projects. From the initial steps of measuring and cutting the fabric, to the final touches of adding decorative trim, we’ve covered it all. We’ve also explored how to elevate our spaces with these custom window treatments and delved into the world of custom window shade ideas, discovering the importance of mastering Roman shade fabric selection. By following these steps and tips, you’ll be well on your way to creating your own unique and functional DIY Roman shades.
As you embark on your own DIY Roman shade adventure, remember that the true beauty lies not just in the end result, but in the creative process itself. Don’t be afraid to experiment, try new things, and make mistakes – it’s all part of the journey. With a little patience, imagination, and help from my trusty DIY team, including my favorite tools, Bertha the sewing machine and Sammy the staple gun, you’ll be unleashing your full creative potential and turning your windows into stunning works of art. So go ahead, get creative, and watch your space transform into a warm and inviting retreat that reflects your personal style.
Frequently Asked Questions
What are the most durable fabrics to use for DIY Roman shades?
I swear by durable fabrics like cotton twill, linen, or even upcycled denim for my DIY Roman shades. My trusty sidekick, ‘Sawyer the Sewing Machine,’ loves working with these materials! They’re not only sturdy but also add a touch of rustic charm to any room.
How do I measure my windows accurately to ensure a perfect fit for my Roman shades?
Measuring your windows accurately is crucial for a perfect fit. I always say, ‘measure twice, cut once’ – my trusty tape measure, Bertha, is my go-to sidekick for this task. Simply record the width and length of your window, considering any obstructions, and you’re ready to create your custom Roman shades.
Can I add motorized or automated features to my DIY Roman shades for easier operation?
Absolutely, you can add a touch of modern convenience to your rustic Roman shades! I’ve worked with my trusty DIY team, including my drill, Bertha, to install motorized kits that make operating your shades a breeze. It’s a fantastic way to blend old charm with new tech, and I’d be happy to share some tips on how to do it seamlessly.